This past June, we had the opportunity to restore the exterior of a charming blue-shingled home in Middleton. What started as a request for a fresh coat of paint turned into a more involved project when our initial inspection revealed significant wood deterioration, specifically around the windows.
When wood is exposed to moisture and neglect over time, it begins to decay. This process, known as wood rot, can quickly compromise the structural integrity and appearance of a home. Before any painting could begin, replacing the rotted wood was essential to ensure a smooth, long-lasting finish.
In the case study below, we walk through how our team approached replacing wood rot, restoring the home’s exterior, and ultimately delivering a polished new look the homeowners loved.
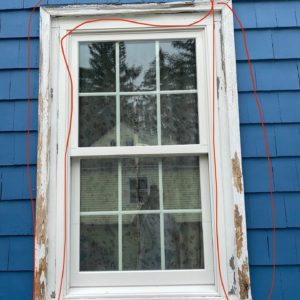
At our initial meeting with the homeowners, we focused on assessing the extent of the damage and identifying the cause, often weather-related, which is common for homes in Portsmouth and Newport. Along the classic coast, homes are frequently exposed to high moisture levels, salty air, and frigid temperatures. Over time, these conditions can wear down paint and deteriorate the materials beneath it, especially wooden window frames and other vulnerable exterior features.
Early signs of wood rot include soft or spongy areas, paint that’s chipping or peeling, splintering wood, and noticeable discoloration. If left untreated, the damage can quickly worsen. That’s why it's important to bring in a professional painting contractor and carpenter as soon as these symptoms appear. They can help determine whether the issue can be repaired or if replacing wood is the better long-term solution.
So how do you know when it’s time for replacing wood rather than repairing it? A good rule of thumb is if more than ten percent of the wood is compromised, replacement is necessary. In some cases, minor rot can be halted and reinforced using epoxy and sealants, but only if caught early.
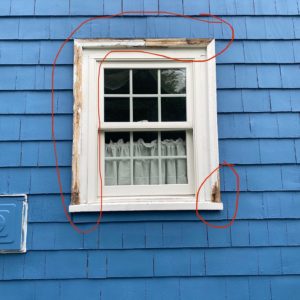
In this particular case, the damage was extensive enough in some places that replacing wood rot was necessary. Our carpentry team made all the necessary repairs before our painters came in to finish the job.
When we removed the rotted frames and sills, our carpentry division took care to pull these boards out without causing damage to the house or windows themselves. Once the old frame and sills were removed, all leftover debris or wood pulp was removed and the area was cleaned.
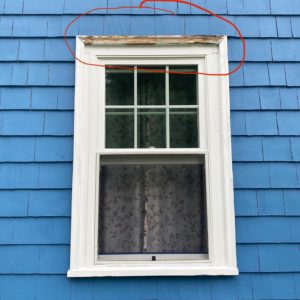
The pieces of the old frame and sill were measured as a reference for the new boards to be put in place. Measurements were also taken of the sheathing where the frame and sill used to sit to ensure that the new pieces would fit securely.
If your home does not have standard fittings and features (and depending on what type of window or home you have), you’ll need a contractor more skilled than the average handyman to help with standout features like mitered corners and fastening sites. Our master carpenter, Chris, and his team did a fantastic job making sure the windows fit perfectly in our client’s home.
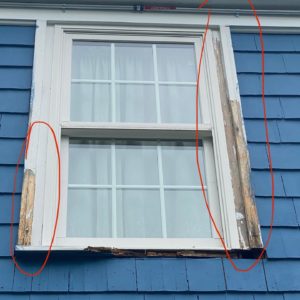
Once the wood frames and sills were removed, our carpentry division inspected the sheathing underneath and made necessary repairs. Repairs that may need to be done on sheathing include using caulk to fill in any smaller cracks and an expanding foam insulation to not only fill larger gaps but to also hold the new boards tightly in place.
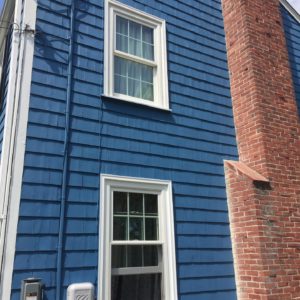
Once the new pieces were cut, our painters stepped in to apply a few coats of paint to protect these new pieces of wood from exposure to moisture and water. Once the new window frames were ready, our carpentry division installed them into the sheathing and secured those pieces in place with nails. The final step in installing these new frames and sills is caulking any seams to keep out unwanted moisture, bugs, and other enemies of wood.
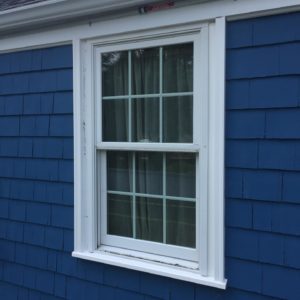
After the frames and sills were installed and inspected for quality, our painters finished the project with a fresh coat of exterior paint. Our team stripped and sanded the old paint to prepare the surface and to prevent unaffected parts of the frames from being exposed to moisture. The entire window trim was repainted with two coats of the highest quality paint to guard against all types of weather conditions.
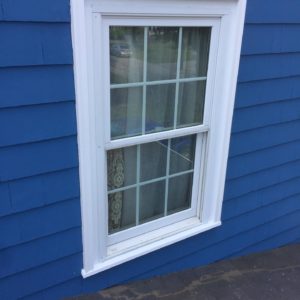
Throughout each step of the process, our team took the time and care necessary to ensure that every surface, from the newly painted siding to the areas where we focused on replacing wood, achieved a flawless, high-quality finish. The homeowners were thrilled with the results and appreciated the craftsmanship and attention to detail we brought to their home.
Since 2004, Bruno Painting has been committed to upholding and caring for surfaces and relationships. We take great pride in our work, and this project was no exception. From replacing wood damaged by coastal weather to restoring the home’s exterior beauty, it was an honor to help create a result that this family will enjoy for decades.
If you’ve noticed signs of damage on your home’s exterior, whether it’s peeling paint, soft window frames, or other signs of deterioration, don’t wait. Contact us today to learn how we can help with evaluating, repairing, or replacing wood to protect your home and restore its curb appeal with lasting results.
Call or email our office for a free estimate to see what we can do for your home!