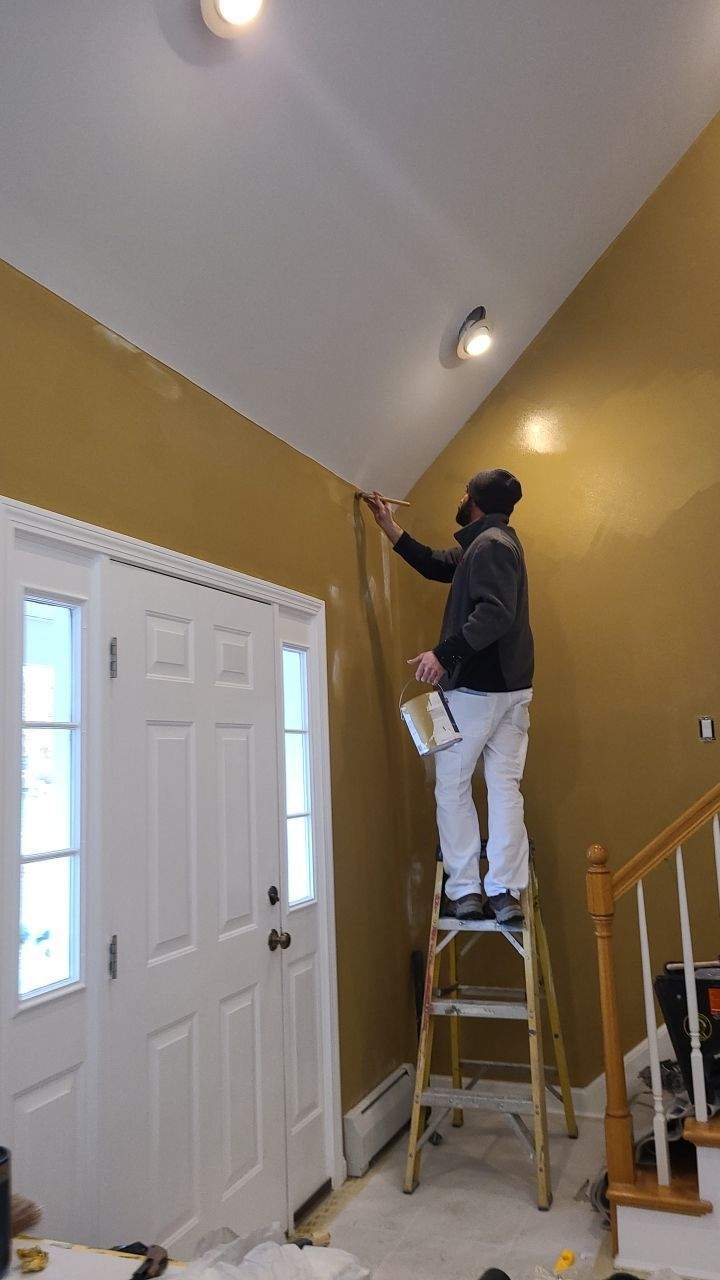
A residential painting contractor knows that not all finishes are created equal. The finish you choose can impact the entire mood of the room. Glossy paint can reflect a lot of light and highlight imperfections. A flat finish can mute a room's energy and bring softness. Picking the correct one ensures that your room not only looks its best but also functions well for years. Scratches, stains, and smudges stand out more or less depending on the surface. With the right guidance, you can strike the right balance between style and durability for your residential painting project, one coat at a time.
Ideal for: Bedrooms, ceilings
Benefits: Conceals imperfections, soft look
Bruno Insight: “Great for older walls or when you want zero glare.”
These finishes are the softest and least reflective. A residential painting contractor often recommends flat or matte paint for rooms that don’t see much wear and tear. Because they soak up light instead of bouncing it around, they help create a cozy, calm vibe. They also hide dings, patches, or old textures well. Just keep in mind that they don’t stand up well to scrubbing. You’ll want to use these in spots where hands and messes are less common.
Ideal for: Living rooms, dining rooms
Benefits: Lightly washable, slight sheen
Bruno Insight: “A go-to for most spaces because it balances beauty and maintenance.”
Eggshell is a favorite for its easygoing nature. It has just enough sheen to reflect a little light, but not so much that it highlights bumps or flaws in the wall. Most residential painting contractors consider eggshell a staple. It’s a smart pick for living spaces that need a little polish but also need to stand up to everyday activity. Fingerprints? A damp cloth usually takes care of that.
Ideal for: Hallways, kitchens, bathrooms
Benefits: More washable, slightly glossier
Bruno Insight: “Perfect for homes with kids or high-traffic areas.”
Satin finishes strike a nice middle ground. They’re glossier than eggshell, but still forgiving enough to use on walls. A residential painting contractor will often steer you toward satin for rooms that need to look good and stay clean. It holds up to repeated wiping and has a soft shine that catches the eye without being over the top. If you’ve got sticky fingers, paw prints, or daily traffic down the hallway, satin’s got your back.
Ideal for: Trim, doors, cabinets
Benefits: Highly durable, moisture resistant
Bruno Insight: “We use this for areas that take a beating like baseboards and kitchens.”
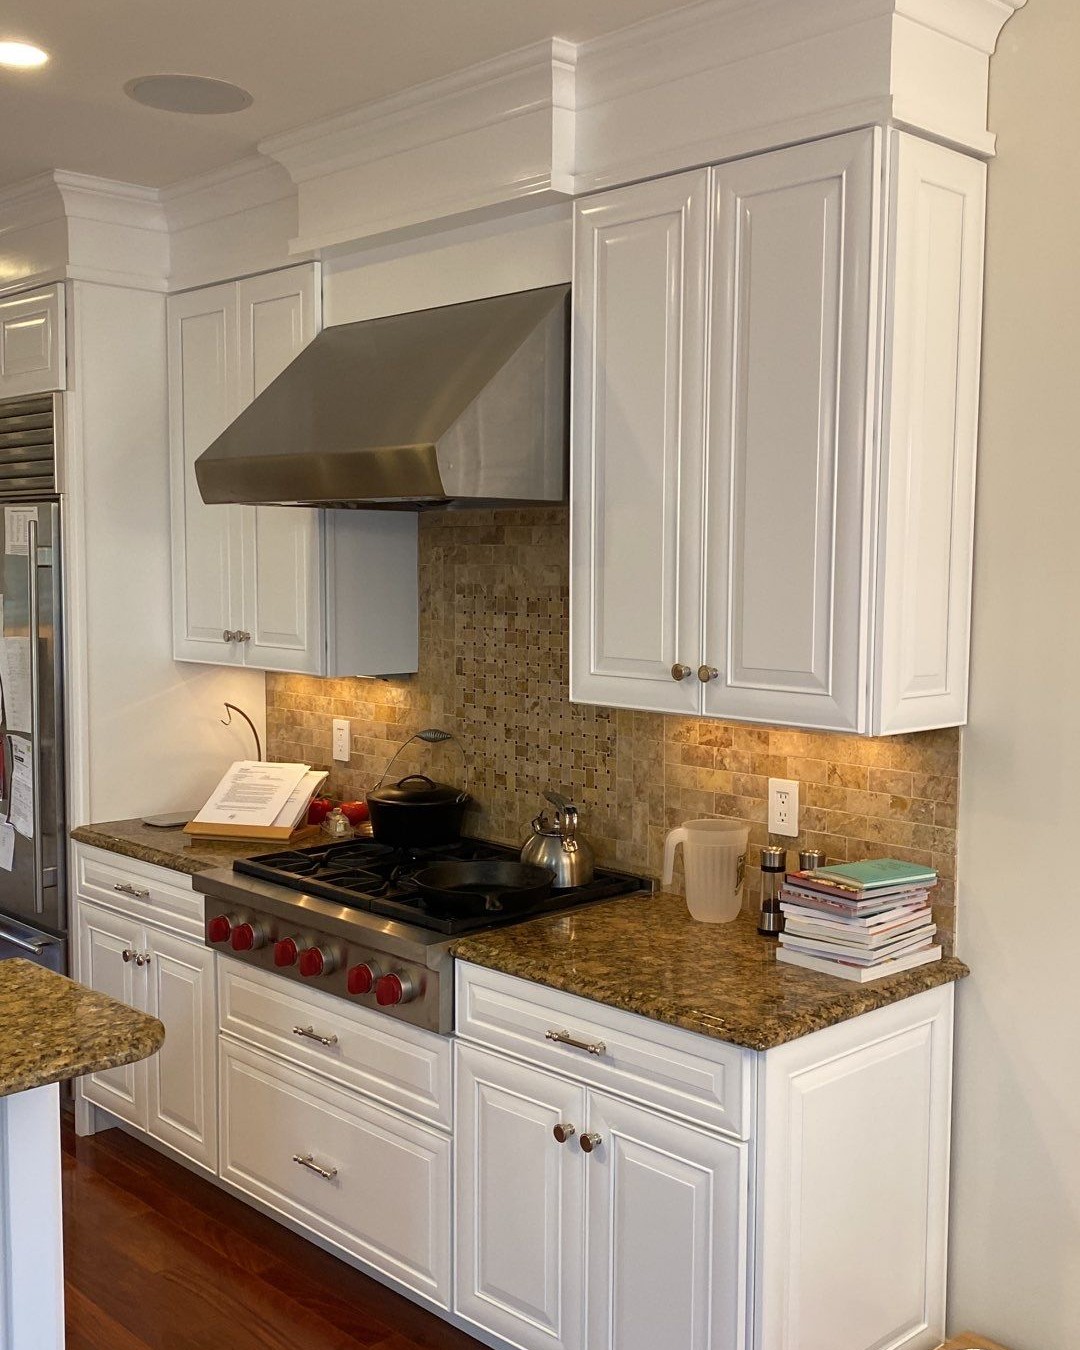
When it comes to places that get knocked around, semi-gloss is a clear winner. It’s harder, shinier, and more resistant to moisture and stains. A residential painting contractor will often apply it to woodwork, moldings, kitchen and bathroom walls, and cabinets. It brightens up architectural features and holds up under constant use. You’ll also find it easier to clean than any of the flatter finishes. It’s not ideal for entire walls in most cases, but it’s perfect for the details.
Ideal for: Accent walls, furniture, or bold designs
Benefits: Maximum reflectivity, easy to clean
Bruno Insight: “Use sparingly. It shows every flaw, but can make a real statement.”
Gloss paint packs a punch. It reflects the most light, has the slickest surface, and brings instant energy to a room. A residential painting contractor will tell you that gloss finishes are high-maintenance but high-reward. Because they highlight every speck of dust and every dent, you’ll need very smooth surfaces and expert prep. That said, in the right space, gloss adds luxury and shine like nothing else.
The way light hits a wall changes how a paint finish looks. Glossy finishes reflect more, especially with darker hues. That means they can feel dramatic but also less forgiving. Lighter colors in matte might feel soft and welcoming, while the same shade in satin could look sharper. It’s smart to test your finish in the actual room before you commit. A sample board near a window or lamp can save you a major headache later.
A skilled residential painting contractor brings more than just a steady hand. They bring years of knowledge on how paint behaves under real-life conditions. At Bruno Painting, we help you pick finishes that complement the way you live. We look at how much sun hits your walls, how often you clean, and who lives in your home. Our goal is to help you love your space, not just on day one, but years down the line.
Your home deserves more than ordinary paint. For homeowners who want the richest color and longest-lasting finish, Bruno Painting offers Fine Paints of Europe. This premium brand is used by top designers and known for its depth of color, incredible durability, and eco-conscious formulas. It doesn’t contain fillers that compromise coverage or fade over time. You’ll notice the difference from the very first brushstroke.
These paints require fewer coats, resist fading, and can last up to 15 years with proper application. That’s more than three times longer than standard brands. In a place like Rhode Island, where salt air and changing weather put paint to the test, that kind of performance matters. Our clients from Newport to Little Compton see the value in investing in finishes that look great and protect their home for the long haul.
Fine Paints of Europe also offers a huge range of colors, with options for custom matching. And because they’re low in VOCs, they keep your air cleaner and safer for your family. We’re proud to be a certified FPE residential painting contractor, trained in their exclusive methods and materials.
For projects that demand exceptional consistency, color fidelity, and broad accessibility, we also proudly offer Benjamin Moore paints. Known for their time-tested performance and rich palette, Benjamin Moore products are a go-to choice for designers and homeowners alike. Their proprietary Gennex color technology ensures lasting vibrancy, while a variety of finishes allow for customized looks throughout your home. Whether you’re refreshing a single room or repainting your entire exterior, Benjamin Moore delivers professional-grade results with every application.
Paint finish makes a bigger difference than most people realize. It can elevate your home’s style, improve functionality, and add serious staying power to your walls. With expert help from a trusted residential painting contractor like Bruno Painting, you can get the results your home deserves.
If you're ready to bring rich color and lasting beauty to your home, Bruno Painting is ready to help. Ask us about Fine Paints of Europe, Benjamin Moore, and what finish works best for your space. We’ll make your home shine for years to come.
Painting detailed woodwork can elevate a space by adding depth, elegance, and a refined finish to your home. However, when it comes to intricate designs, trim, and molding, achieving a flawless finish requires more than just a steady hand—it requires expertise, precision, and knowledge of the right techniques. This is why hiring a qualified painter for painting detailed woodwork is essential. Not only does this ensure a professional-level outcome, but it also prevents costly mistakes, uneven coverage, and a frustrating experience. In this blog, we’ll explore why working with a skilled painter is crucial for your next detailed woodwork project, and how Bruno Painting, with its experienced team, can bring your vision to life.
Detailed woodwork presents unique challenges that require a painter’s experience and skill. From baseboards and crown molding to intricate door frames and window sills, this type of project calls for precision. A qualified painter understands the nuances of wood surfaces, how to prep them properly, and the importance of selecting the right paint and tools. This ensures that your detailed woodwork not only looks stunning but also stands the test of time.
When it comes to painting detailed woodwork, the last thing you want is to compromise the beauty and craftsmanship of your home with amateurish mistakes. Poor surface preparation, uneven paint application, and improper drying techniques can lead to drips, streaks, and spots where paint either pools or appears too thin. This is why trusting your project to a professional painter is so important.
Before painting woodwork, it’s crucial to assess the condition of the surfaces being painted. Wood can crack, warp, or sustain damage over time. To achieve a flawless finish, any damage must be addressed. Hiring a painting company with an in-house carpentry team, like Bruno Painting, is ideal because it ensures that any necessary repairs can be seamlessly handled before paint is applied.
For challenges like replacing rotten wood, a qualified carpenter works in tandem with the painter to make sure that the woodwork will allow the finished vision to become reality. Painting detailed woodwork on surfaces that haven't been repaired is a recipe for disaster. Instead, working with a professional team that covers both carpentry and painting needs ensures your woodwork maintains its integrity and beauty.
Proper surface preparation is essential for achieving a smooth and flawless finish when painting detailed woodwork. A qualified painter will clean, sand, and prime the surfaces to ensure the paint adheres properly and lasts longer. Skipping these steps or rushing through the prep work can result in uneven paint application, drips, and an overall subpar finish.
A common issue with painting detailed woodwork is applying either too much or too little paint in certain areas, especially in corners and crevices. A professional painter knows how to apply an even coat of paint, preventing drips and ensuring no areas are missed or overdone. They use the right brushes and rollers specifically designed for fine detail work to ensure precision in every stroke.
Additionally, a skilled painter knows how to cut in neatly around the edges, ensuring sharp lines between the woodwork and adjacent surfaces like walls or ceilings. The attention to detail and focus on clean, straight lines make all the difference when painting detailed woodwork, and a professional touch guarantees an outcome that transforms your space.
Another critical aspect of painting woodwork is allowing enough time for each coat to dry thoroughly before applying the next. This is where patience and knowledge of paint properties come into play. Rushing the process can result in a tacky finish, streaks, or even peeling over time. A professional painter understands the importance of drying times and will work diligently to apply the right number of coats, allowing each one to dry completely to ensure a smooth and durable finish.
Hiring a qualified painter also ensures the use of high-quality paints and finishes, which can further enhance the longevity and appearance of your detailed woodwork. From selecting the appropriate paint for wood surfaces to understanding how weather and humidity affect drying times, a professional will take all of these factors into account to deliver an impeccable finish.
When it comes to painting woodwork, it’s important to remember that you’re not just adding a fresh coat of paint—you’re protecting an investment in your home’s value and aesthetic appeal. Detailed woodwork often serves as a focal point in a room, and any imperfections or mistakes in the painting process can detract from the overall look and feel of your space. By working with a qualified painter, you can be confident that your woodwork will be treated with the care, attention, and skill it deserves.
At Bruno Painting, our team is dedicated to delivering flawless results on every project. With a background in both painting and carpentry, we can handle every aspect of painting detailed woodwork, from repair to preparation to the final coat. Our experienced painters understand how to work with intricate designs and patterns, ensuring that every detail shines through beautifully.
Bruno Painting takes pride in our ability to deliver exceptional results on even the most intricate projects. Our team of professional painters and carpenters works together to ensure that your detailed woodwork is not only beautifully painted but also well-maintained for years to come.
Ready to transform your home with beautifully painted detailed woodwork? Trust Bruno Painting to handle your next project with the care and expertise it deserves. Contact us today to schedule a consultation and discover how we can bring your vision to life!
In the heart of Newport, our team at Bruno Painting has offered support for various causes in the area because that is consistent with our mission of caring for surfaces and relationships. We recognize the importance of engaging with our neighbors as more than just business initiatives; they are our way of paying it forward and investing in the collective well-being of our area. From Alzheimer’s awareness to youth sports sponsorship, discover how Bruno Painting helps sustain our vibrant, caring community.
Walking the Extra Mile: Alzheimer’s Association Walk
Fall sees Newport bathed in hues of autumn, and it's also the time when Bruno Painting joins the Alzheimer’s Association Walk to End Alzheimer's. With every step, we raise awareness about Alzheimer's, supporting a cause that touches lives in our community.
Shining Light on Mental Health: American Foundation of Suicide Prevention Walk
Addressing mental health challenges is crucial, and Bruno Painting takes part in the Out of the Darkness Walk organized by the American Foundation of Suicide Prevention. We believe in helping destigmatize mental health issues and fostering a supportive community.
Fielding Dreams: Supporting Youth Sports
From Newport Little League to Portsmouth Babe Ruth and the New England Collegiate Baseball League (NECBL) Newport Gulls, we're nurturing the dreams of young athletes, adding color to the canvas of their future.
Community Guardians: Support for Local Police and Fire Departments
In a gesture of gratitude to those who ensure our safety, Bruno Painting extends its support to local police and fire departments. Our donations serve as a reminder of the symbiotic relationship between businesses and community guardians.
Harmony in Giving: St. Barnabas Church Food Drive
Bruno Painting contributes yearly to St. Barnabas Church's Festival. Our commitment to addressing local hunger showcases the power of businesses in creating positive change in the community.
Preserving Nature: Aquidneck Land Trust
Environmental conservation finds an ally in Bruno Painting. Through support for Aquidneck Land Trust, we contribute to preserving nature and creating spaces where the community can thrive amidst the beauty of the outdoors.
Social Equality: Dr. Martin Luther King Jr. Community Center
In the pursuit of social equality, Bruno Painting doesn't just donate money; we put effort into painting a better tomorrow. By supporting the Dr. Martin Luther King Jr. Community Center, we are dedicated to building a more inclusive community.
Empowering Tomorrow: Tools For Today & Tomorrow
Tools are instruments of empowerment, and Bruno Painting recognizes this by donating tools to Tools For Today & Tomorrow to help support the youth, a gesture to our belief of education and skill development for a brighter tomorrow.
Clean Shores: Aquidneck Island Beach Clean Up
Bruno Painting doesn't shy away from getting our hands dirty, especially when it comes to preserving the beauty of our shores. Yearly, we participate in the Aquidneck Island Beach Clean Up with a commitment to environmental stewardship. Yearly, Bruno Painting takes it upon themselves to head to local beaches with team members for a full day of beach clean ups.
Winging It: Norman Bird Sanctuary
The call to protect our natural habitat is echoed in Bruno Painting's sponsorship of events and donations to the Norman Bird Sanctuary. We provide & paint birdhouses at the Birds and Breakfast and also show up and sponsor their yearly Beach Bash. We understand the importance of maintaining a balance that allows both human and avian communities to flourish.
Let's celebrate and support those who make Newport and its surrounding areas a more colorful and caring place to call home.
Struggling to find the perfect paint colors for your home’s exterior? You are not alone! Many homeowners have a difficult time landing on the right hue(s) for their home. We have some paint color ideas and color combinations that can help! Fine Paints of Europe and Benjamin Moore are two paint companies that we love and use in our painting projects. Here are some of the best exterior paint colors and color combinations from these companies, as well as general things to consider when choosing colors.
Professional color consultants typically use three to four paint colors when creating an exterior color scheme. These are usually for siding, doors, trim, and accents. When planning your exterior paint color palette, consider trim, windows, garage doors, shutters, and other exterior elements for the full picture.
Start building your palette using color direction from unchanging exterior elements like roofing, stone, brick, and landscaping. Since these elements are unlikely to change, you’ll want to make sure any colors you choose will go well with the colors of the unchanging aspects. If these exterior accents lean warmer, consider hues like browns, reds, oranges or yellows. If they lean cooler, look to grays, blues, greens and violets.
Fine Paints of Europe has been in operation since 1987. These paints are formulated with superior pigments, binders, and solvents; however, they never have fillers that stretch coverage at the cost of color and longevity.
Fine Paints of Europe are made to last. They require fewer coats to produce a beautiful and rich color, retain an even finish and are crafted with everyday living in mind. The true value of this paint comes from its longevity. Fine Paints of Europe can protect your home for up to 15 years when properly applied.
Benjamin Moore Paints has been in business since 1883 and has always striven to produce the highest quality paints in the industry. When it comes to premium paints and stains for your home, Benjamin Moore has set a high standard for excellence.
They manufacture their own resins and proprietary Gennex® colorants, which deliver superior performance and application properties in every product. Paired with their incomparable selection of authentic colors, their products are formulated to help you achieve beautiful, lasting results every time you paint. The exterior of your home is so important, and a great choice to ensure a high-quality finish is Benjamin Moore Exterior paints.
Dark olive-green house exteriors are rare, but they tend to be very memorable. This is because of their unique style and captivating character! With homeowners looking for more modern ways to make their home stand out, dark olive green, with white or light trim, is now becoming a go-to.
Colors
Fine Paints of Europe
Siding (Olive Green) – Mooreland Green
Accent (White) - White Café or Royal White
Benjamin Moore Paints
Siding (Olive Green) – Trailing Vines
Accent (White) – Swiss Coffee or Cloud White
Gray is a great neutral that can match just about any style of home and is a beautiful complement to brick. The shutters and doors done in a more saturated color, like blue, provides a sophisticated accent. The question is... do you prefer light blue or dark blue?
Colors
Fine Paints of Europe
Siding (Gray) – Winter Sky or Grey Mist
Accent (Blue) – Blue Horizon or North Sea Blue
Benjamin Moore Paints
Siding (Gray) – Horizon or Slate or Thunder
Accent (Blue) – Polar Sky or Smoke or Hale Navy

Black and white never goes out of style. The more common way to use this combo is white siding and black accents. However, if you want to go the less tradition route, black siding with white accents can make a great look! Whether you have an old home or a new build, this classic combo looks fresh forever. And it really pops against a lot of greenery!
Colors
Fine Paints of Europe
Siding (White) – Spinnaker White or Royal White
Siding (Black) - G21850
Accent (White) – White Café
Accent (Black) – Black or G21850
Benjamin Moore Paints
Siding (White) – White Heron or Cloud Cover
Siding (Black) – Onyx or Soot
Accent (White) – Atrium White or White Dove
Accent (Black) – Flint or Black Tar
Especially on smaller or more traditional-style homes, simplicity works best for exterior color combinations. Neutral siding colors, like warm gray, create a solid foundation. Then introduce color in small doses, such as a glossy red front door, to create a focal point that doesn't overwhelm the exterior color scheme.
Colors
Fine Paints of Europe
Siding (Gray) – Storm Cloud or Silverblade
Trim and Accent (Black) – Black or G21850
Door (Red) – Rembrandt Red or Tulip Red
Benjamin Moore Paints
Siding (Gray) – Gray Owl or Storm
Trim and Accent (Black) – Flint or Soot
Door (Red) – Caliente or Smoldering Red
When considering exterior paint colors for your home, there are practical elements to consider, as well as stylistic choices to make. At Bruno Painting, we provide color assistance to our clients so their exteriors look exactly how they want! If your exterior could use a fresh coat of paint, call us for a free estimate – 401-662-0057.
At Bruno Painting and Carpentry, we’re proud to have expanded our services beyond painting to handle all your carpentry. We offer a wide variety of projects, that vary in size and scope. We can easily tackle some projects in just a day with our Carpenter or Handyman for a Day service, while others will take longer if it is a larger project. Here are the most popular exterior carpentry projects that can beautify your home and how long you can expect them to take.
Weather in Rhode Island can be rough, especially in the Winter and Spring. Weather patterns such as snowstorms, heavy rains, and wind can all do damage to your deck, roof, siding, and other parts of your home leaving you to repair them. Minor repair work might not be overly intricate or complicated but repairing damage sooner rather than later is essential to the longevity of your home.
The trim on your home’s exterior is probably not something you think about all the time, but it can add a lot of dimension to the overall look of your house. Making sure the quality of the trim is high, and any needed repairs are handled regularly is essential to maintaining a beautiful exterior.
Small repairs and trim work are simpler than the projects we have listed below. They can be handled in a shorter amount of time than other exterior projects. Our Carpenter or Handyman for a Day service is perfect for anyone who needs these smaller updates or work done for their home.
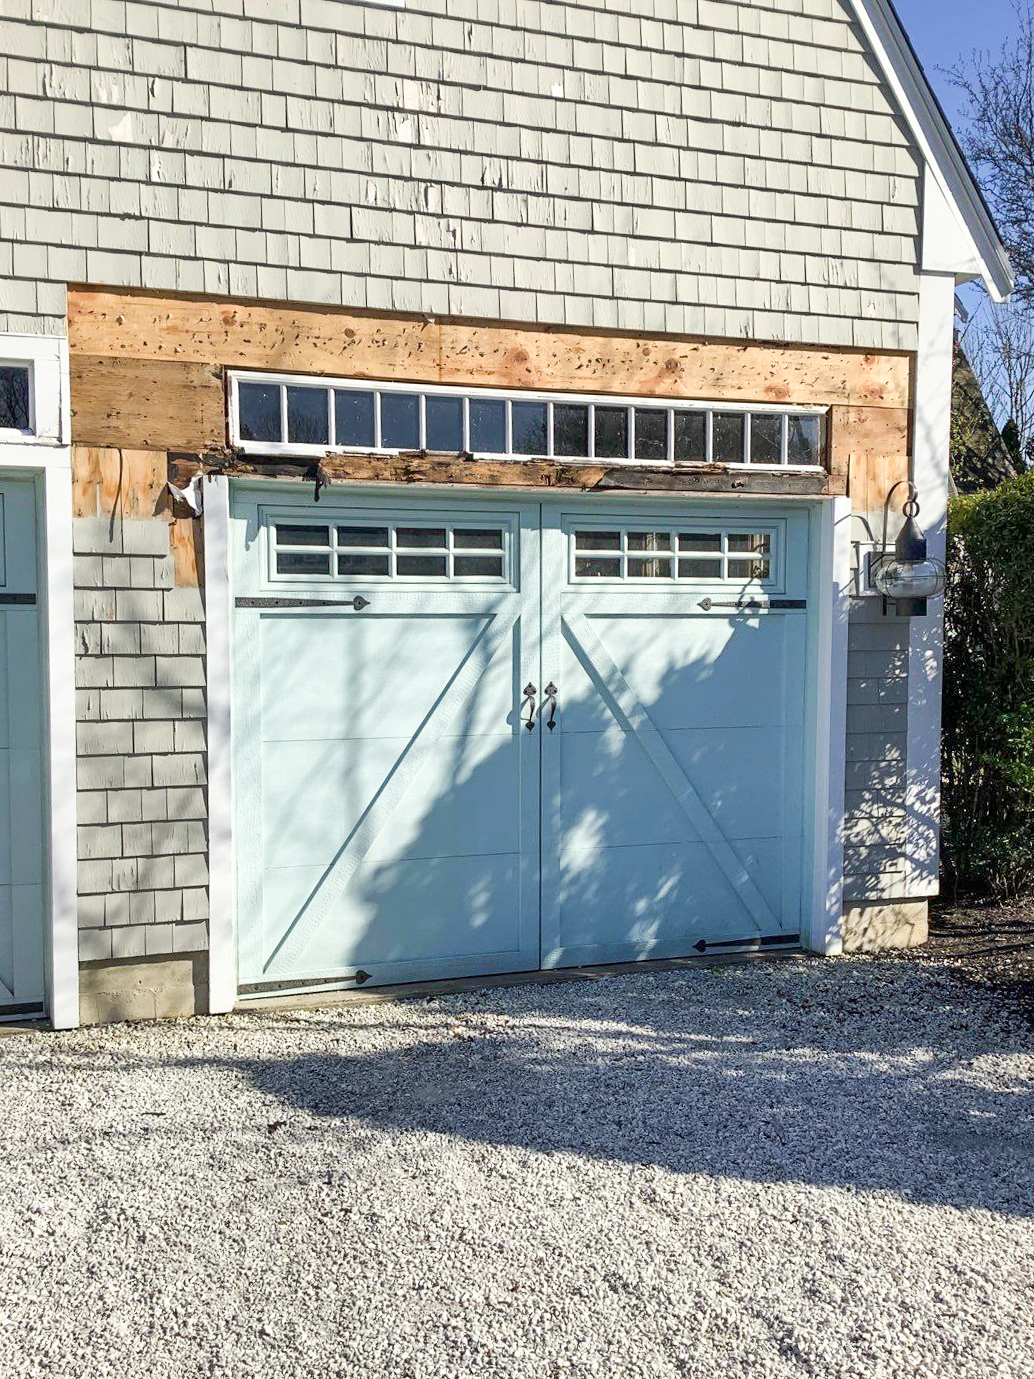
Wood rot can greatly affect your home's curb appeal and its structural integrity. Not only is it an eyesore, but if wood rot is left untreated, it can spread and cause even more damage to your home. Before you paint the exterior of your home, the rotted pieces of wood will need to be repaired or, in some cases, replaced.
How do you know if you have wood rot? Look for pieces of wood that seem spongy or soft. They are at the beginning or intermediate stages of rot. Other signs of wood rot include paint chipping, paint peeling, wood splintering, or discoloration. If you think your home may have wood rot, contact a professional as soon as you can to remedy these areas to protect your home from further damage.
You may not commonly think about your windows and exterior doors needing to be replaced, but there will come a time when they do! Usually, your windows need to be replaced between 15-30 years and your doors should be refinished after 5-10 years. If your home is not brand new and you’re not the first owner, these might be aspects you need to consider since these elements might need maintenance or replacement.
Another reason to replace your windows or doors is if you want to upgrade them. Having double-paned windows is important for protection and keeping your home insulated. Additionally, you may want a heavier exterior door front or back door for protection or a new door for a different look.

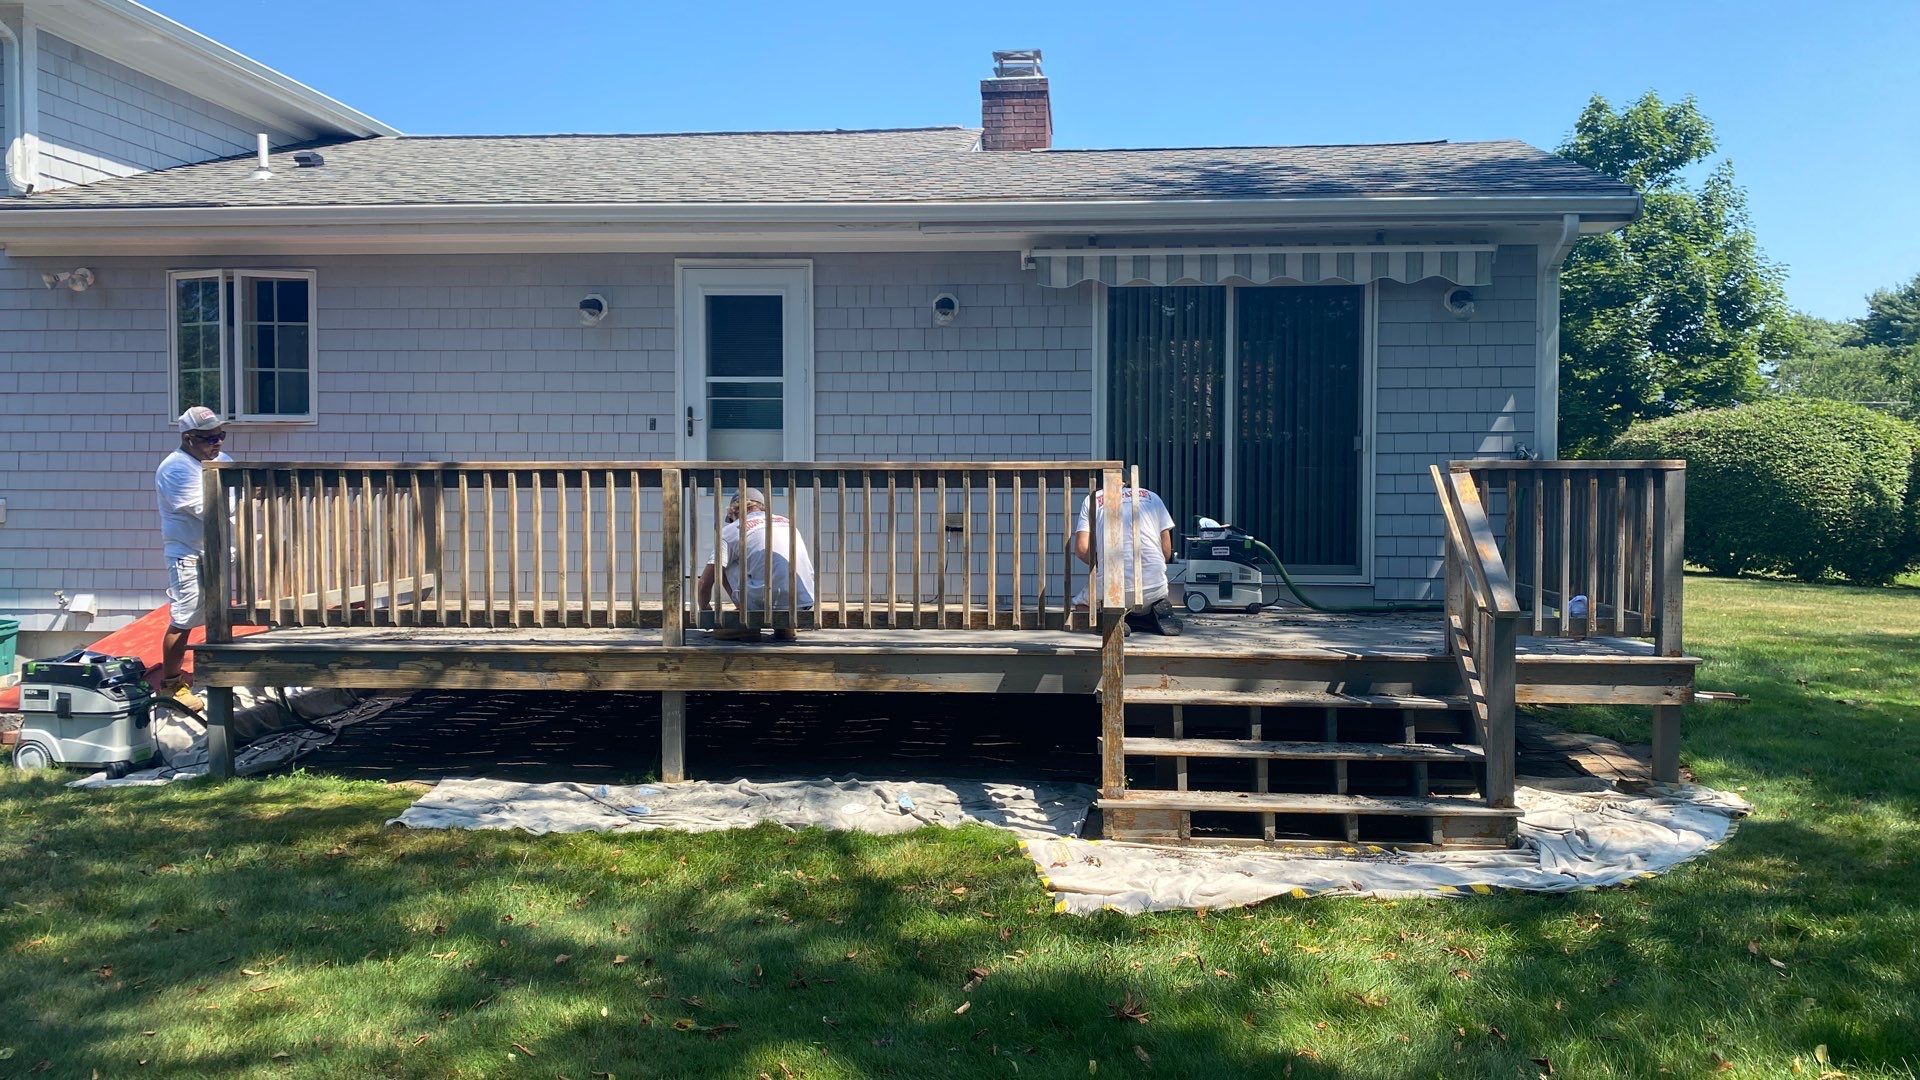
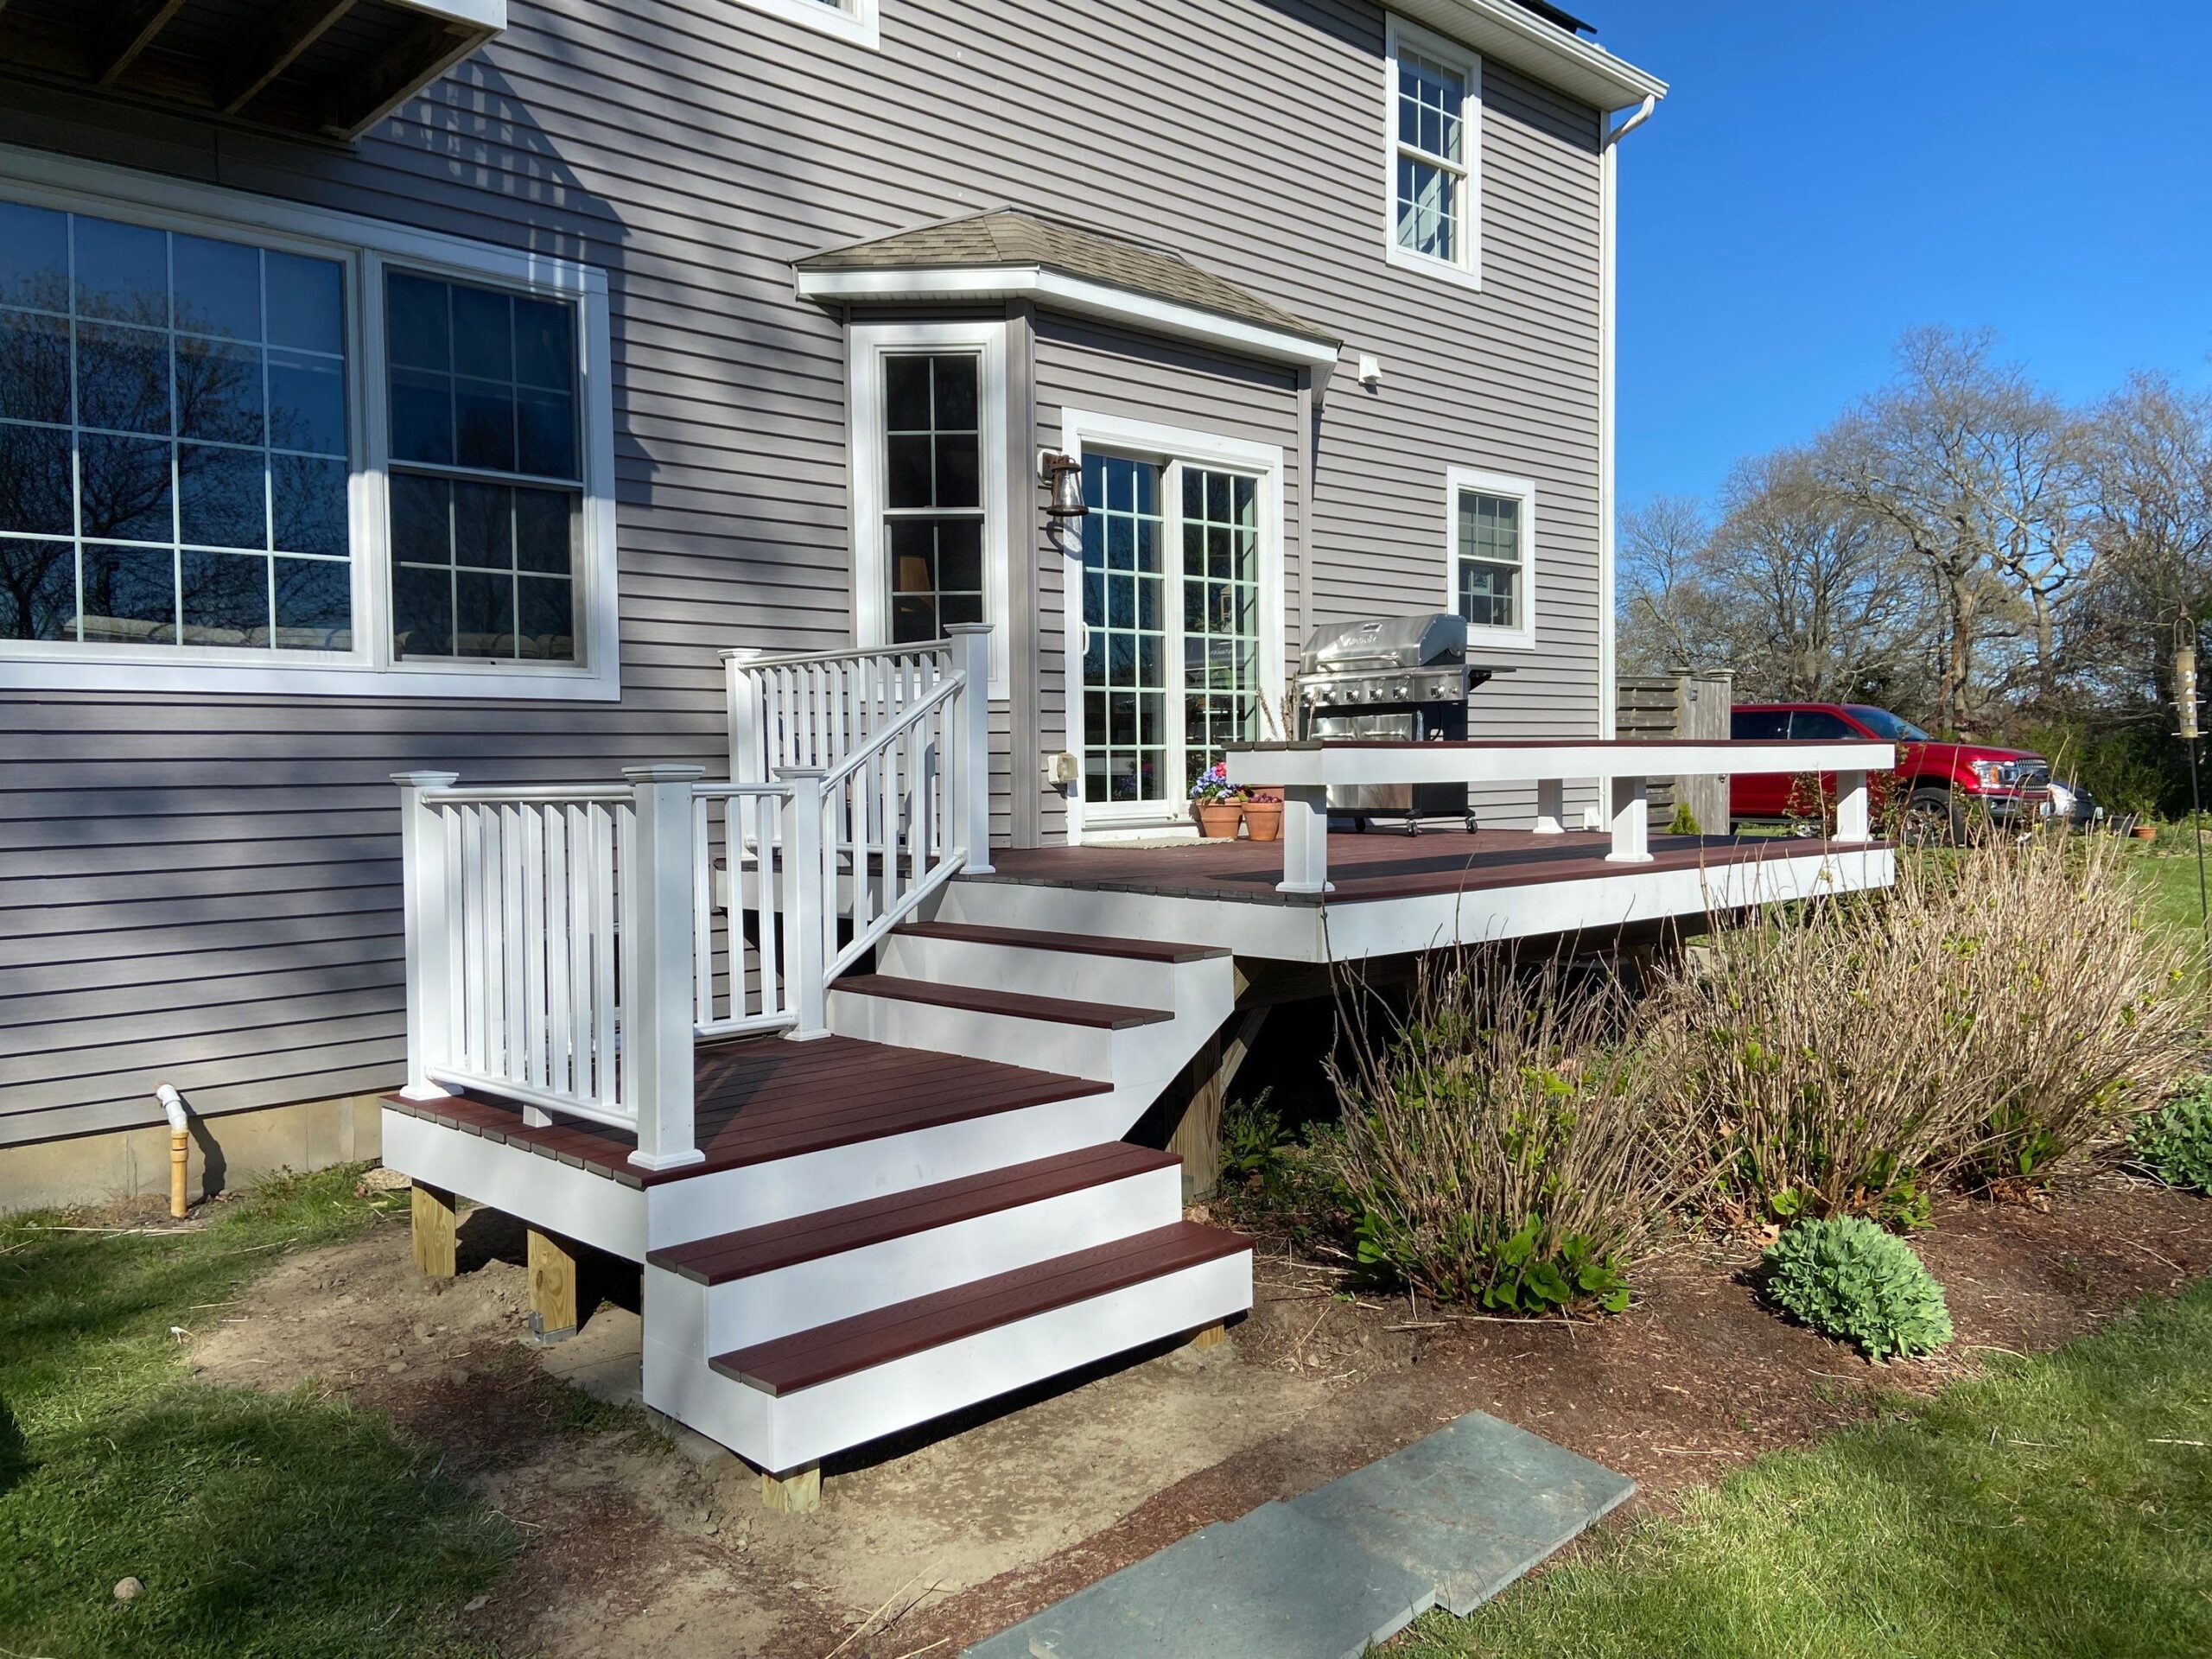
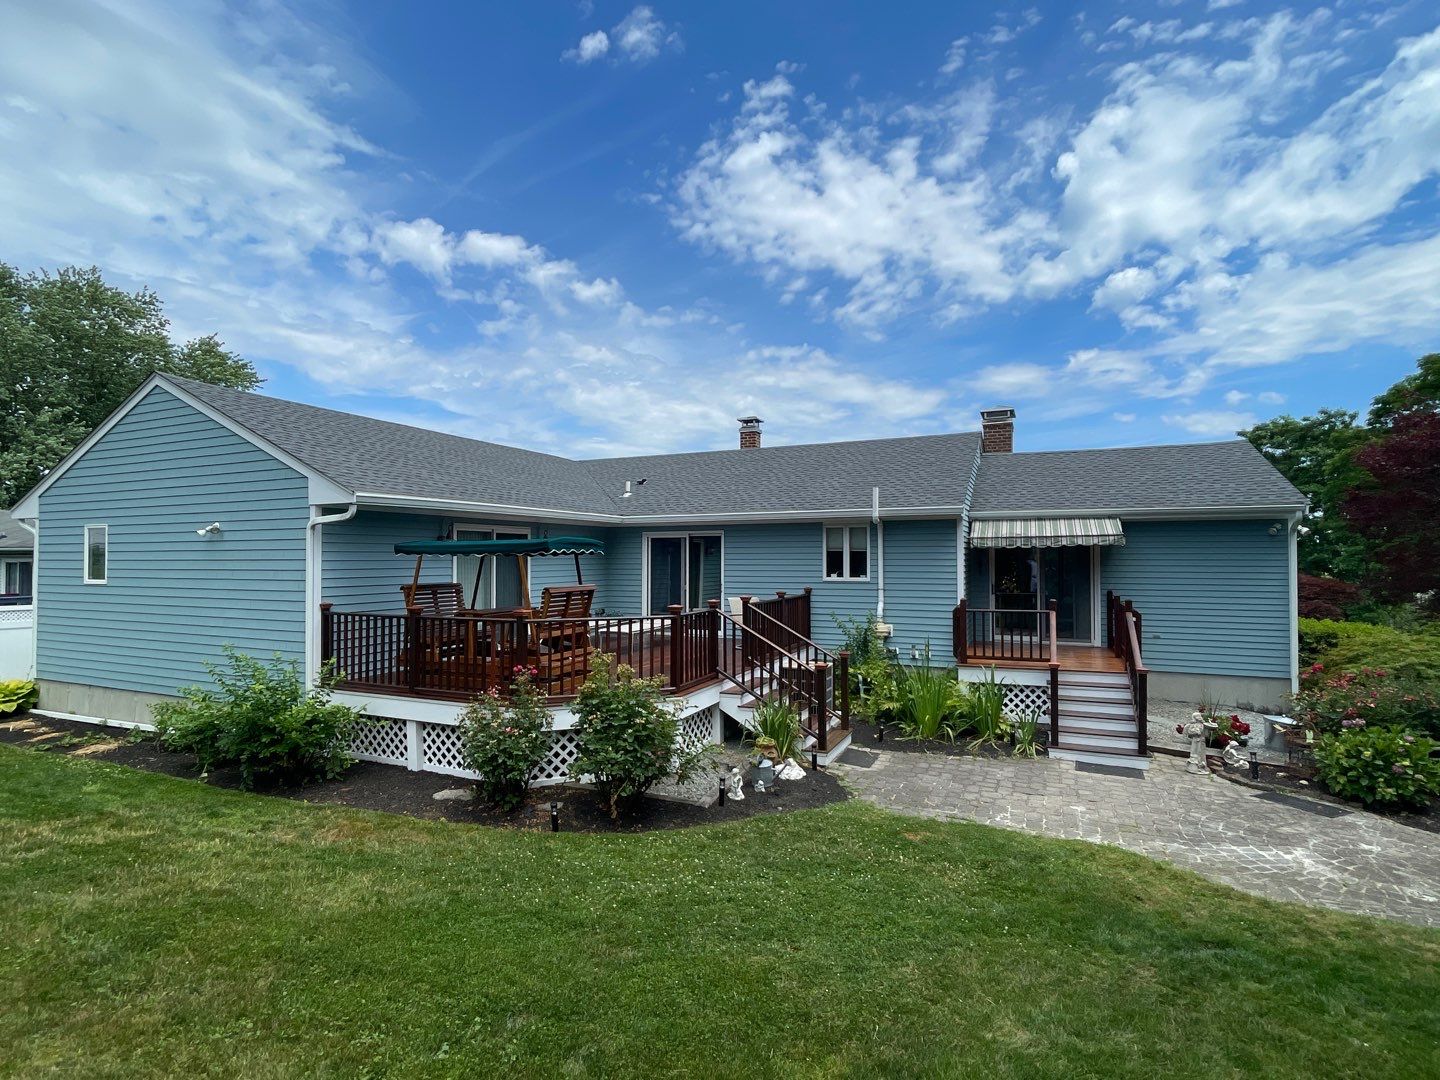
If you're looking for a way to add extra living space to your home, a great option is a new deck or patio. When choosing materials for your deck or patio, choose something that compliments the style of your home and will hold up over time. You can also add some accent colors to add personality!
Siding is one of the most important layers of protection for your home. Reshingling or replacing siding that has signs of wear and tear can prevent larger issues, such as wood rot or mold. Preventing these common issues is important and finding a contractor who can replace your siding, as well as make any further adjustments to your exterior, is an essential step to prevent any future damage.
If you are interested in changing the look of your home, try one of the above exterior carpentry projects! We cover everything from basic structural repairs to intricate finish work. Our talented carpenters receive ongoing training and bring care and expertise to every project. They will listen to your needs and thoroughly inspect your current carpentry work so that when the job looks as good as new.
To learn more about our talented carpenters and how our carpentry services will work for your Rhode Island home, visit our project process page. If your home’s woodwork needs some vital repairs or if you’re beginning a larger home improvement journey that requires carpentry, start by scheduling an estimate!
When most homeowners think of projects that can improve and elevate their homes, carpentry work isn’t necessarily the first thing on the list. However, there are several carpentry projects that can do just that: improve your home. With a range of complexity and costs, there are many carpentry projects that can add to your home and take it to that next level of quality. Here are our top carpentry projects that elevate your home not only aesthetically, but also functionally.
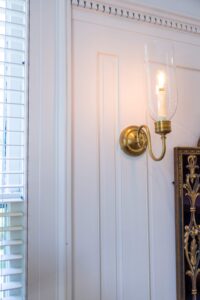
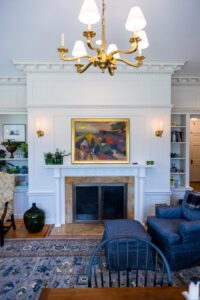
A classic use of carpentry in your home is adding crown molding or wainscotting. For a room revival that brings dimension and lasting value to plain walls, nothing beats a traditional wainscoting of richly layered wood panels. In addition to the aesthetic appeal, wainscoting offers some practical benefits still as well. Wainscoting can be great for preventing damage to your walls, entryways, hallways, stairways, etc. Any place that sees a high amount of foot traffic in the home is at risk for taking damage from accidental bumps, knocks, and brush ups. This is just an added benefit on top of the centuries old, time-tested beauty of wainscoting.
Crown molding is a lower cost carpentry addition that can similarly improve your aesthetic. Crown molding isn’t nearly as visually intense as wainscoting. The original purpose of crown molding was to conceal imperfections in older homes, especially where the walls and ceilings touch. If your house is a newer build, you probably won’t have to worry about cracks or warps along the tight corners, but older properties are prone to these specific flaws. Crown molding is a quick and easy way to transform the look of your home without any large renovations. At a much lower cost, crown molding can increase your home’s value as it is usually an indicator of a higher-quality home.
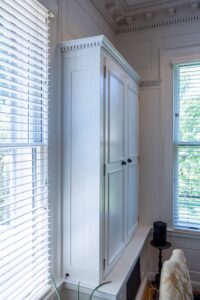
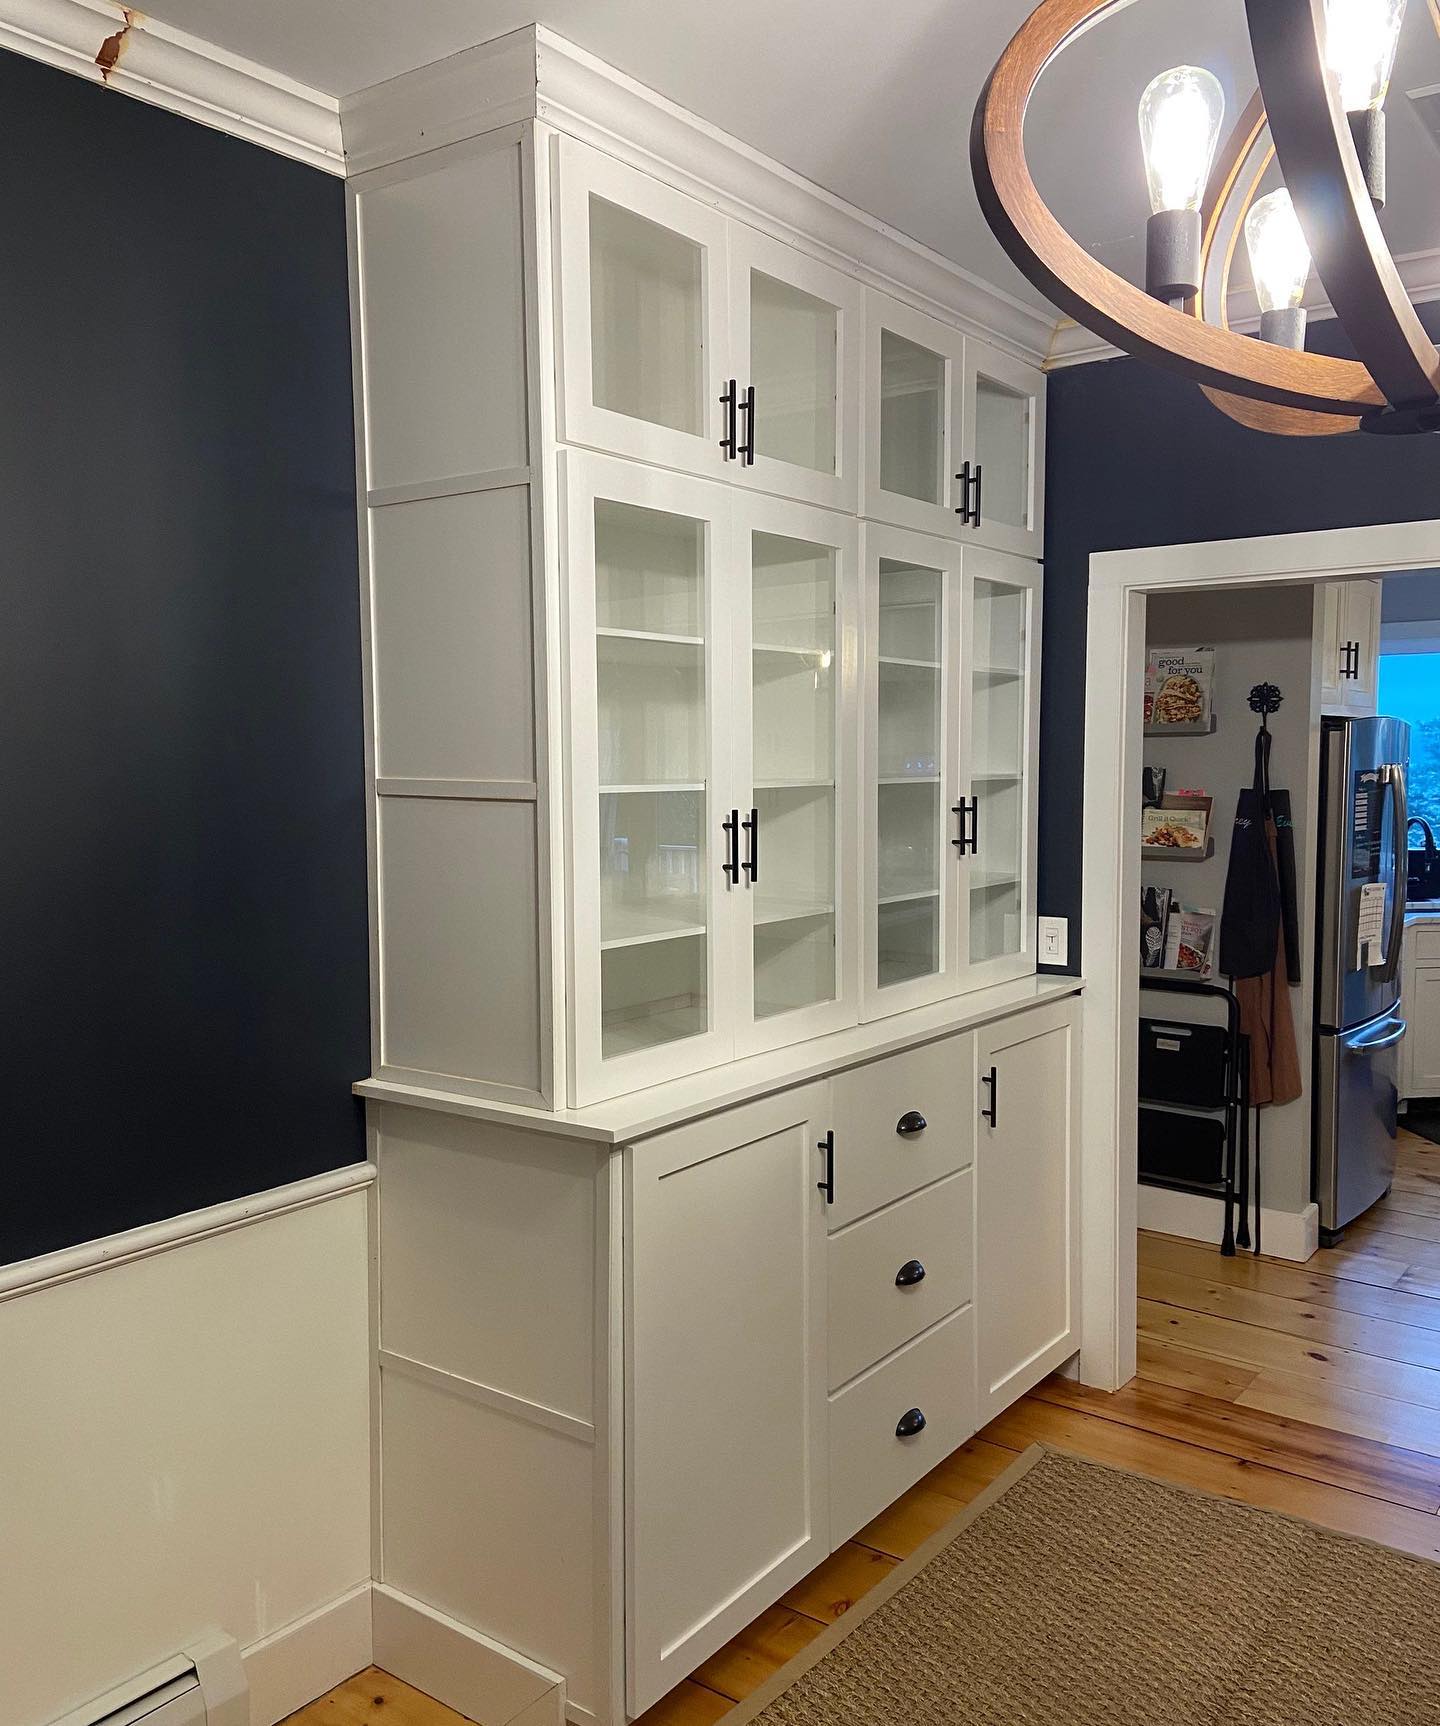
Carpentry work can also elevate your house through updating its existing features. Cabinets and closets are two aspects of your home that can easily be improved and reworked via carpentry work. While these are parts of your home that you might not think about very often, adding new cabinet doors or shelving in a closet can make the space more functional and make them easier to use.
Closet improvements can include adding additional shelving, redoing your current shelving, and creating built-ins, and replacing your closet doors. Cabinet updates can involve replacing the doors, refinishing the doors, or fixing the shelves.
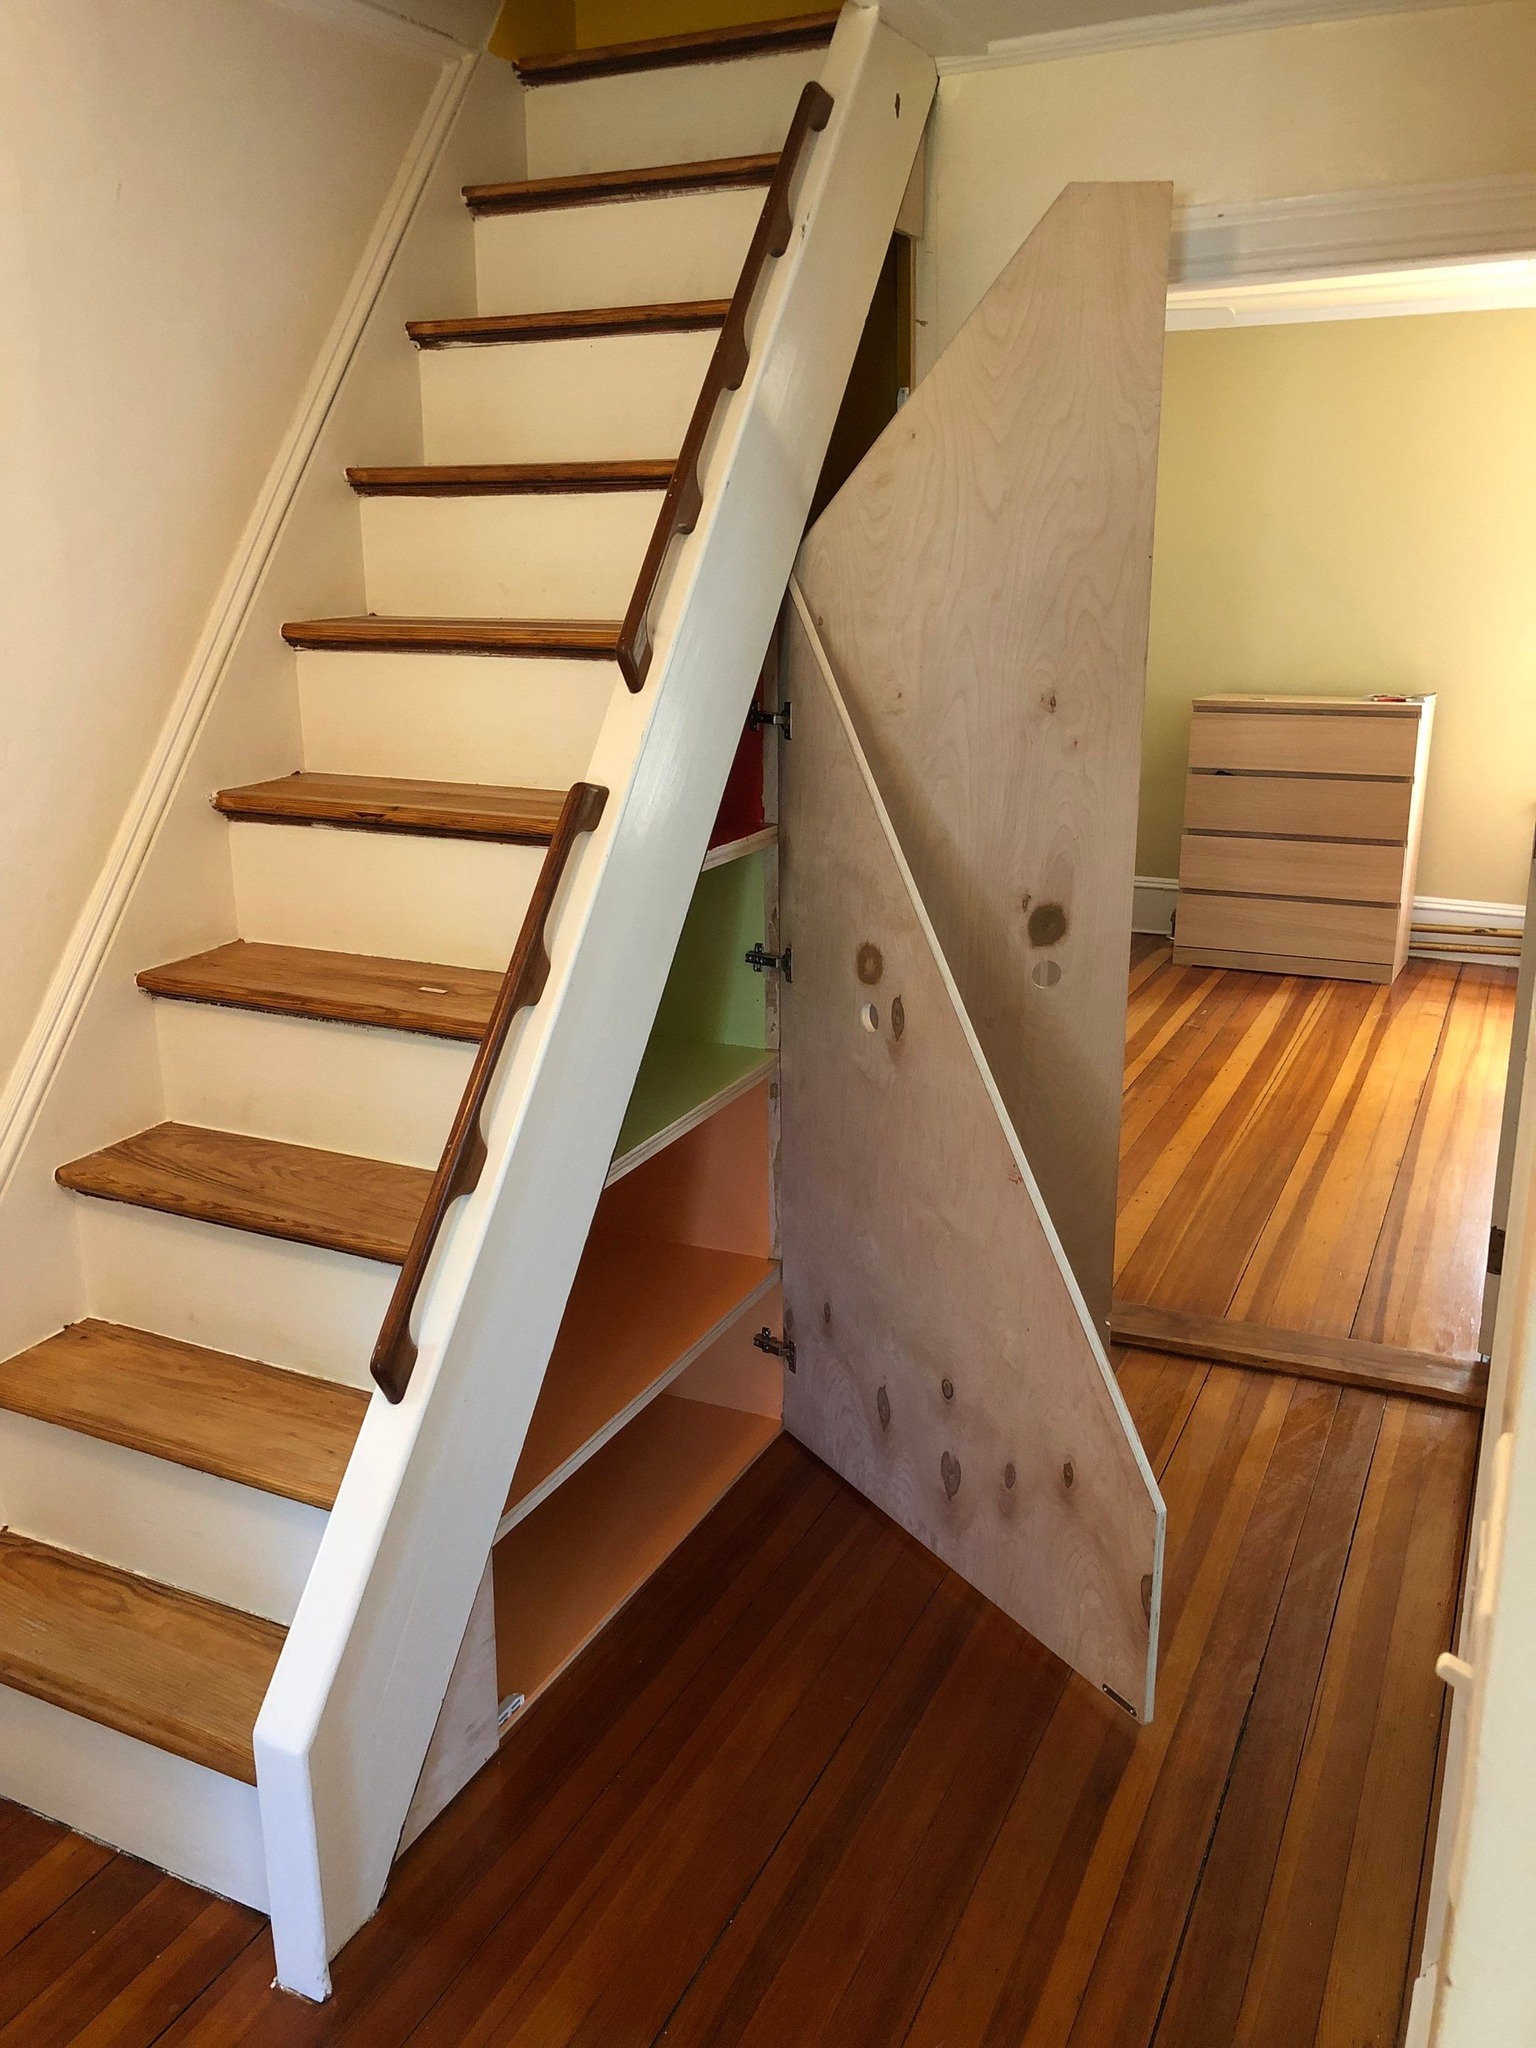
Built-in shelving is one of the top carpentry projects that elevate your home’s functionality and look. This addition is extra versatile because this style of shelving can be added to any type of room and doesn’t take up a lot of space. Bedrooms, offices, living rooms, and dining rooms can all utilize shelving in different ways. If smaller space is an issue, a built-in space can help address it by giving you more room to move since the shelving is completely against the wall. Built-in shelving is also a great way to improve an unused area of your home, such as under a staircase, a narrow hallway or a corner where your furniture cannot fit well. Your built-in shelves can also be used as a focal point over a furniture piece.
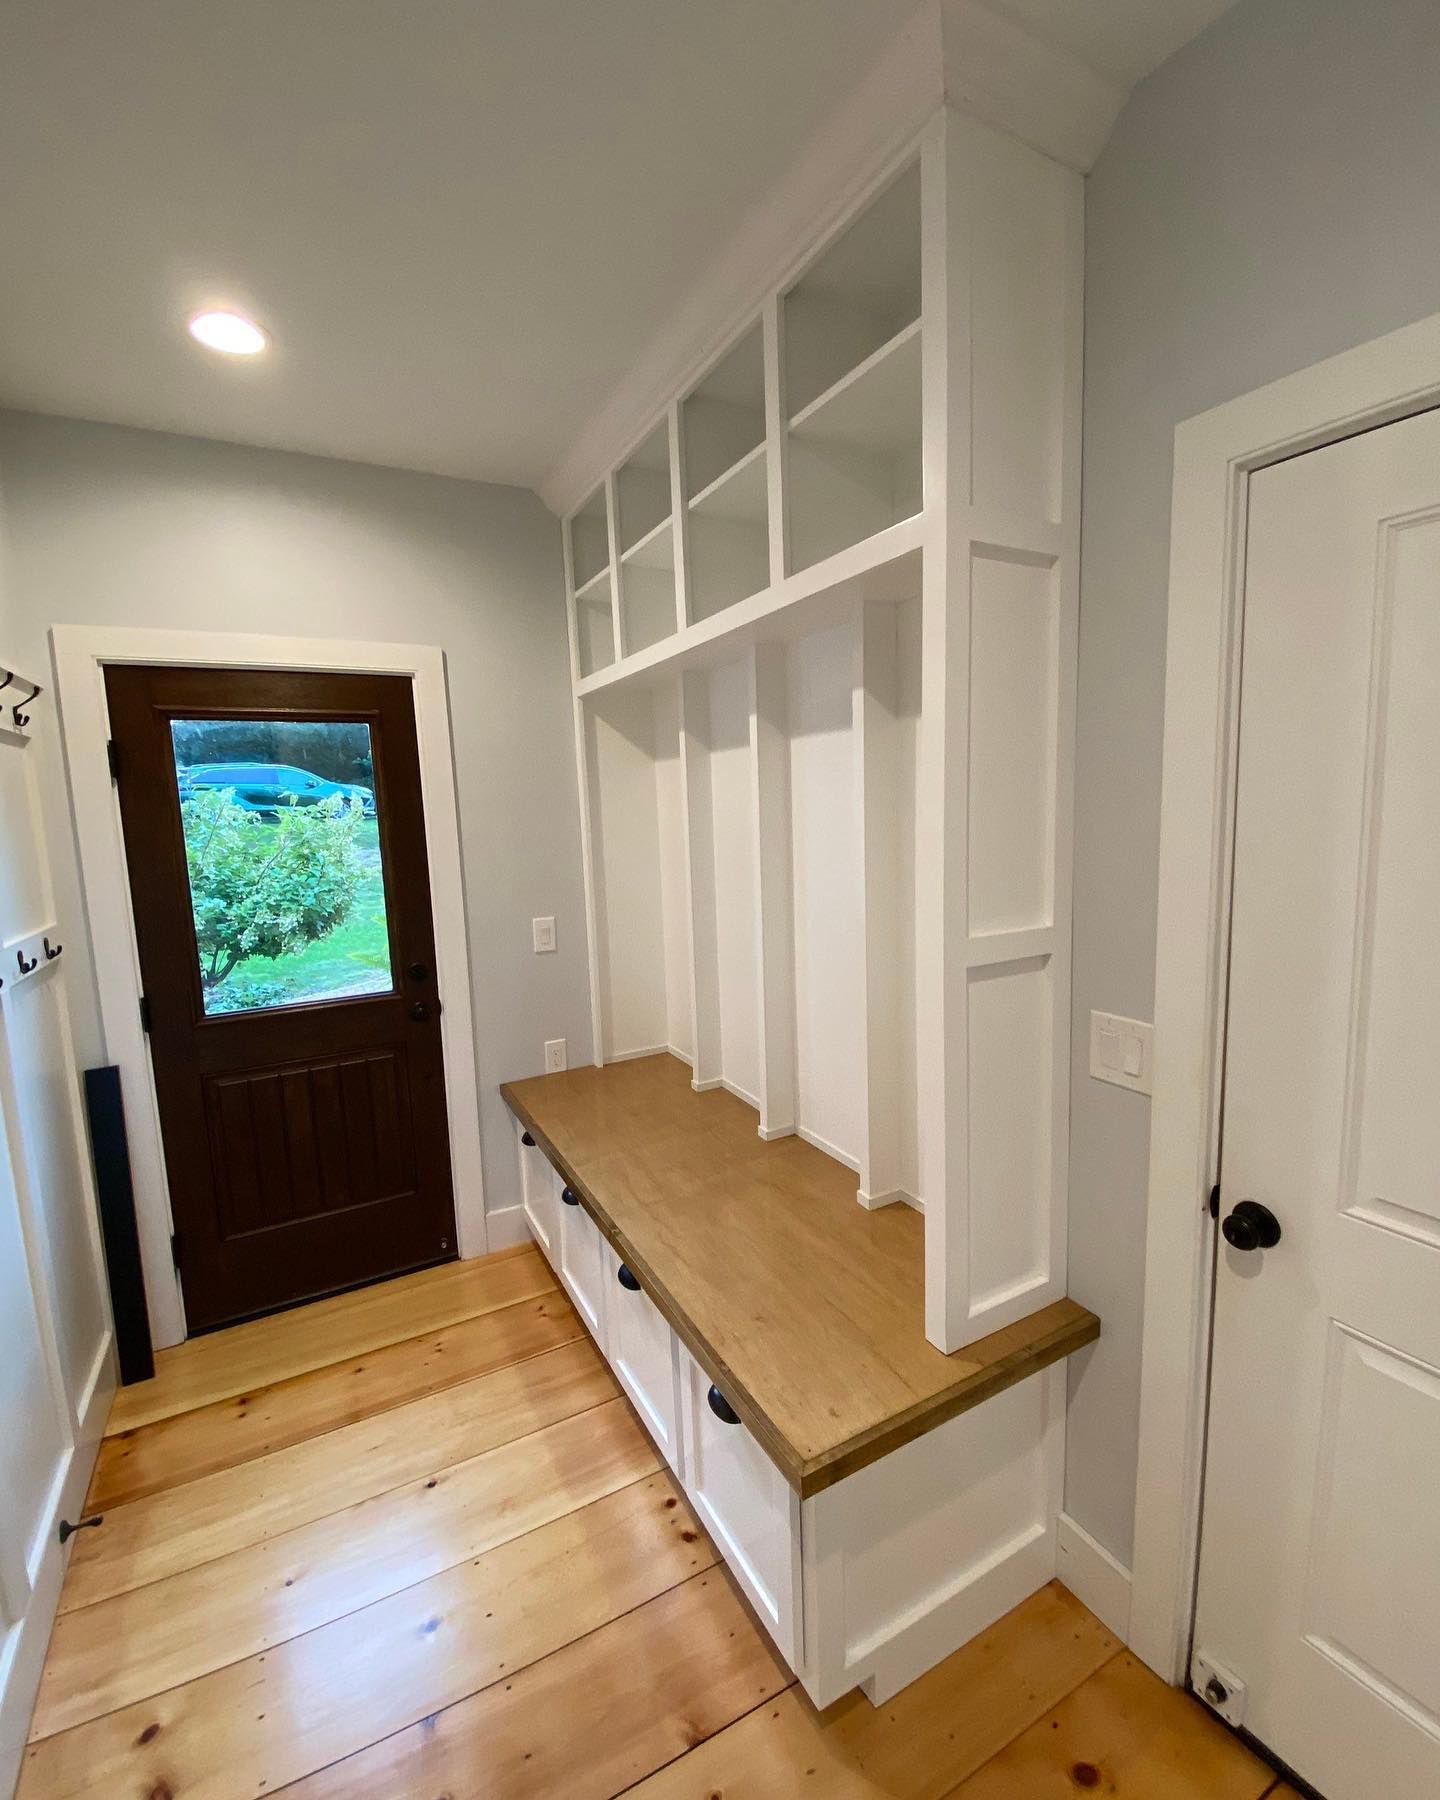
A mudroom is a dedicated space in the home, usually located at the rear or front entrance. These rooms usually have a bench, as well as cabinets and shelving, sometimes including cubbies and hooks. The shelving and cubbies store all the dirty shoes and clothes to protect your home from dirt and mud collected throughout the day. A mudroom can be an extremely practical and useful way to elevate your home. While in concept mudrooms are very utilitarian, they don’t have to be ugly! High quality carpentry work will make the room look beautiful in addition to being functional.
It looks like the home office is here to stay whether you have a fully decked out space or a smaller area with a desk and chair. Some home offices are as simple as a built-in kitchen desk, a small area to check the mail, pay a few bills or where the kids can do their homework. Other home offices include multiple workstations and built-in bookcases.
Home offices can be custom designed to fit the needs of you and your family. If your needs are greater (if you work from home consistently), explore the idea of creating a specific space for your work. You can add built-ins for organization or a built-in desk to save space. If your home office needs aren’t as big, you can add a built-in kitchen desk or drop-down desk that can also serve as a place for other things like paying bills.
Have a carpentry project, big or small, on your to-do list this year? Contact us! We can answer any questions you have and would love to assist you in elevating your home.
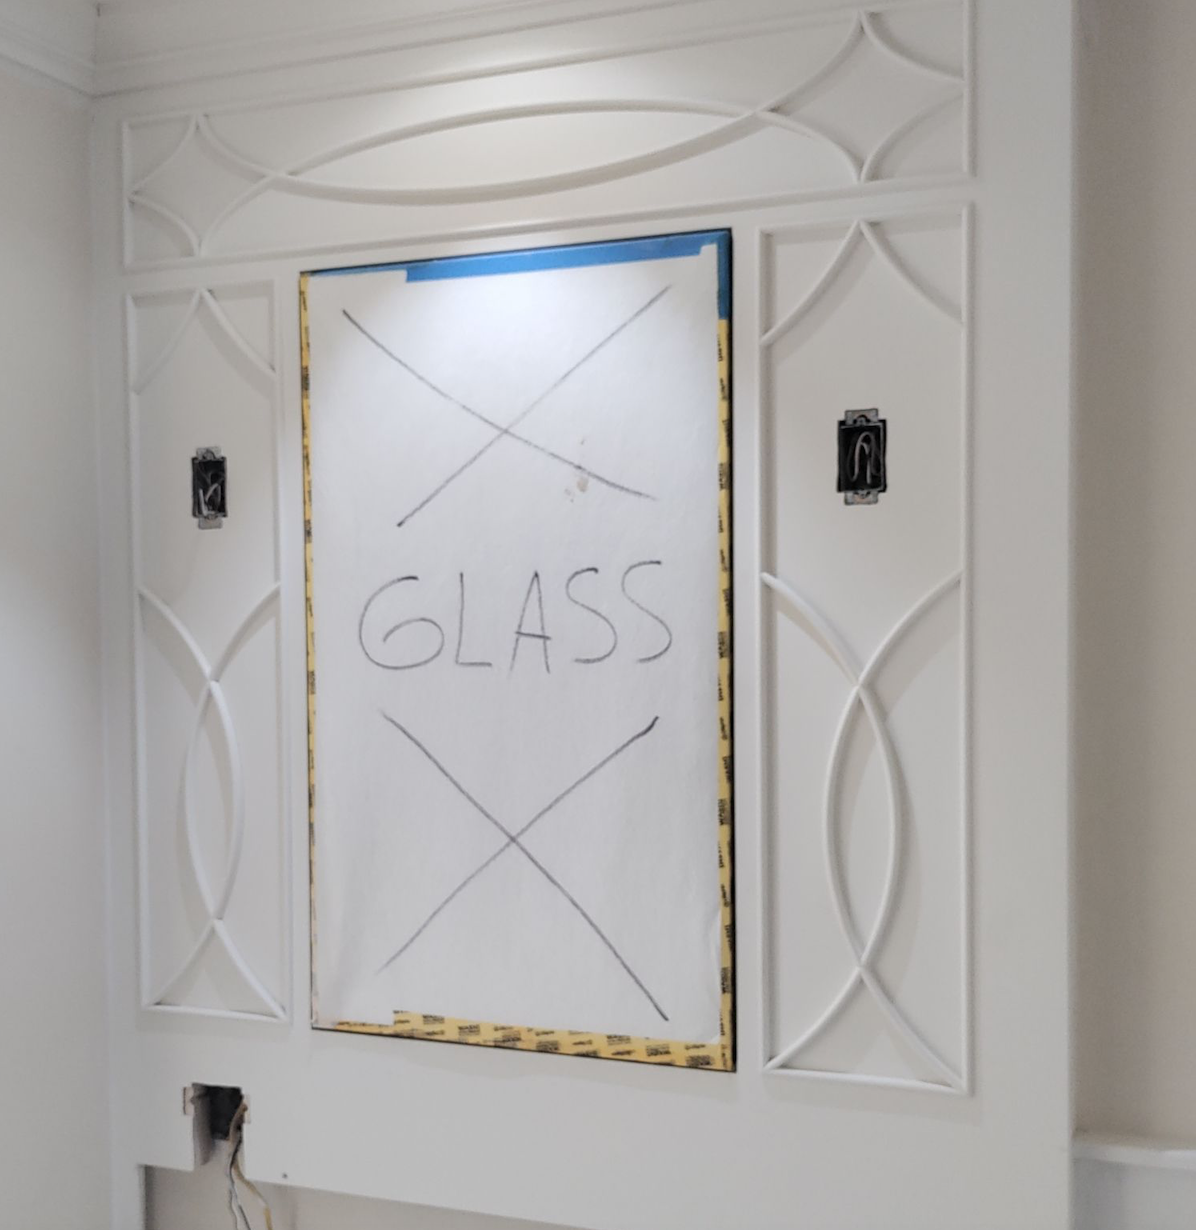
Preparing a home for interior painting is one of, if not the most crucial step in the painting process. If an area or surface is not properly prepared before painting, it can add much more work and time for cleanup. It can also mean that the new paint job won’t not last as long as it should. These are the common steps that professional painters go through for interior painting preparation, and why they are so important.
Scraping the walls is the first step in preparing your interior for painting. This makes sure that there are no surfaces that would be rough or cause the new paint to not adhere properly. This can be old, flaking paint, dirty areas with grime build up, or simply uneven surfaces.
If your walls have texture on them, professional painters might scrape this off too. Removing texture allows for a smoother painting surface and ensures a higher quality finish. It’s possible that a textured surface won’t allow the paint to adhere as well as it should and might mean another repaint would be needed sooner than it should be. The same principle applies to wallpaper. Painting over wallpaper is always a bad idea. If the wallpaper starts to peel, there goes the new paint too! Removing wallpaper to make way for the new paint is always the best option.
Filling holes and cracks is another important part of the painting preparation process. If these holes and gaps are not filled, the paint will simply sink into the holes. Using spackle or drywall compound is an easy way to cover up those spots to prepare them to be painted. Once the spackle or drywall compound is applied and the area is repainted, it will be as if there was never a hole there.
The next step is to sand your walls, if needed. Sanding walls before painting does even more to make a surface optimal for painting. Sanding makes the area as smooth as possible, which will ensure the surface is even and the final project will look as high quality as possible.
We don’t always think our walls need to be cleaned, but they do! This is especially true if they’re going to be repainted. Even if you aren’t having your walls scraped or sanded, cleaning the walls is a necessary step and a simple way to ensure the new finish has a higher quality look. If dirt or grime is painted over, that can show through the fresh coat and look subpar. Cleaning the walls well makes sure this doesn’t happen.
If your walls show major stains of any kind, you can apply a special type of primer to those areas. The purpose of stain-covering primer is to prevent stains from bleeding through the paint. This typically depends on the color of paint that will be used. If the color is lighter than your current one, you will need some assistance in covering the stains. If the color is darker than your current one, you may not need a stain-covering primer since the new darker hue can cover them. White is a trending color at the moment, and would certainly require some prep work on any existing stains that will be under the new coat of paint.
Finally, apply painter's tape to all the trim in the room to protect it. Remove the outlet covers and set them aside to reuse them when the project is completed. Taping aids in keeping paint off of trim, baseboards, outlet covers, and anywhere else you don’t want paint. This final step also saves cleanup time if paint were to spill onto these areas. Additionally, furniture should be moved to the center of the room, and drop cloths should be put on the floor and any furniture for protection.
For an interior painting job, surface preparation can make it or break it. Making sure your interior painting preparation is done properly makes your invested time and money worth it and will help your paint job will last as long as it’s supposed to. Skimping out on it because you don’t have the time or because it’s cheaper not to do it will cause you more problems in the long run. Buying the most expensive paint and using the newest techniques can’t save you from necessary but skipped surface preparation.
Reach out to Bruno Painting today for your interior painting and carpentry work in Newport, Portsmouth, and all Rhode Island areas. Our mission since 2004 is Upholding and Caring for Surfaces and Relationships. We’d love to welcome you to our customer family. We look forward to serving you!
There are so many aspects of home maintenance to keep track of when you are a homeowner. Exterior home maintenance can seem obvious: cleaning out gutters, power washing siding, or replacing roofing. Interior maintenance, we often think of just needing a fresh coat of paint or maybe fixing a leaky pipe now and then. However, there are other common home interior issues worth keeping an eye out for as a homeowner! Here are a few of the most common interior issues we are asked to fix and how to spot them in your own home.
One of the most common issues we see in Rhode Island homes is wood rot. Wood rot is decay caused by fungal growth in damp wood. When timber becomes damp enough to have 20% or more moisture content and isn't able to dry out quickly or is repeatedly dampened, it creates the ideal conditions for wood-eating fungi.
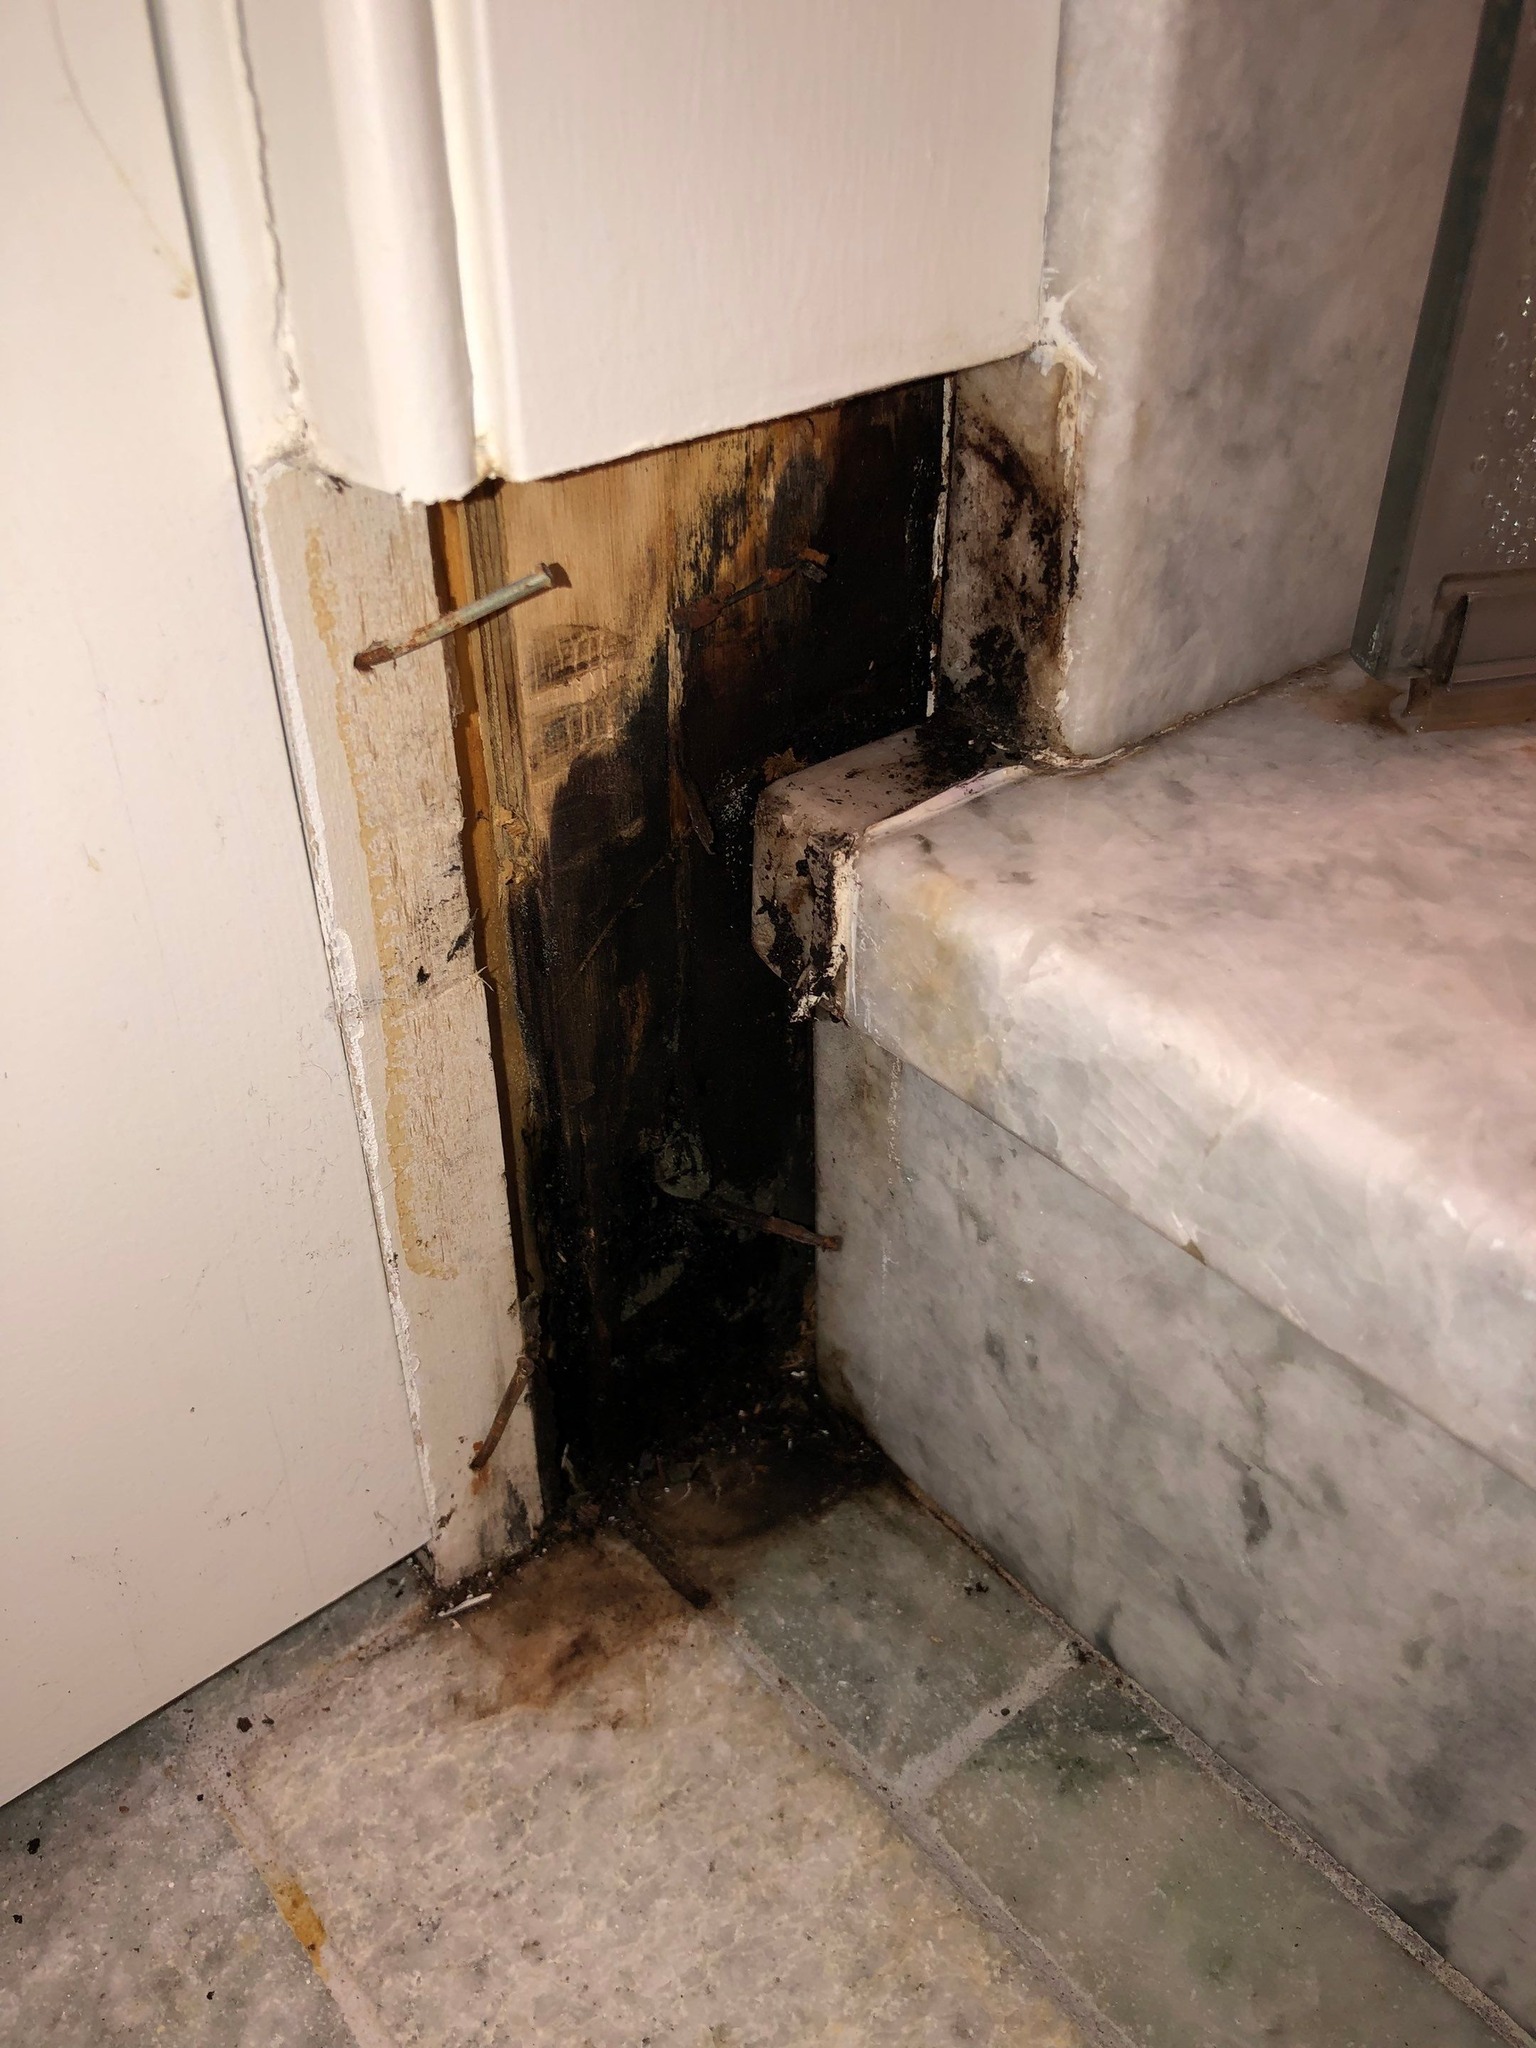
Wood rot is most commonly found in bathrooms, kitchens, and attics or basements. Anywhere moisture levels are higher in your home is at higher risk for wood rot.
To see if you have wood rot, take a good look at the visible wood in your home. Look for:
If you’re still unsure, the easiest way to test for wood rot is to take a screwdriver and press it against an area you are testing. If it sinks in easily, you likely have wood rot.
How do you solve a problem of wood rot? Contact a professional carpenter or contractor and consult them! Our common course for repair is either removing the rotted wood entirely and replacing it with new lumber or replacing sections that have rotted and filling gaps with epoxy or a similar material.
Old wood can be an eye-sore, as well as dangerous if left alone. Some wood can be noticeably outdated and make your home feel old. On the other hand, old wood may not be as visually noticeable, but can be as structurally insecure.
Old wood can be a structural risk depending on the wood piece’s location and purpose. While wood can last a very long time, sometimes up to 150 years, older homes (like the ones we have in the Northeast) can have wood items that have come close to the end of their sturdiness.
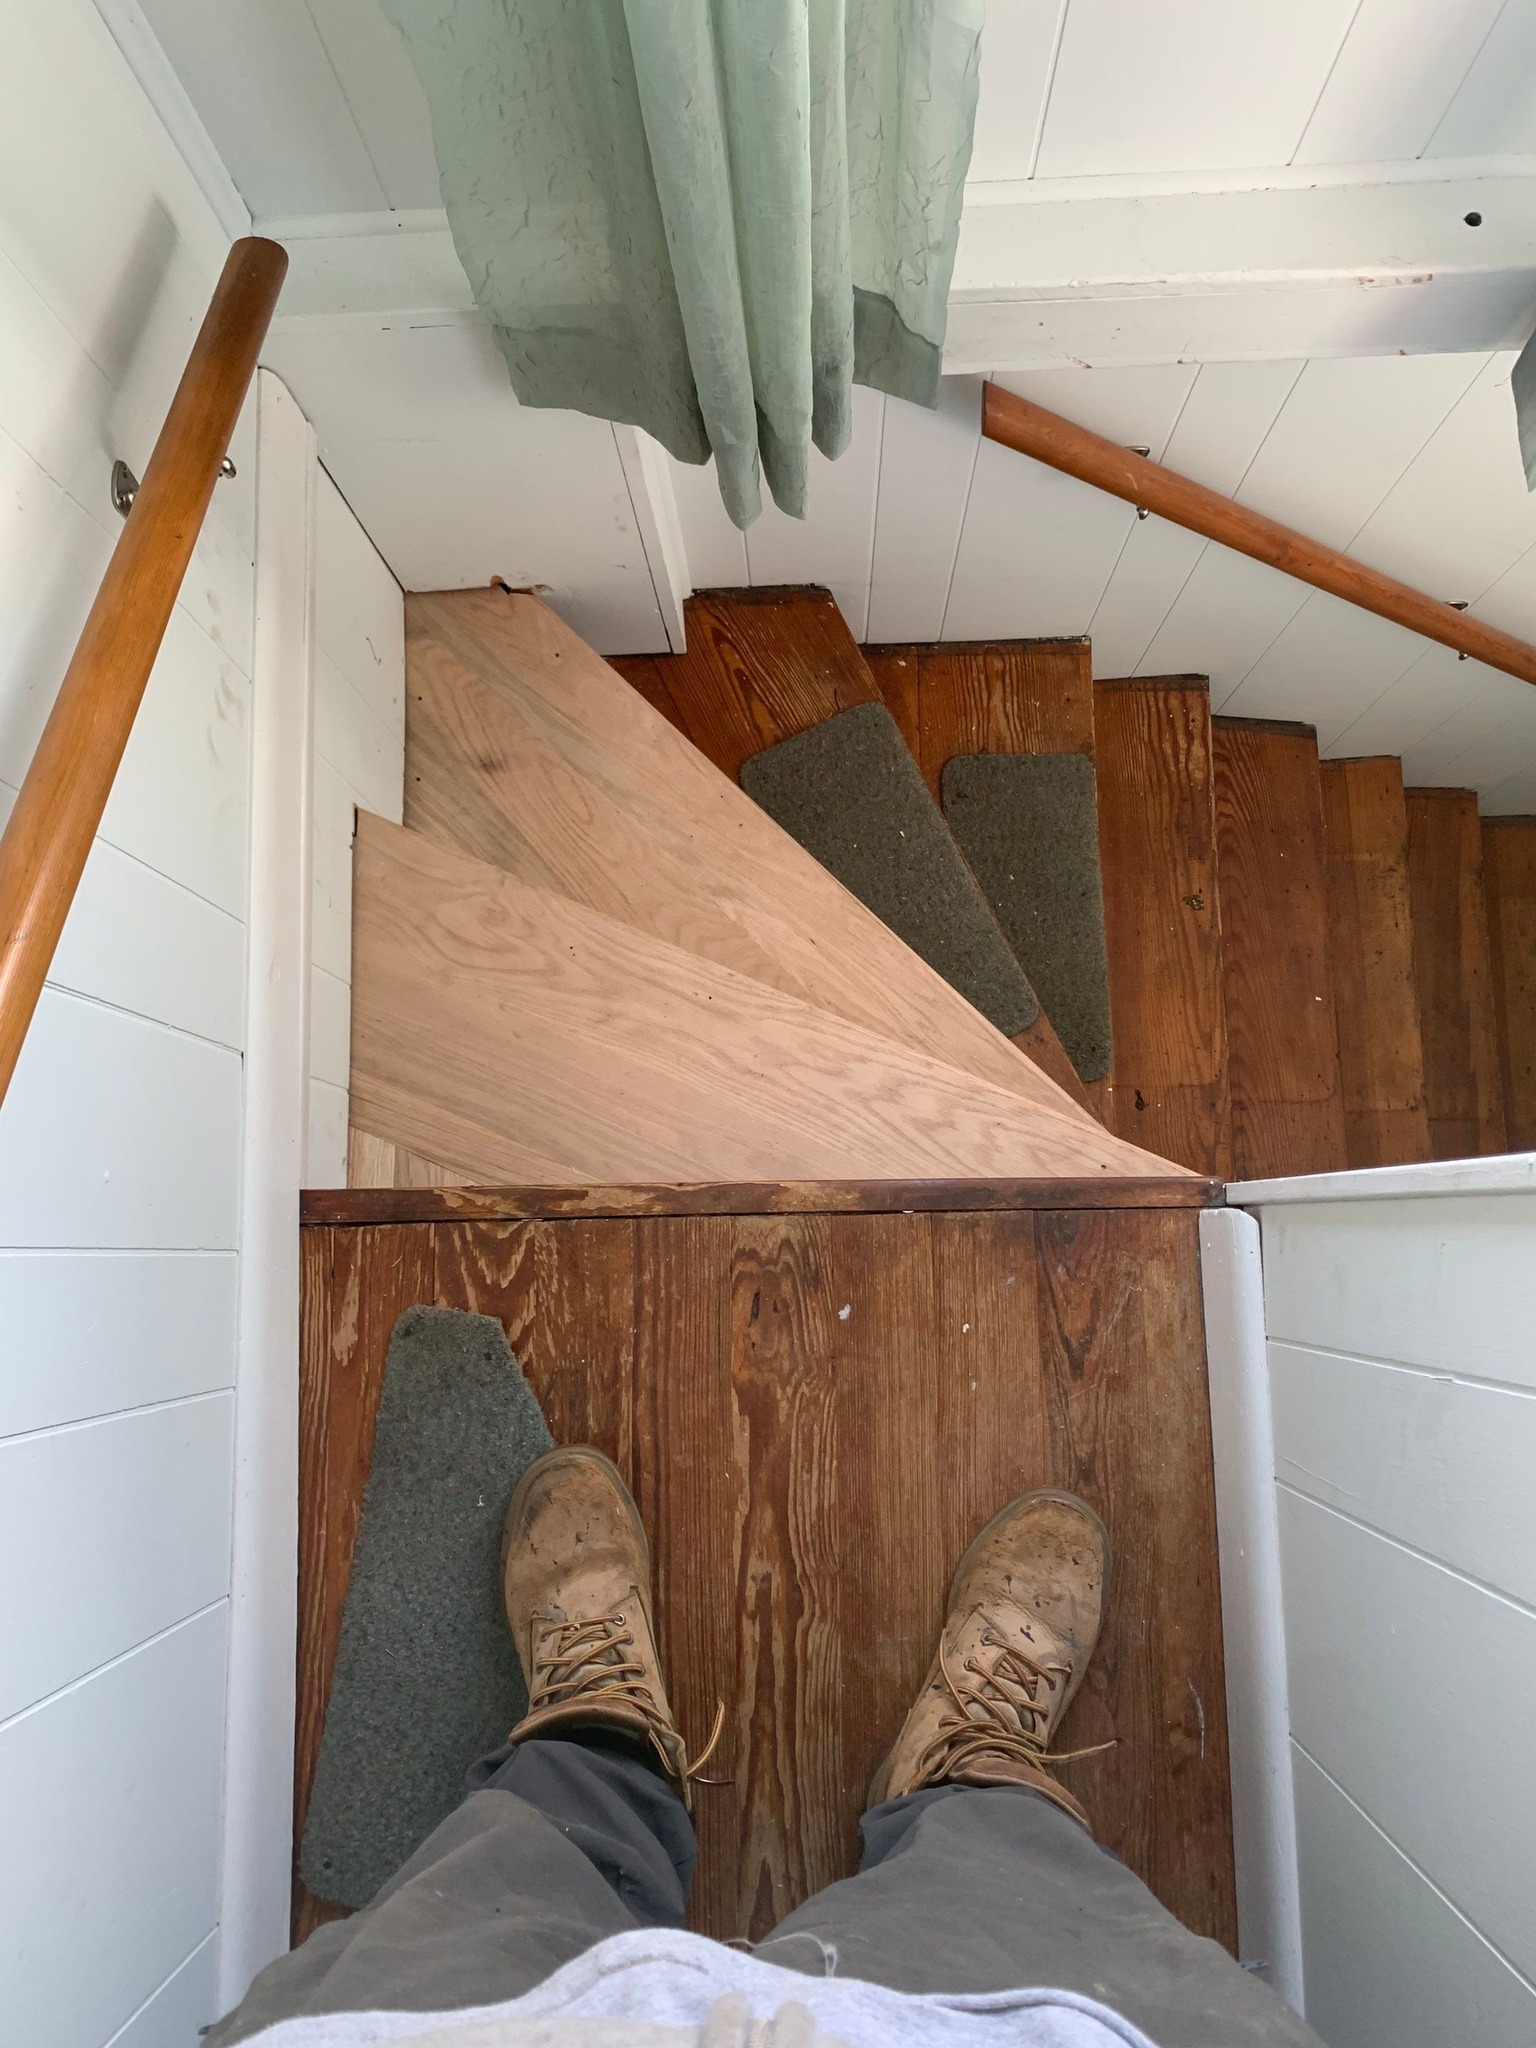
Places to look for older wood are stairs, overhead beams, and other wood surfaces that are not as visible, like cabinet interiors. If wood is splitting or cracked, that can be a tell-tale sign of age. Creaky stairs can be sign of structural issues underneath and might be something to investigate further if you begin to hear that noise.
Another issue we see in homes are plaster cracks. Plaster cracks are an incredibly normal occurrence in homes. Plaster walls respond to inevitable foundation shifts and climate changes, and they can begin to crack. Everyday life, with its bumps and bangs, also takes its toll on plaster walls.
Certain areas, such as above and beside doorways and windows, are classic areas where cracking occurs. Nearly all homes with plaster walls will eventually develop window and door cracks. Repairing these cracks is essential, as leaving these areas unfixed can result in severe structural issues. An early sign can be that a door becomes unable to close because of the shift in the doorframe. Though the repair is a relatively simple and common process, you’ll want a professional to handle it since any mistake can give way to further damage.
If you have awkward spaces in your home, such as gaps underneath stairs, carpentry projects can fill those spaces! We have done projects that utilize that free space with carpentry work, including under-the-stairs cabinets, breakfast nooks, mudroom built-ins, and kitchen islands. If spaces in your home feel like they are lacking or empty, an addition of any of the above can make the area feel complete.
If you notice that some areas in your home feel off or empty, but you don’t have any idea how to fix it, consult with a professional contractor! They can help you come up with some creative ideas to utilize those spaces that need a little something more.
Your home is so important since it acts as the barrier between you and the outdoors. Our goal is to help you maintain it and keep it in top shape. Tackling any of these issues as they appear in your house will increase the longevity of the home, as well as make sure everything is structurally sound. If you think that your home might have one (or more) of these issues, contact us! As professional painters and carpenters in Rhode Island, we are here to help with any common (or uncommon) interior home issues you may have.
As the cooler months approach, thoughts turn towards holiday preparations, envisioning gatherings with friends and family. With Covid's impact diminishing, many are eager to once again open their doors to visitors and celebrate the upcoming seasons. Amidst these plans, a common query arises: When to repaint house interior?
Questions you may be asking yourself include … Is my home ready to entertain for the holidays? What can I do to get my home ready for the holidays? Whether you’re getting your home ready to entertain, simply want to refresh it for your own enjoyment, or if selling your home is in your plans, an interior paint job is a relatively inexpensive way to update your home. Understanding when you should repaint your home's interior will help you get past whether you should or shouldn’t and onto the color and sheen selection, arguably the most enjoyable part of the process.
The simplest way to know when your home’s interior should be repainted is when you look at a space in your home and it no longer makes you happy to be in it. The color may be drab, out of style, or just doesn’t please you.
Large, often-used spaces, such as your kitchen, should feel pleasing to you and to your guests. Having just the right color, shade, and sheen in these spaces makes a big difference in the enjoyment you get when spending lots of time in them. Don’t overlook powder rooms, laundry areas, and foyers, as those spaces either introduce your home to visitors or are used by you more than you think. Having your home fully color planned so there is a great flow from one area to another can further help you enjoy the overall look and feel of your home.
Another way to know when your home’s interior should be repainted is to inspect the paint finish to look for any imperfections, such as marks or scrapes you cannot clean off, peeling, or fading. You see the interior of your home almost every day, and sometimes those imperfections seem normal, but they’re not.
When your existing paint finish begins to fail, it is time to call your trusted, local paint contractor to come over and inspect the interior of your home. Interior paint imperfections may be a sign of unwanted water, mold, or other even less welcome issues.
Your professional painter will be able to diagnose the cause of the imperfections, but they’ll also be able to resolve the problems correctly so your home’s integrity is intact. If mold is present, your professional painter will likely call in a mold remediation specialist to take care of the problem.

The work necessary to take care of a paint imperfection may be extensive and can include scraping, spackling, filling, priming, and other steps you may or may not be able to handle on your own. Either way, we recommend letting our painting and carpentry experts take a look to be sure you have nothing serious going on behind your walls.
Aside from the aesthetic importance of beautifully finished wall and trim surfaces, it is a health hazard if water seeps and creates damage. Because we’re close to water and have our share of wet weather, having an annual or biannual inspection of your home’s interior and exterior is a good idea.
Finally, even if you’ve recently painted a room, an area, or the entire house, if you simply want another color or set of colors to adorn your walls, that is a perfectly good reason to do so. Whereas some people prefer to see the same colors (and ask us to repaint their walls in the exact same colors, which is perfectly okay), you may be the type of person who thrives on change or loves to have the latest trending colors surrounding them at home.
We’re happy to oblige and help you repaint your home’s interior regardless of your reasons for wanting it to be done. Our team of experienced carpenters can help fix most imperfections you may have in your walls or trim, and our experienced painters will give your home’s interior the smooth and beautiful paint finish in the colors you carefully and lovingly select.
Getting ready for the holidays is an act of love. It’s about preparing to welcome others into your home to spend precious moments that last a lifetime. We’re here to help you with all of your carpentry and painting needs. Reach out if you’re in the Rhode Island area. We look forward to serving you!
With our 2022 summer coming to an end and Labor Day just around the corner, we’re preparing for fall in Rhode Island! As the seasons change, you may been considering some home interior updates and improvements to enhance its aesthetic appeal and to protect the integrity of its structure.
We love helping our friends and neighbors keep their homes in top shape and we’re focusing on specific home interior updates for fall 2022. Home updates you may want to consider include:
Paint repairs can be done yourself if you’re detail-oriented or handy, however, some paint repairs are best done by a painting professional. Repairs that require spackling, scraping, sanding, priming, and color matching are more difficult than simply painting over a mark on the wall, and may be best left to a painting pro.
Stress cracks, unlike more minor repairs, should almost always be taken care of by a skilled carpenter and painter. According to Fine Homebuilding, “Stress cracks, which typically occur above a doorway or window, are caused by structural movement or settling. If a crack occurs at a seam, the tape may blister or come loose. But stress cracks can also occur where there is no joint in the drywall. It may run along the actual face of the panel, or it may go all the way through to the other side. A seam located next to the edge of a header is more likely to crack than one located 8 in. or more from the edge.”
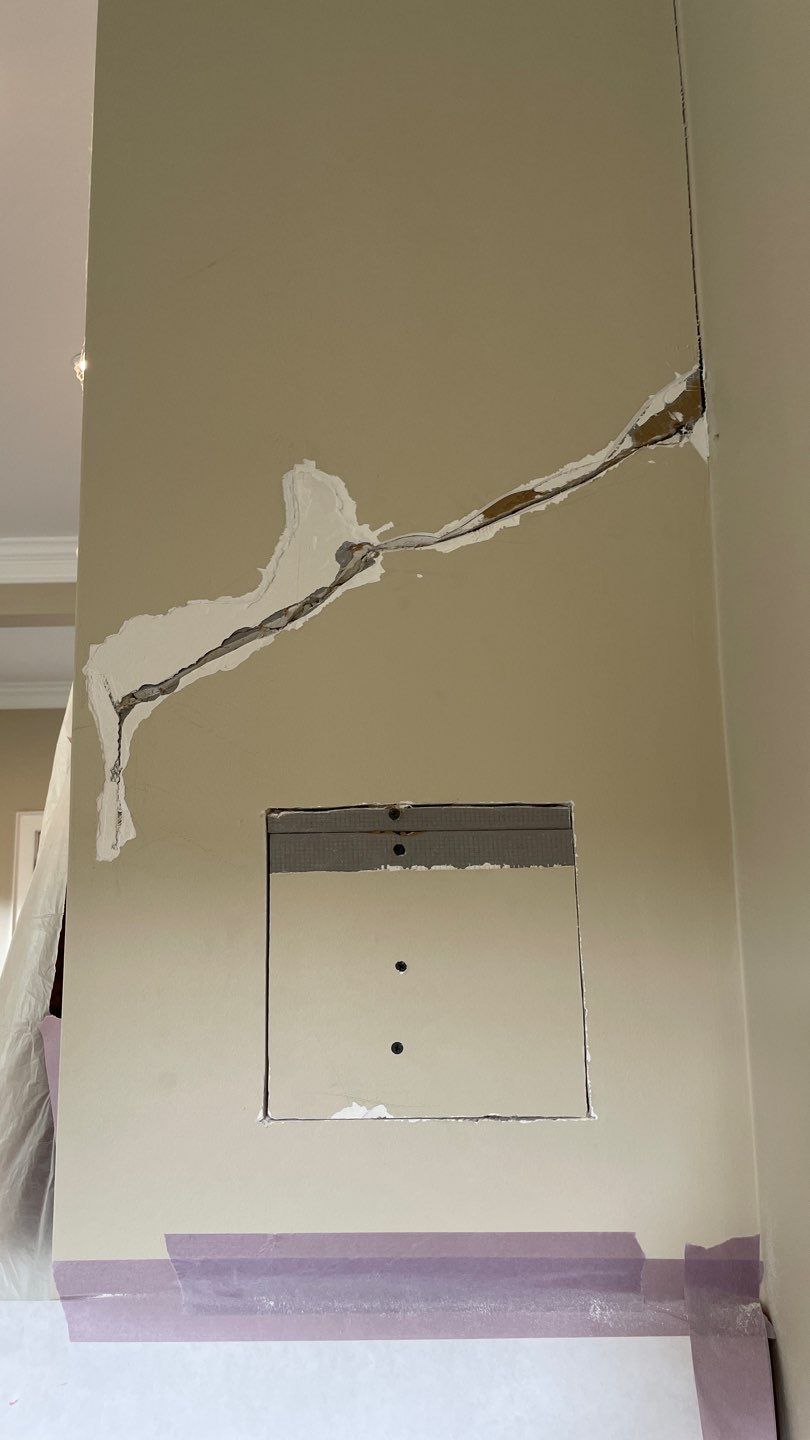
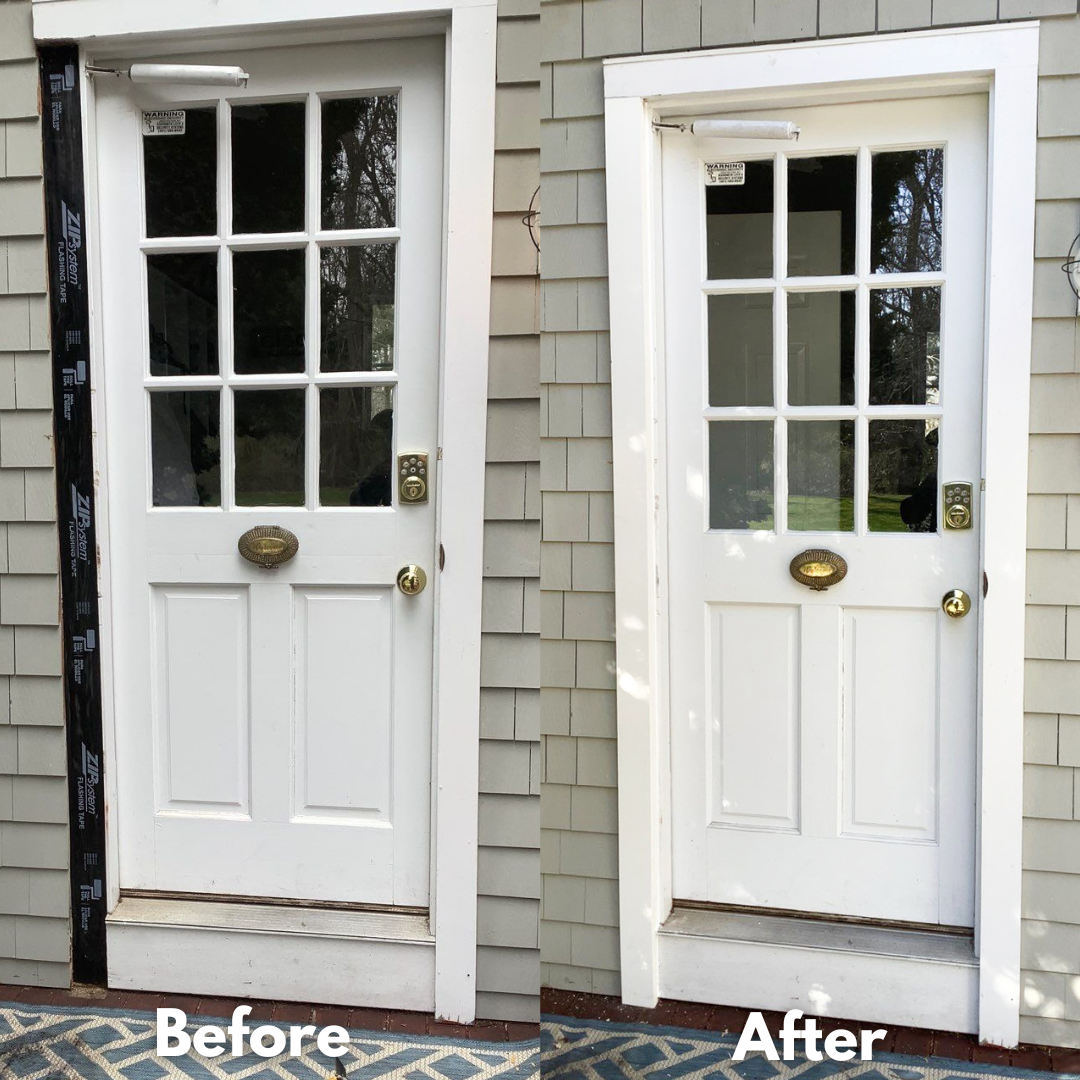
Before
After
Simply understanding the type of stress crack and its cause is difficult. Repairing a stress crack can be even more tricky. A sharp utility knife, mesh tape, and compound are a few items needed to repair a stress crack and are common items our experienced carpenters use to skillfully repair your home’s stress cracks.

Case opening trim work is an aesthetically pleasing addition to your home’s doorways. As the Fall approaches and you begin entertaining family and friends for Halloween, Thanksgiving, and other Fall and Winter holidays, you’ll be amazed at how adding beautiful cased opening trim work can change the appearance of your home’s interior.
Our well-trained carpenters can expertly add the size, shape, and thickness of trim you prefer. Once the cased opening trim work is completed, it can be stained or painted to match or complement your trim, including baseboards, window trim, ceiling trim, medallions, fireplace mantles, and any other interior trim work you have in your home.
When it comes to making a big “Before” and “After” difference in your home, having your kitchen cabinets professionally painted or installing brand new cabinets in your kitchen, office, or elsewhere in your home may provide you with the most remarkable change.
Many of our clients ask us if they should repaint their existing cabinets or if they should have brand new ones installed. We suggest repainting your existing cabinets if you like the style of the cabinets and if they’re of high-quality material.
If you do not like the look and style of your existing cabinets, paint will not change that. If your cabinets are made of a material that would be best replaced, such as inexpensive particle board, or some material that cannot be sanded down for excellent results, then we’d recommend having brand new, updated cabinets installed.
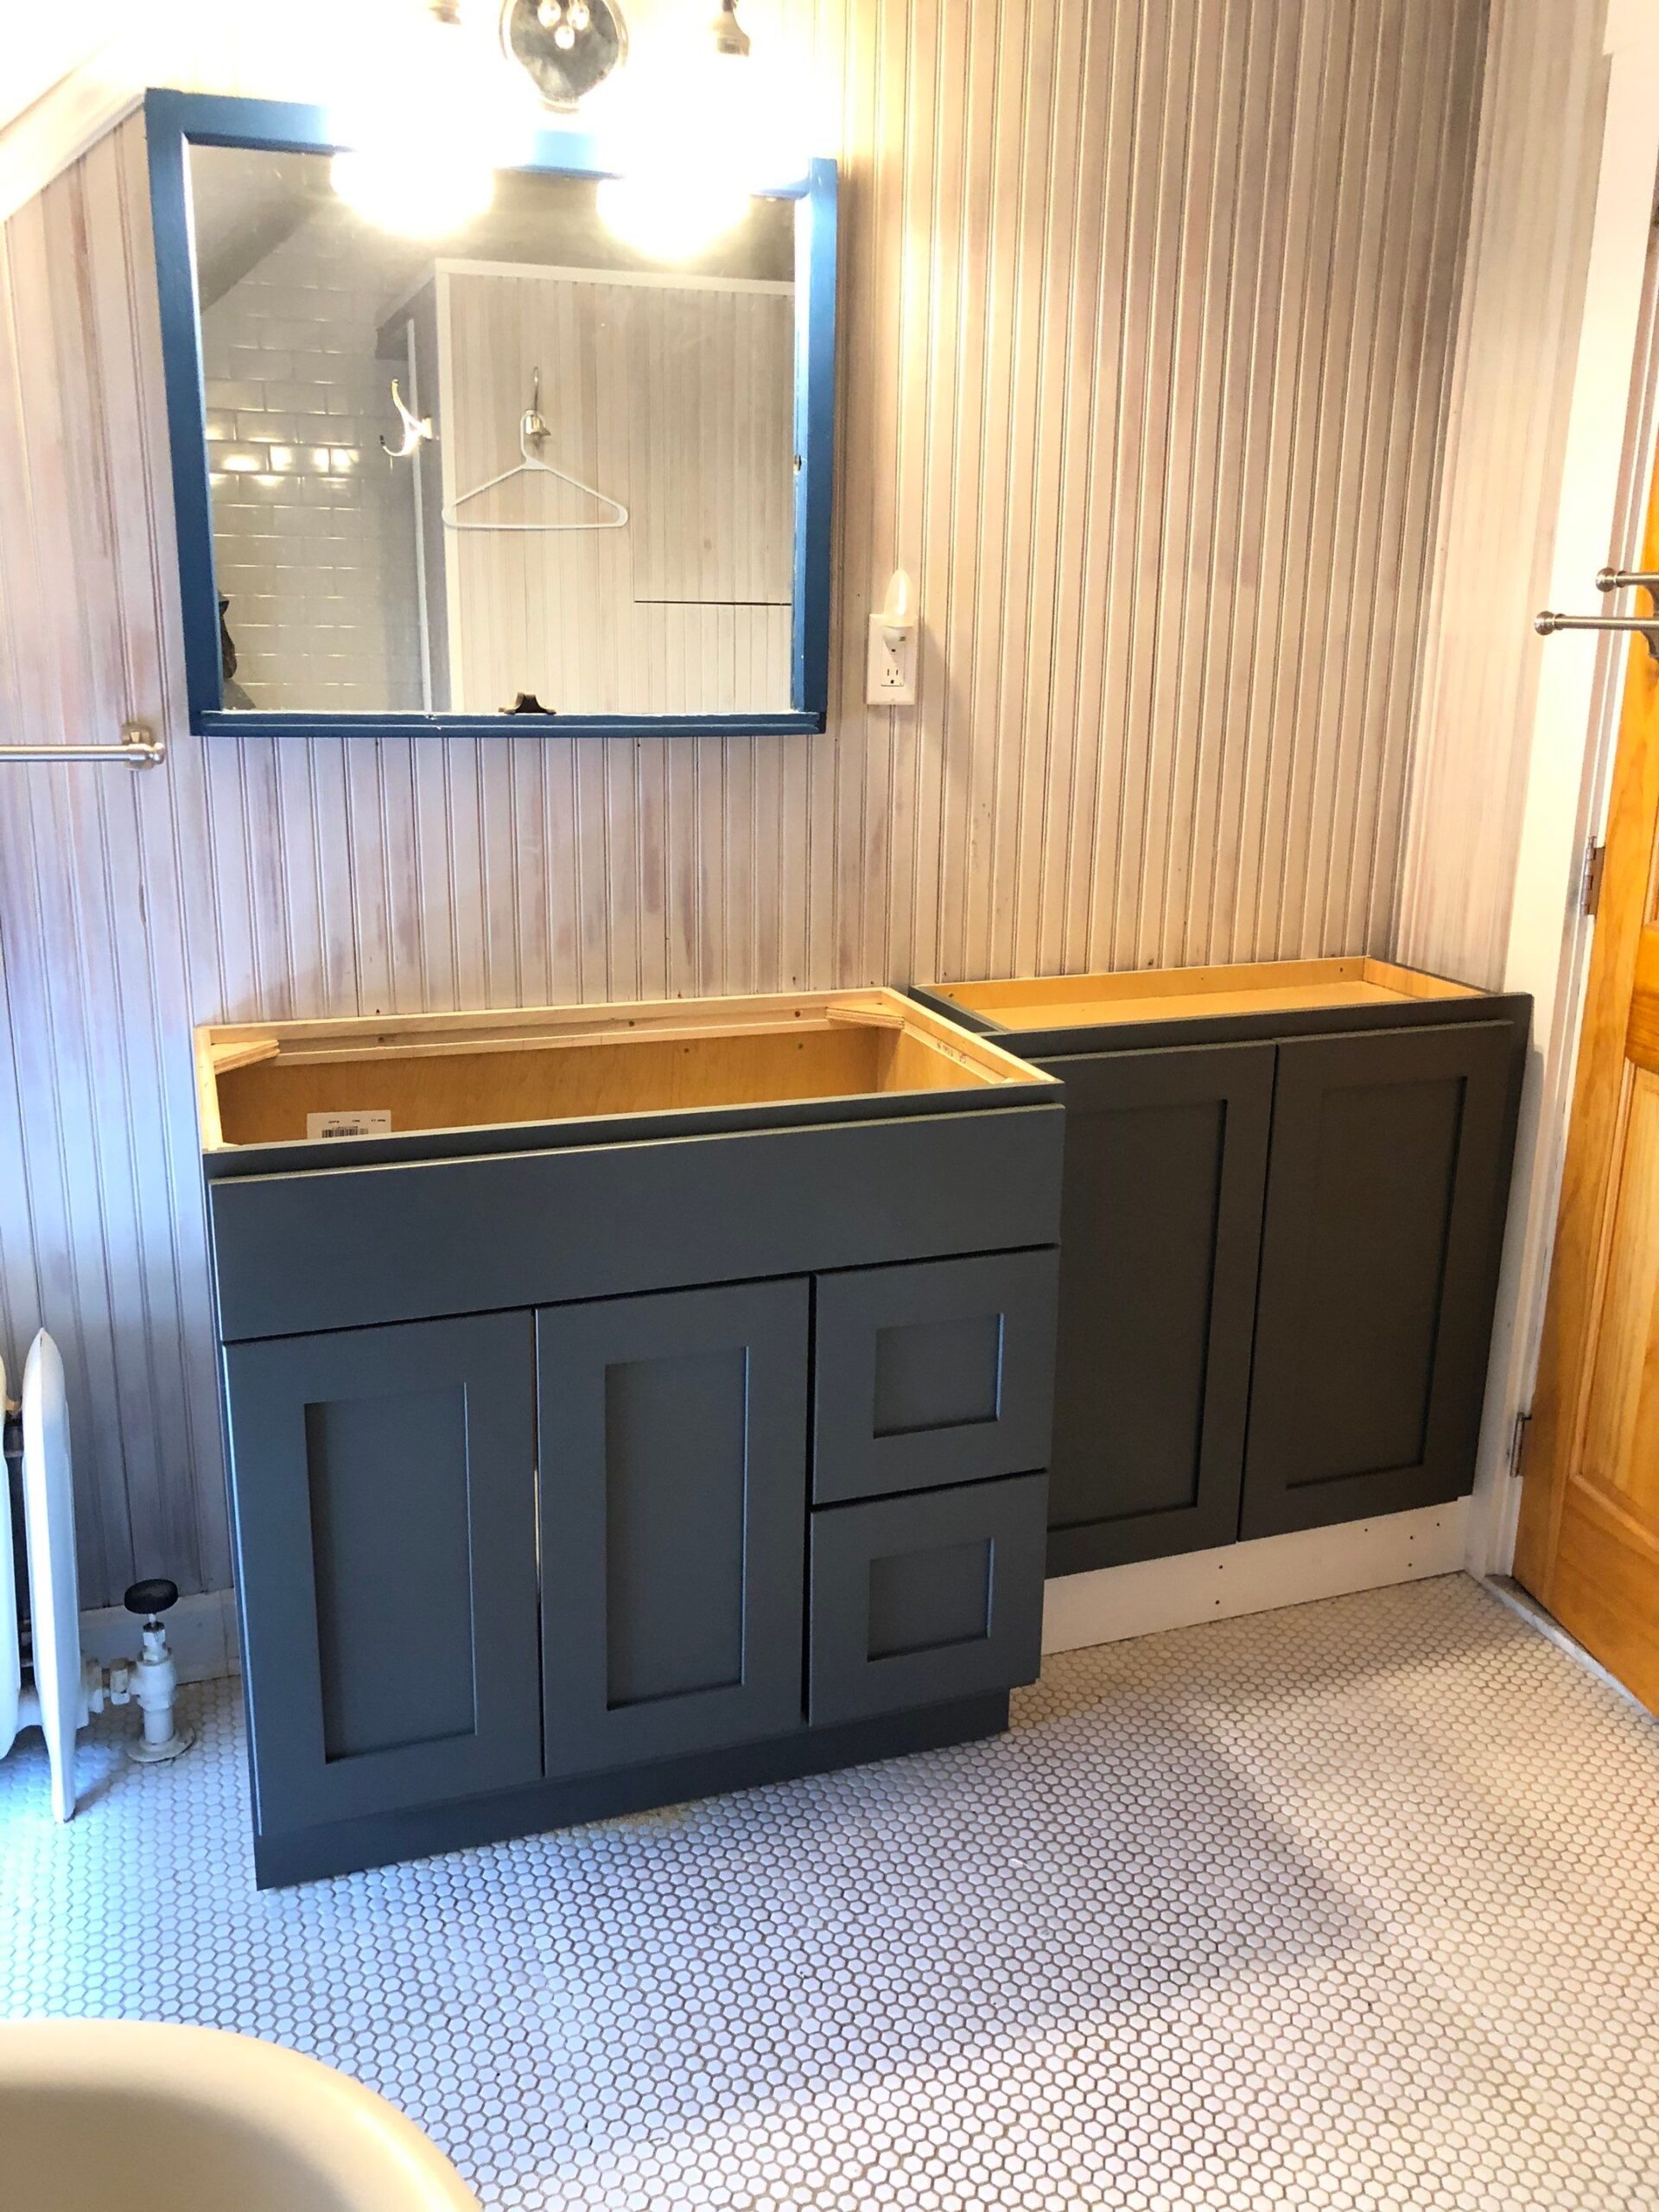
The good news is that our skilled carpenters and painters at Bruno Painting can help you with either painting your existing cabinets or installing a new set of cabinets. And we can help you make the best decision about your cabinets during our complimentary consultation with you.
Though we’re sad to see the end of the summer, we’re excited for great things ahead in the upcoming fall and winter seasons. Whether you want any of the home interior updates for fall that we’ve discussed above or some other update that requires a professional carpenter or a professional painter or both, we’re happy to help!
Reach out to Bruno Painting today for painting and carpentry work in Newport and all Rhode Island areas. Our motto since 2004 is Upholding and Caring for Surfaces and Relationships. We’d love to welcome you to our customer family. We look forward to serving you!
The first thing you may think of when it comes time to repaint your home’s exterior is the color you’ll choose this time around. Since a well-done exterior paint job lasts between 5 – 7 years, considering our often-harsh Rhode Island weather conditions, you’ll be looking at the color you choose for some time. Selecting the exterior paint color you’ll love for many years is a topic for another blog. Suffice it to say, paint color selection is not the only thing that goes into painting your home’s exterior.
You may or may not know that an excellent paint prep and application can actually protect your home’s exterior surfaces, and provide protection from unwanted water, from snow, rain, condensation, or other sources, from entering your home. If unwanted water gets inside and is not somehow dried, you may get mold which can cause rot and harm your health.
Before your house can benefit from the protection afforded by a well-executed paint job, it’s essential to be sure your professional painter does all it takes to properly prepare and then paint your home’s exterior.
One of our favorite paint brands to use for our clients is called Fine Paints of Europe (FPE). Their tagline is “Luxurious Lasting Color, Imported from Holland.” They’re not inexpensive, but what FPE supports is following proper painting protocols for best results.
In fact, on their website, FPE says, “Please do not consider the use of our house paints unless you are committed to doing a proper job and are aware of the factors which will determine the appearance and durability of the application.”
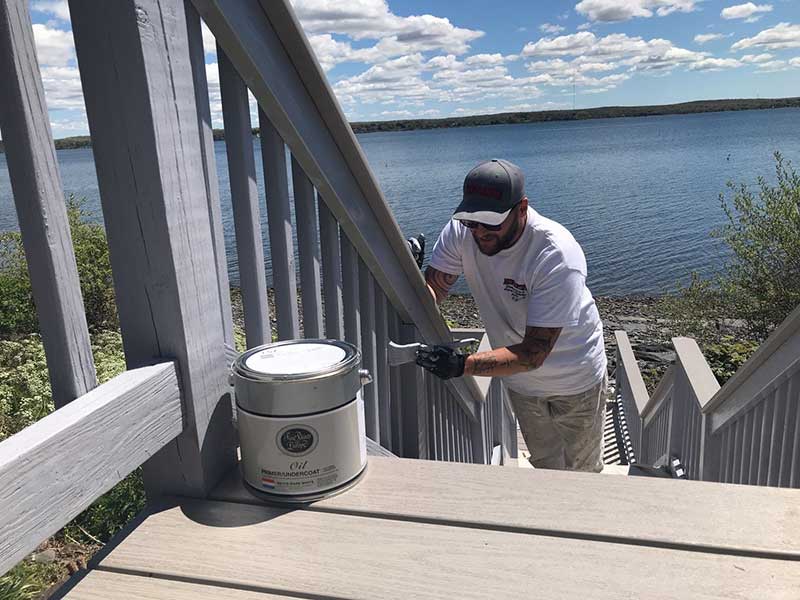
At Bruno Painting, we are 100% committed to doing a proper job and exceeding expectations for best painting results. How do we do that? We follow a step-by-step process cultivated over many years of painting our clients’ homes. Our formula is proprietary, but we’ll share the basic steps for how to properly paint your home’s exterior for the best results.
Select your painting professional. Of course, we’re biased and believe we’re one of the best painters in Rhode Island. (Anyone who takes their work seriously should believe they’re the best!) At Bruno Painting, we not only offer elite painting services, we also have a team of experienced carpenters who can remodel your home, fix any fixable problems with your home, and basically re-work or rebuild your home to your liking. Then our team of experienced, highly trained painters come in and add the coats of paint needed to make your home aesthetically amazing!
What we’ve cultivated at Bruno Painting is a teamwork environment so our carpenters and our painters work seamlessly to do the work the right way, no cutting corners, the best way, the correct way. You’re assured a structurally sound, well-painted home when your project is completed!
Plan which parts of your exterior will be painted and agree on the paint brand and the color palettes that will be used. If there are any structural updates or fixes to be made to your home, we’ll discuss those with you in detail so you can decide all the work that needs to be done prior to paint prep.
Decide on exactly what color and finish goes on which surfaces. Even exterior paints come in different sheens and selecting the sheen for each area to be painted, such as the siding or the trim, is an important step not to be overlooked. To note, exterior paints with a more matted sheen tend to be less durable. Conversely, exterior paints with a more glossy sheen tend to tolerate wear and tear better.
Another consideration when choosing the sheen for your exterior paint is to realize that an exterior paint with a more matted sheen is not as easy to wash. If you anticipate needing to have your home power washed because it is near an ocean or trees, you’ll want to select a finish that is not completely a matte finish.
During your professional painting consultation, paint brand, color, and sheen selection will all be addressed.
Decide on a schedule for the painting your home based on your best estimates and weather forecasts. Another one of our favorite paint brands is Benjamin Moore. According to the experts at Benjamin Moore, “Plan based on weather – rain can easily ruin a fresh coat of paint … so weather Is truly a critical component of a successful exterior paint project.”
Benjamin Moore’s tip for exterior painting in the “right” weather: “Low temperatures and high humidity are a bad combination. Generally speaking, the higher the humidity, the slower a product dries.”
Realize, of course, that the weather can change. But it’s important to be aware of upcoming weather to give your paint project the best chance of success!
Prepare your home for painting. This stage is often referred to as “prep” and many experts prep a home for painting in different order. The important thing to note is that a house exterior is cleaned, dried, caulked, and sanded for optimal paint adherence before a primer or paint brush is used.
Prime the exterior surfaces to be painted, including brick surfaces. Note that some experts recommend caulking after priming. You may even choose to caulk some areas before priming and caulking other spots after priming. The key point is to make the caulked surface as smooth as possible so the paint covering it will look as smooth.
Have your carefully chosen paint color and sheen applied to your home’s exterior. This is the most rewarding step, of course, especially if you’re changing to a new color that you’re excited to see on your home.
While painting professionals may differ in their process of painting your home, the best exterior painting results will be achieved when the approach is systematic and well-planned. It is a big endeavor to have your home’s exterior painted. There’s a lot that goes into properly painting your home’s exterior.
At Bruno Painting, we’re focused on doing all the right things and on Upholding and Caring for Surfaces and Relationships since 2004. We invite you to become a completely happy Bruno Painting client. Reach out today for your complimentary remodeling and painting estimate.
Summer is here on the classic coast and with it comes enjoying the outdoor areas of your home. The summer season is also the best time to make some exterior updates to your home.
Exterior updates are a great way to boost your curb appeal, protect your home and add value to your investment. Regularly inspecting and updating your home's exterior will help to identify any potential problems.
Whether you're looking to add some curb appeal or just want to make your home more enjoyable, there are easy ways to make home exterior updates for summer. Here are some great ideas for giving your home a summer makeover.
Late nights around a fire pit or beautiful patio are some of the best ways to entertain and spend time with your family. Updating your outdoor spaces can extend your living area to your backyard and beyond. Try incorporating some of these into your next home improvement project.
Painting is one of the most effective ways to transform your home. Paint is also an incredible agent for protecting your surfaces against weather and decay. Two of the most popular updates homeowners make to their exteriors are siding and front door projects.
Installing new windows is a great way to update your home's exterior and improve its energy efficiency. If your windows are old or drafty, they could be costing you money on your energy bills.
New windows will keep your home better insulated and reduce your energy costs. You can also find windows that come with UV protection to help keep your furniture and carpets from fading.
Exterior updates are also a great way to improve your home's energy efficiency. Not only will regular exterior updates save you money in the long run, but they'll also help make your home more comfortable and efficient.
Updating and maintaining your exterior in summer protects your home, improves your curb appeal, and adds value to your investment. At Bruno Painting, we handle any necessary carpentry work, do the key prep work to ensure longevity in your project, and use high-quality paint. Our expert teams of painters and carpenters are ready to make your home exterior updates seamless. Contact us for your next exterior painting or carpentry project!