At Bruno Painting and Carpentry, we’re proud to have expanded our services beyond painting to handle all your carpentry. We offer a wide variety of projects, that vary in size and scope. We can easily tackle some projects in just a day with our Carpenter or Handyman for a Day service, while others will take longer if it is a larger project. Here are the most popular exterior carpentry projects that can beautify your home and how long you can expect them to take.
Weather in Rhode Island can be rough, especially in the Winter and Spring. Weather patterns such as snowstorms, heavy rains, and wind can all do damage to your deck, roof, siding, and other parts of your home leaving you to repair them. Minor repair work might not be overly intricate or complicated but repairing damage sooner rather than later is essential to the longevity of your home.
The trim on your home’s exterior is probably not something you think about all the time, but it can add a lot of dimension to the overall look of your house. Making sure the quality of the trim is high, and any needed repairs are handled regularly is essential to maintaining a beautiful exterior.
Small repairs and trim work are simpler than the projects we have listed below. They can be handled in a shorter amount of time than other exterior projects. Our Carpenter or Handyman for a Day service is perfect for anyone who needs these smaller updates or work done for their home.
Wood rot can greatly affect your home's curb appeal and its structural integrity. Not only is it an eyesore, but if wood rot is left untreated, it can spread and cause even more damage to your home. Before you paint the exterior of your home, the rotted pieces of wood will need to be repaired or, in some cases, replaced.
How do you know if you have wood rot? Look for pieces of wood that seem spongy or soft. They are at the beginning or intermediate stages of rot. Other signs of wood rot include paint chipping, paint peeling, wood splintering, or discoloration. If you think your home may have wood rot, contact a professional as soon as you can to remedy these areas to protect your home from further damage.
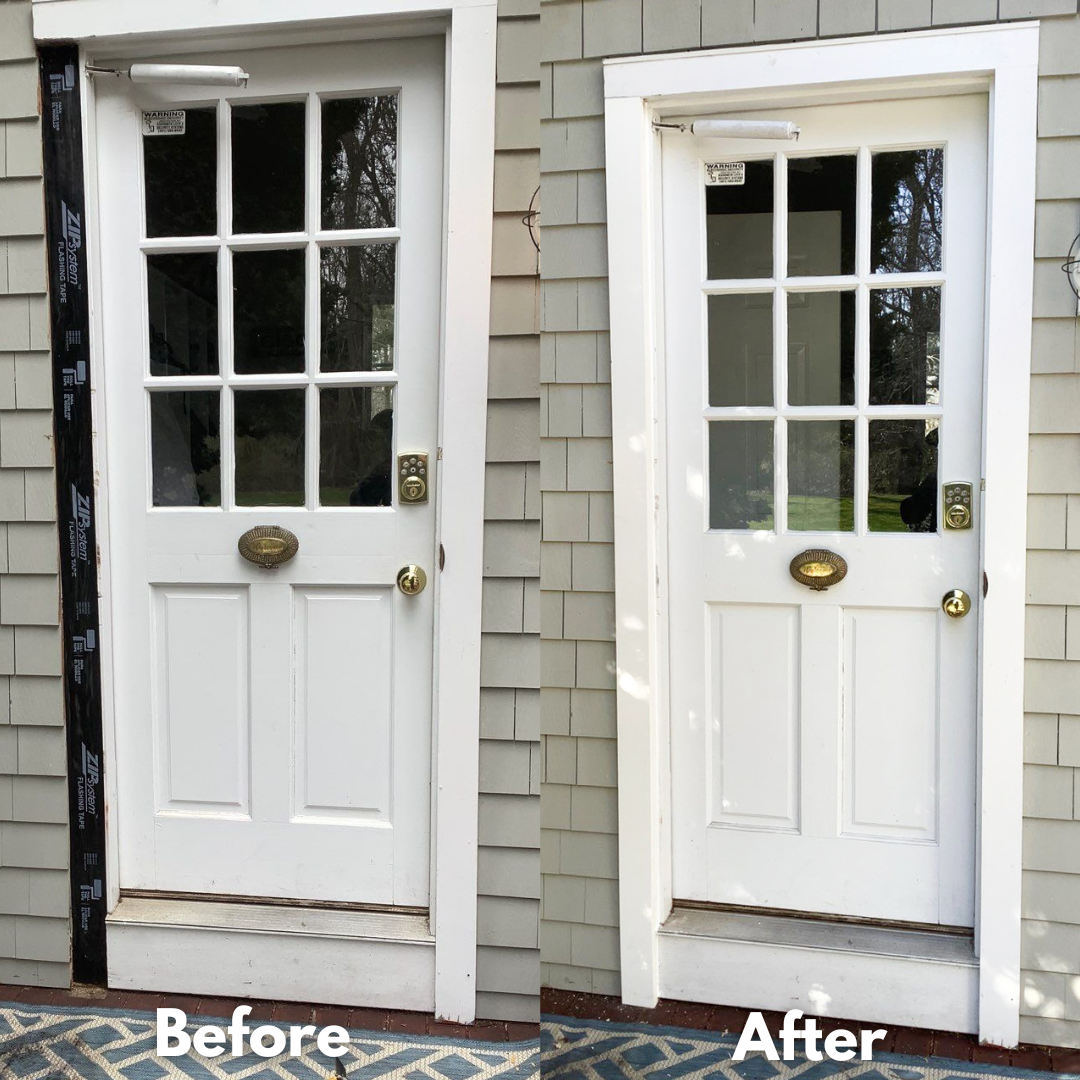
You may not commonly think about your windows and exterior doors needing to be replaced, but there will come a time when they do! Usually, your windows need to be replaced between 15-30 years and your doors should be refinished after 5-10 years. If your home is not brand new and you’re not the first owner, these might be aspects you need to consider since these elements might need maintenance or replacement.
Another reason to replace your windows or doors is if you want to upgrade them. Having double-paned windows is important for protection and keeping your home insulated. Additionally, you may want a heavier exterior door front or back door for protection or a new door for a different look.

If you're looking for a way to add extra living space to your home, a great option is a new deck or patio. When choosing materials for your deck or patio, choose something that compliments the style of your home and will hold up over time. You can also add some accent colors to add personality!
Siding is one of the most important layers of protection for your home. Reshingling or replacing siding that has signs of wear and tear can prevent larger issues, such as wood rot or mold. Preventing these common issues is important and finding a contractor who can replace your siding, as well as make any further adjustments to your exterior, is an essential step to prevent any future damage.
If you are interested in changing the look of your home, try one of the above exterior carpentry projects! We cover everything from basic structural repairs to intricate finish work. Our talented carpenters receive ongoing training and bring care and expertise to every project. They will listen to your needs and thoroughly inspect your current carpentry work so that when the job looks as good as new.
To learn more about our talented carpenters and how our carpentry services will work for your Rhode Island home, visit our project process page. If your home’s woodwork needs some vital repairs or if you’re beginning a larger home improvement journey that requires carpentry, start by scheduling an estimate!
There are so many aspects of home maintenance to keep track of when you are a homeowner. Exterior home maintenance can seem obvious: cleaning out gutters, power washing siding, or replacing roofing. Interior maintenance, we often think of just needing a fresh coat of paint or maybe fixing a leaky pipe now and then. However, there are other common home interior issues worth keeping an eye out for as a homeowner! Here are a few of the most common interior issues we are asked to fix and how to spot them in your own home.
One of the most common issues we see in Rhode Island homes is wood rot. Wood rot is decay caused by fungal growth in damp wood. When timber becomes damp enough to have 20% or more moisture content and isn't able to dry out quickly or is repeatedly dampened, it creates the ideal conditions for wood-eating fungi.
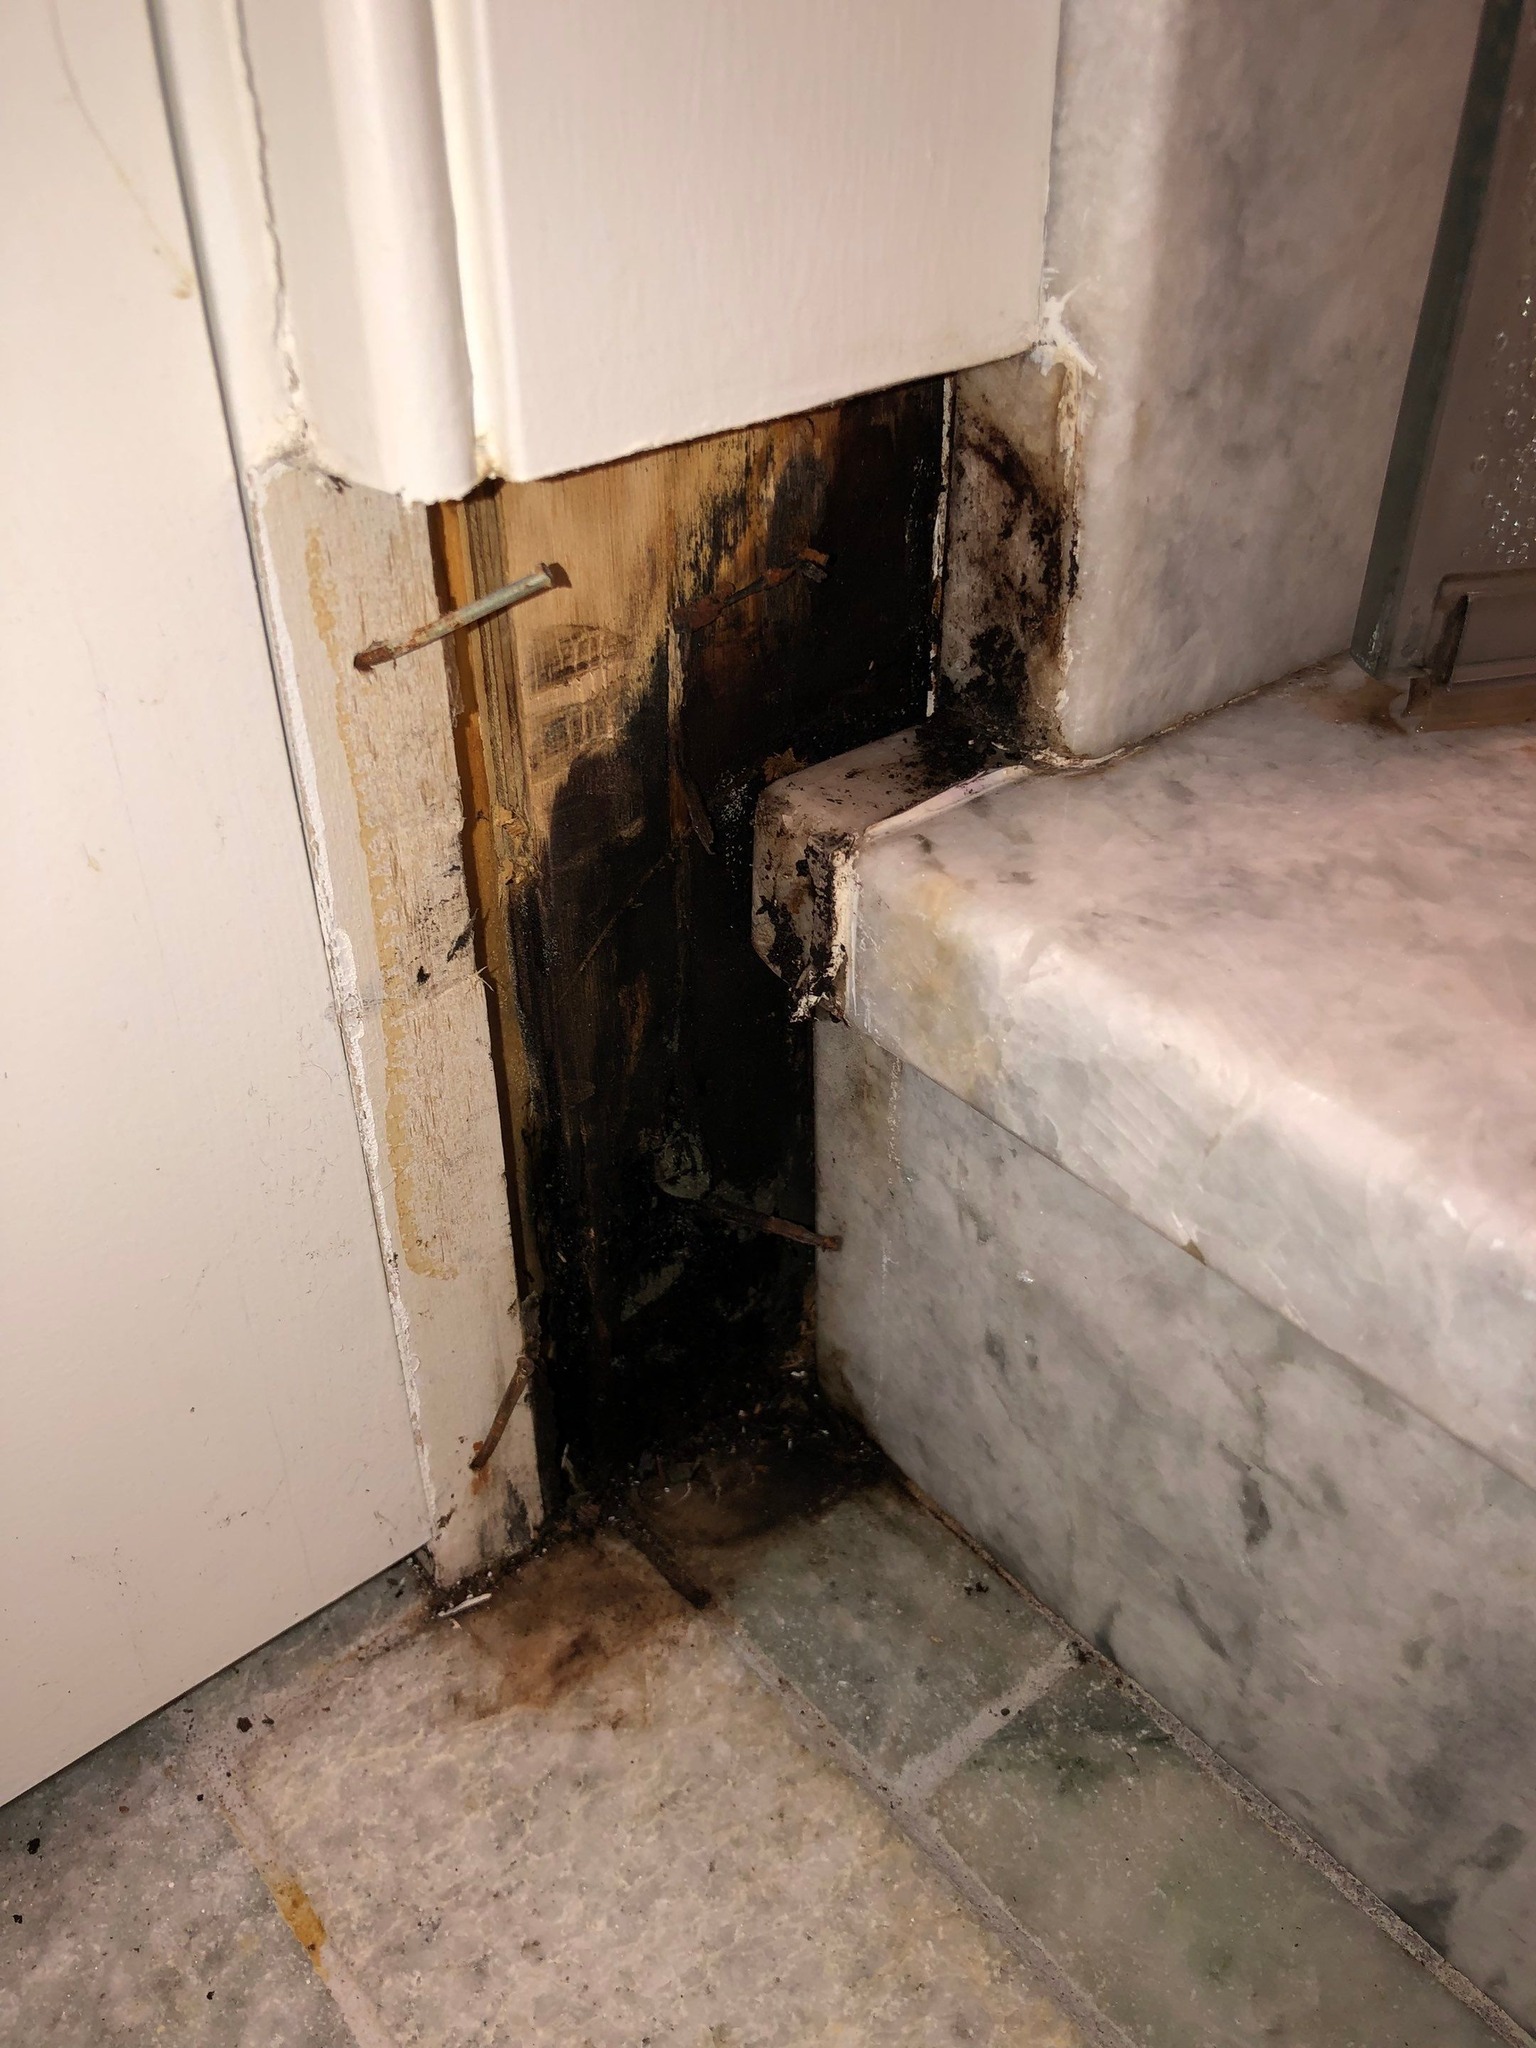
Wood rot is most commonly found in bathrooms, kitchens, and attics or basements. Anywhere moisture levels are higher in your home is at higher risk for wood rot.
To see if you have wood rot, take a good look at the visible wood in your home. Look for:
If you’re still unsure, the easiest way to test for wood rot is to take a screwdriver and press it against an area you are testing. If it sinks in easily, you likely have wood rot.
How do you solve a problem of wood rot? Contact a professional carpenter or contractor and consult them! Our common course for repair is either removing the rotted wood entirely and replacing it with new lumber or replacing sections that have rotted and filling gaps with epoxy or a similar material.
Old wood can be an eye-sore, as well as dangerous if left alone. Some wood can be noticeably outdated and make your home feel old. On the other hand, old wood may not be as visually noticeable, but can be as structurally insecure.
Old wood can be a structural risk depending on the wood piece’s location and purpose. While wood can last a very long time, sometimes up to 150 years, older homes (like the ones we have in the Northeast) can have wood items that have come close to the end of their sturdiness.
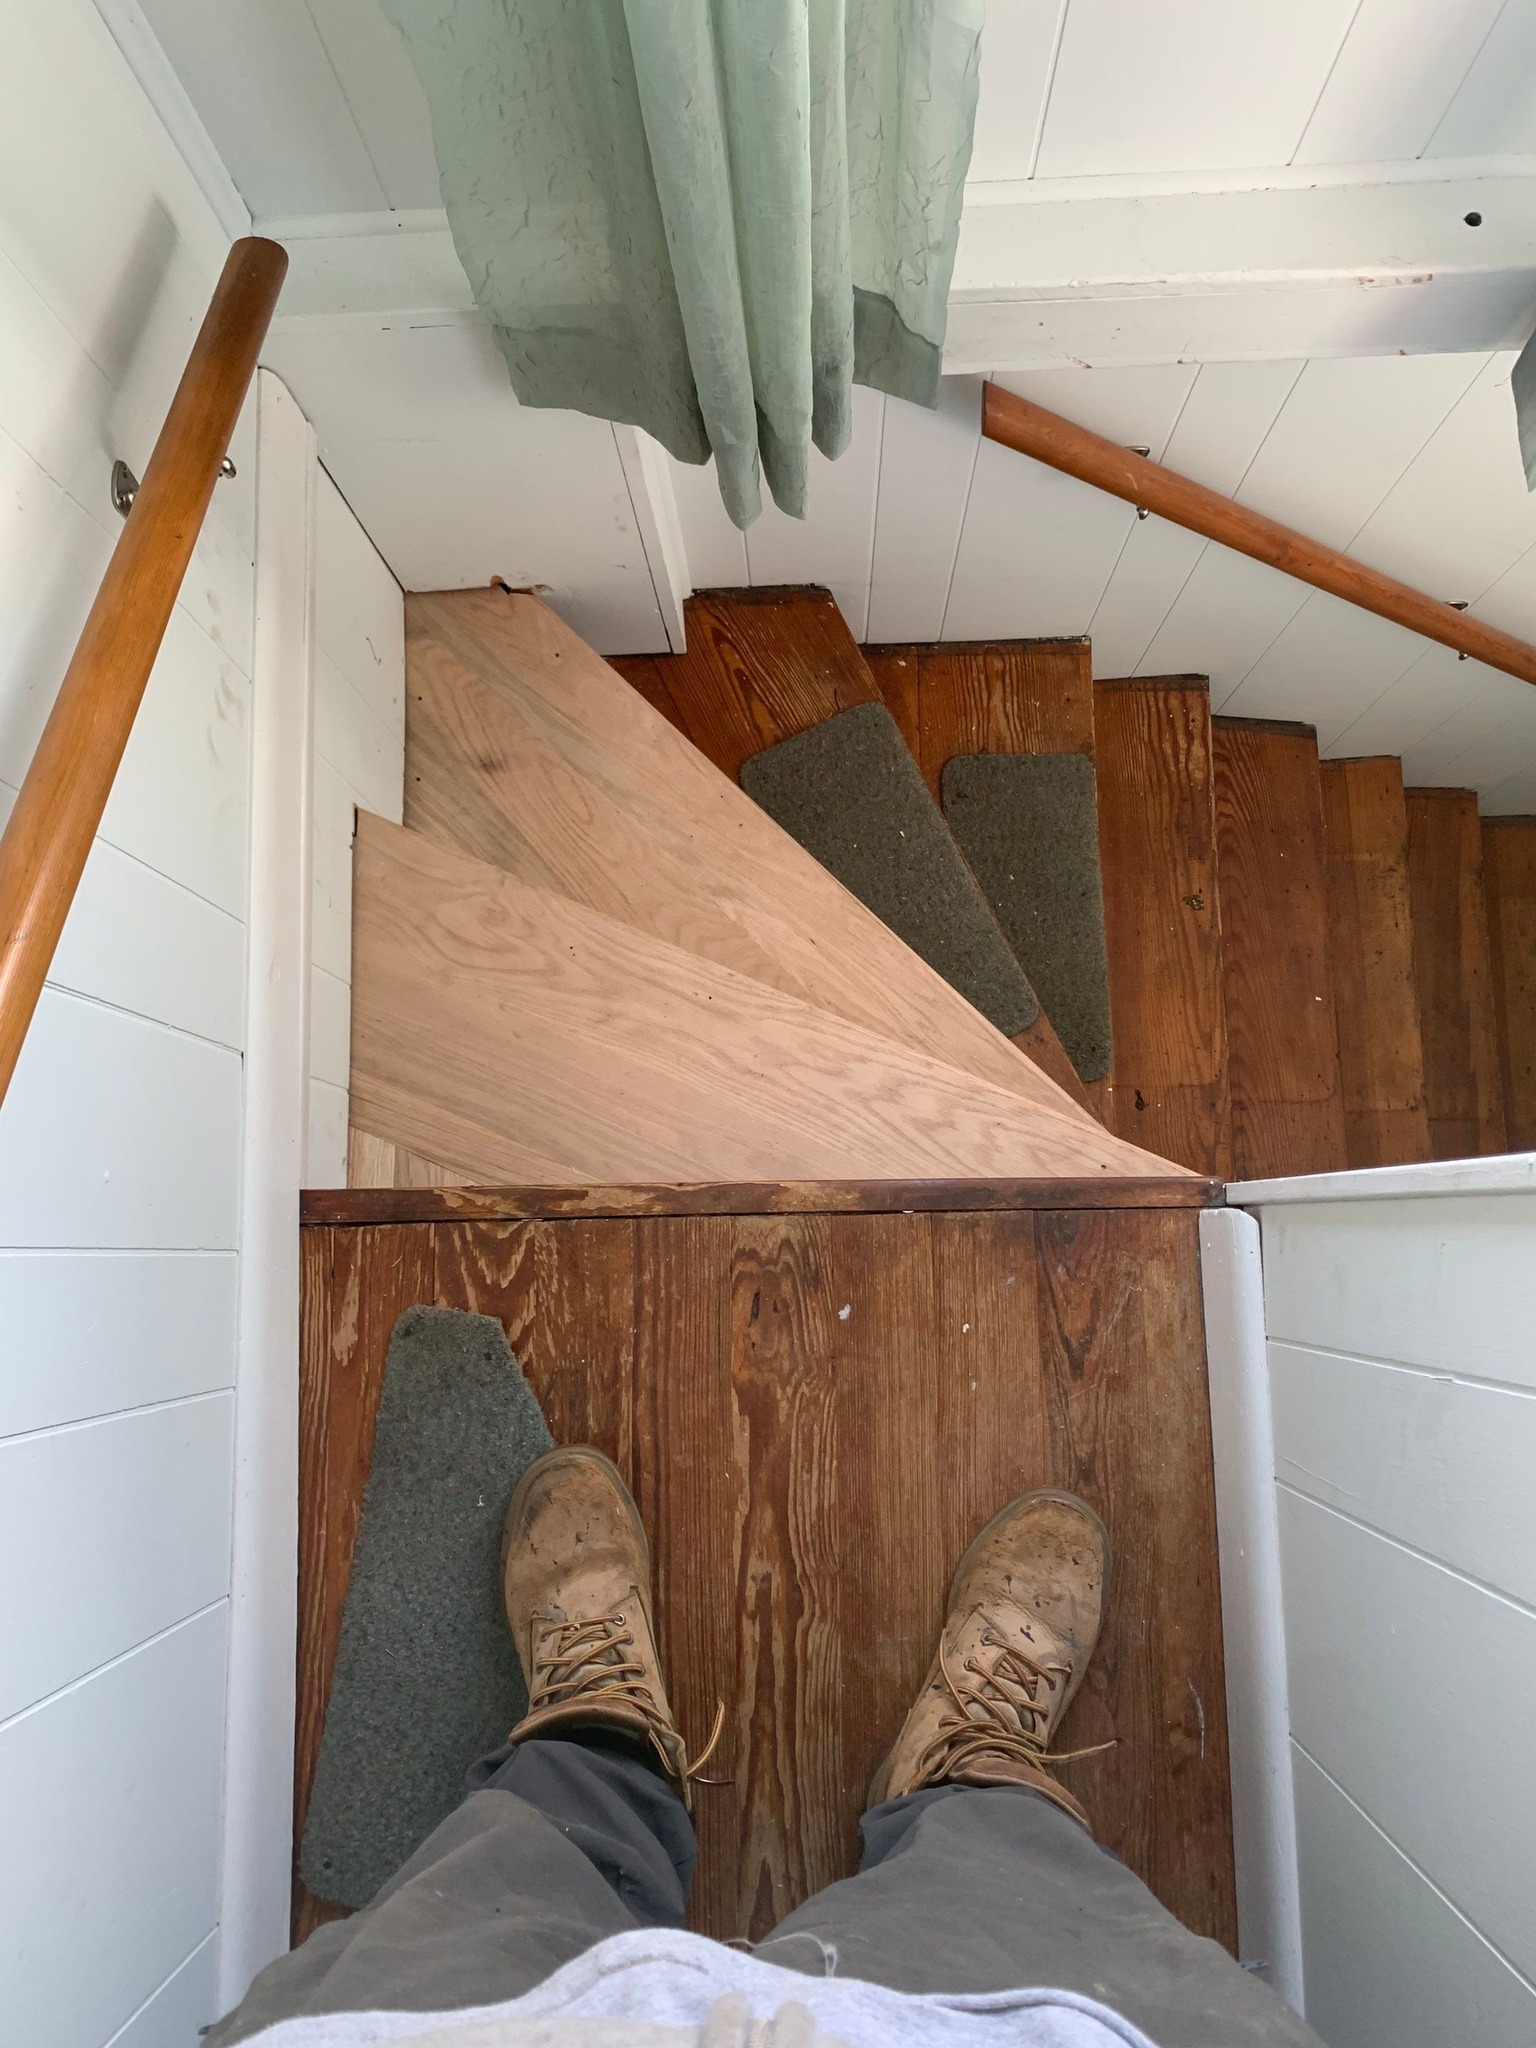
Places to look for older wood are stairs, overhead beams, and other wood surfaces that are not as visible, like cabinet interiors. If wood is splitting or cracked, that can be a tell-tale sign of age. Creaky stairs can be sign of structural issues underneath and might be something to investigate further if you begin to hear that noise.
Another issue we see in homes are plaster cracks. Plaster cracks are an incredibly normal occurrence in homes. Plaster walls respond to inevitable foundation shifts and climate changes, and they can begin to crack. Everyday life, with its bumps and bangs, also takes its toll on plaster walls.
Certain areas, such as above and beside doorways and windows, are classic areas where cracking occurs. Nearly all homes with plaster walls will eventually develop window and door cracks. Repairing these cracks is essential, as leaving these areas unfixed can result in severe structural issues. An early sign can be that a door becomes unable to close because of the shift in the doorframe. Though the repair is a relatively simple and common process, you’ll want a professional to handle it since any mistake can give way to further damage.
If you have awkward spaces in your home, such as gaps underneath stairs, carpentry projects can fill those spaces! We have done projects that utilize that free space with carpentry work, including under-the-stairs cabinets, breakfast nooks, mudroom built-ins, and kitchen islands. If spaces in your home feel like they are lacking or empty, an addition of any of the above can make the area feel complete.
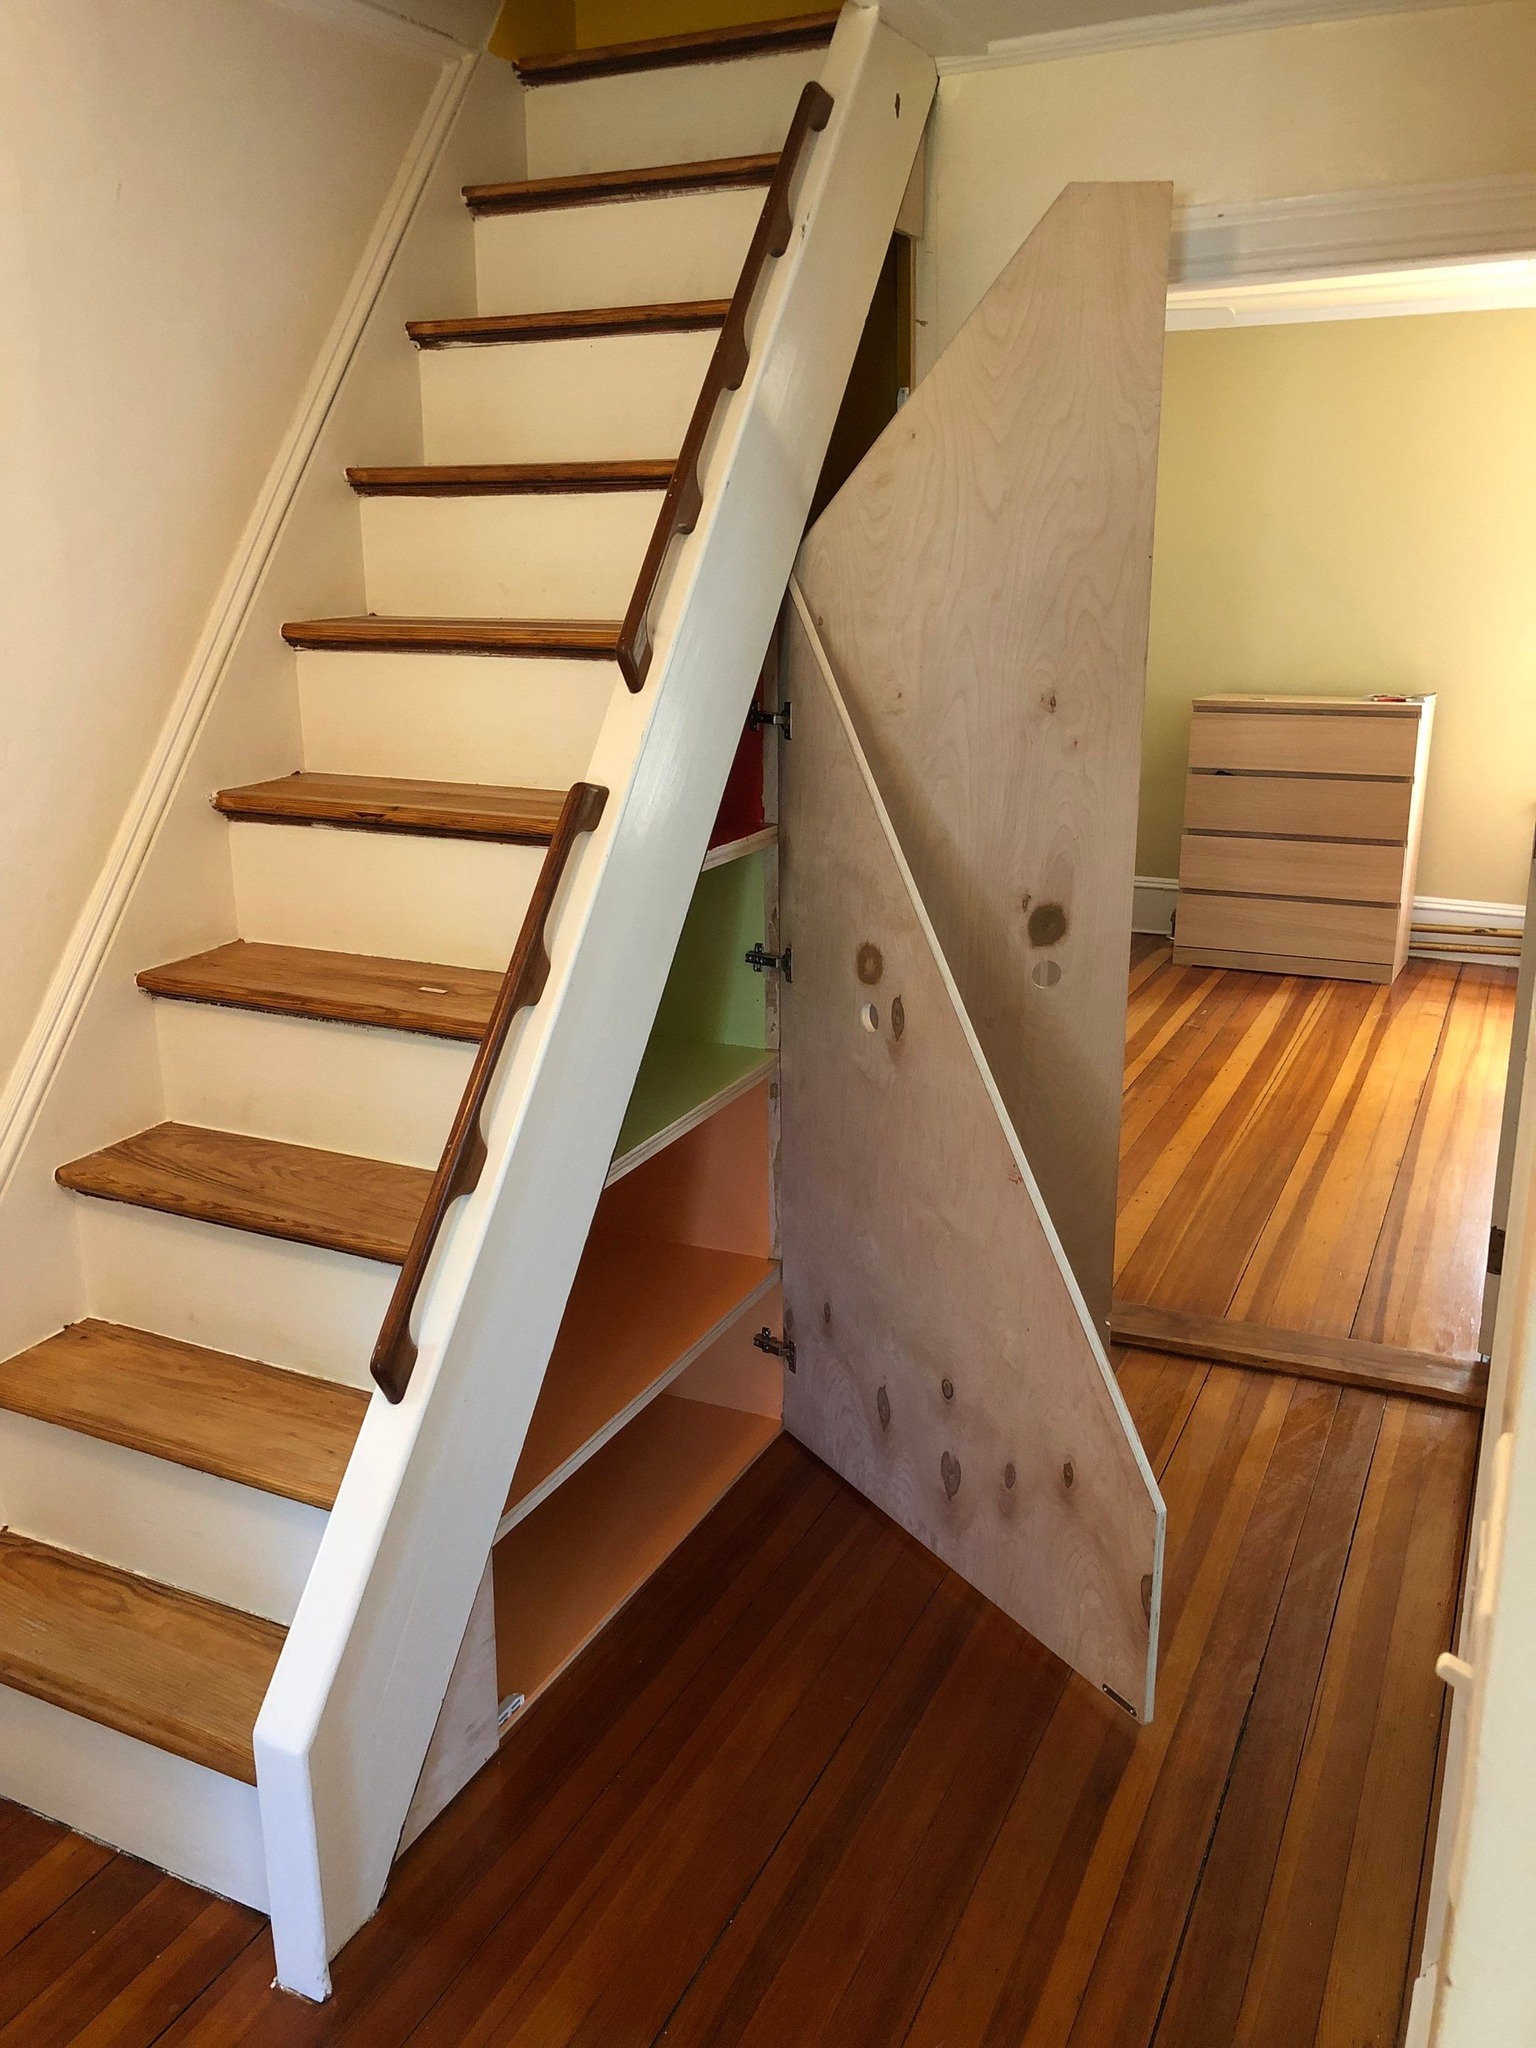
If you notice that some areas in your home feel off or empty, but you don’t have any idea how to fix it, consult with a professional contractor! They can help you come up with some creative ideas to utilize those spaces that need a little something more.
Your home is so important since it acts as the barrier between you and the outdoors. Our goal is to help you maintain it and keep it in top shape. Tackling any of these issues as they appear in your house will increase the longevity of the home, as well as make sure everything is structurally sound. If you think that your home might have one (or more) of these issues, contact us! As professional painters and carpenters in Rhode Island, we are here to help with any common (or uncommon) interior home issues you may have.
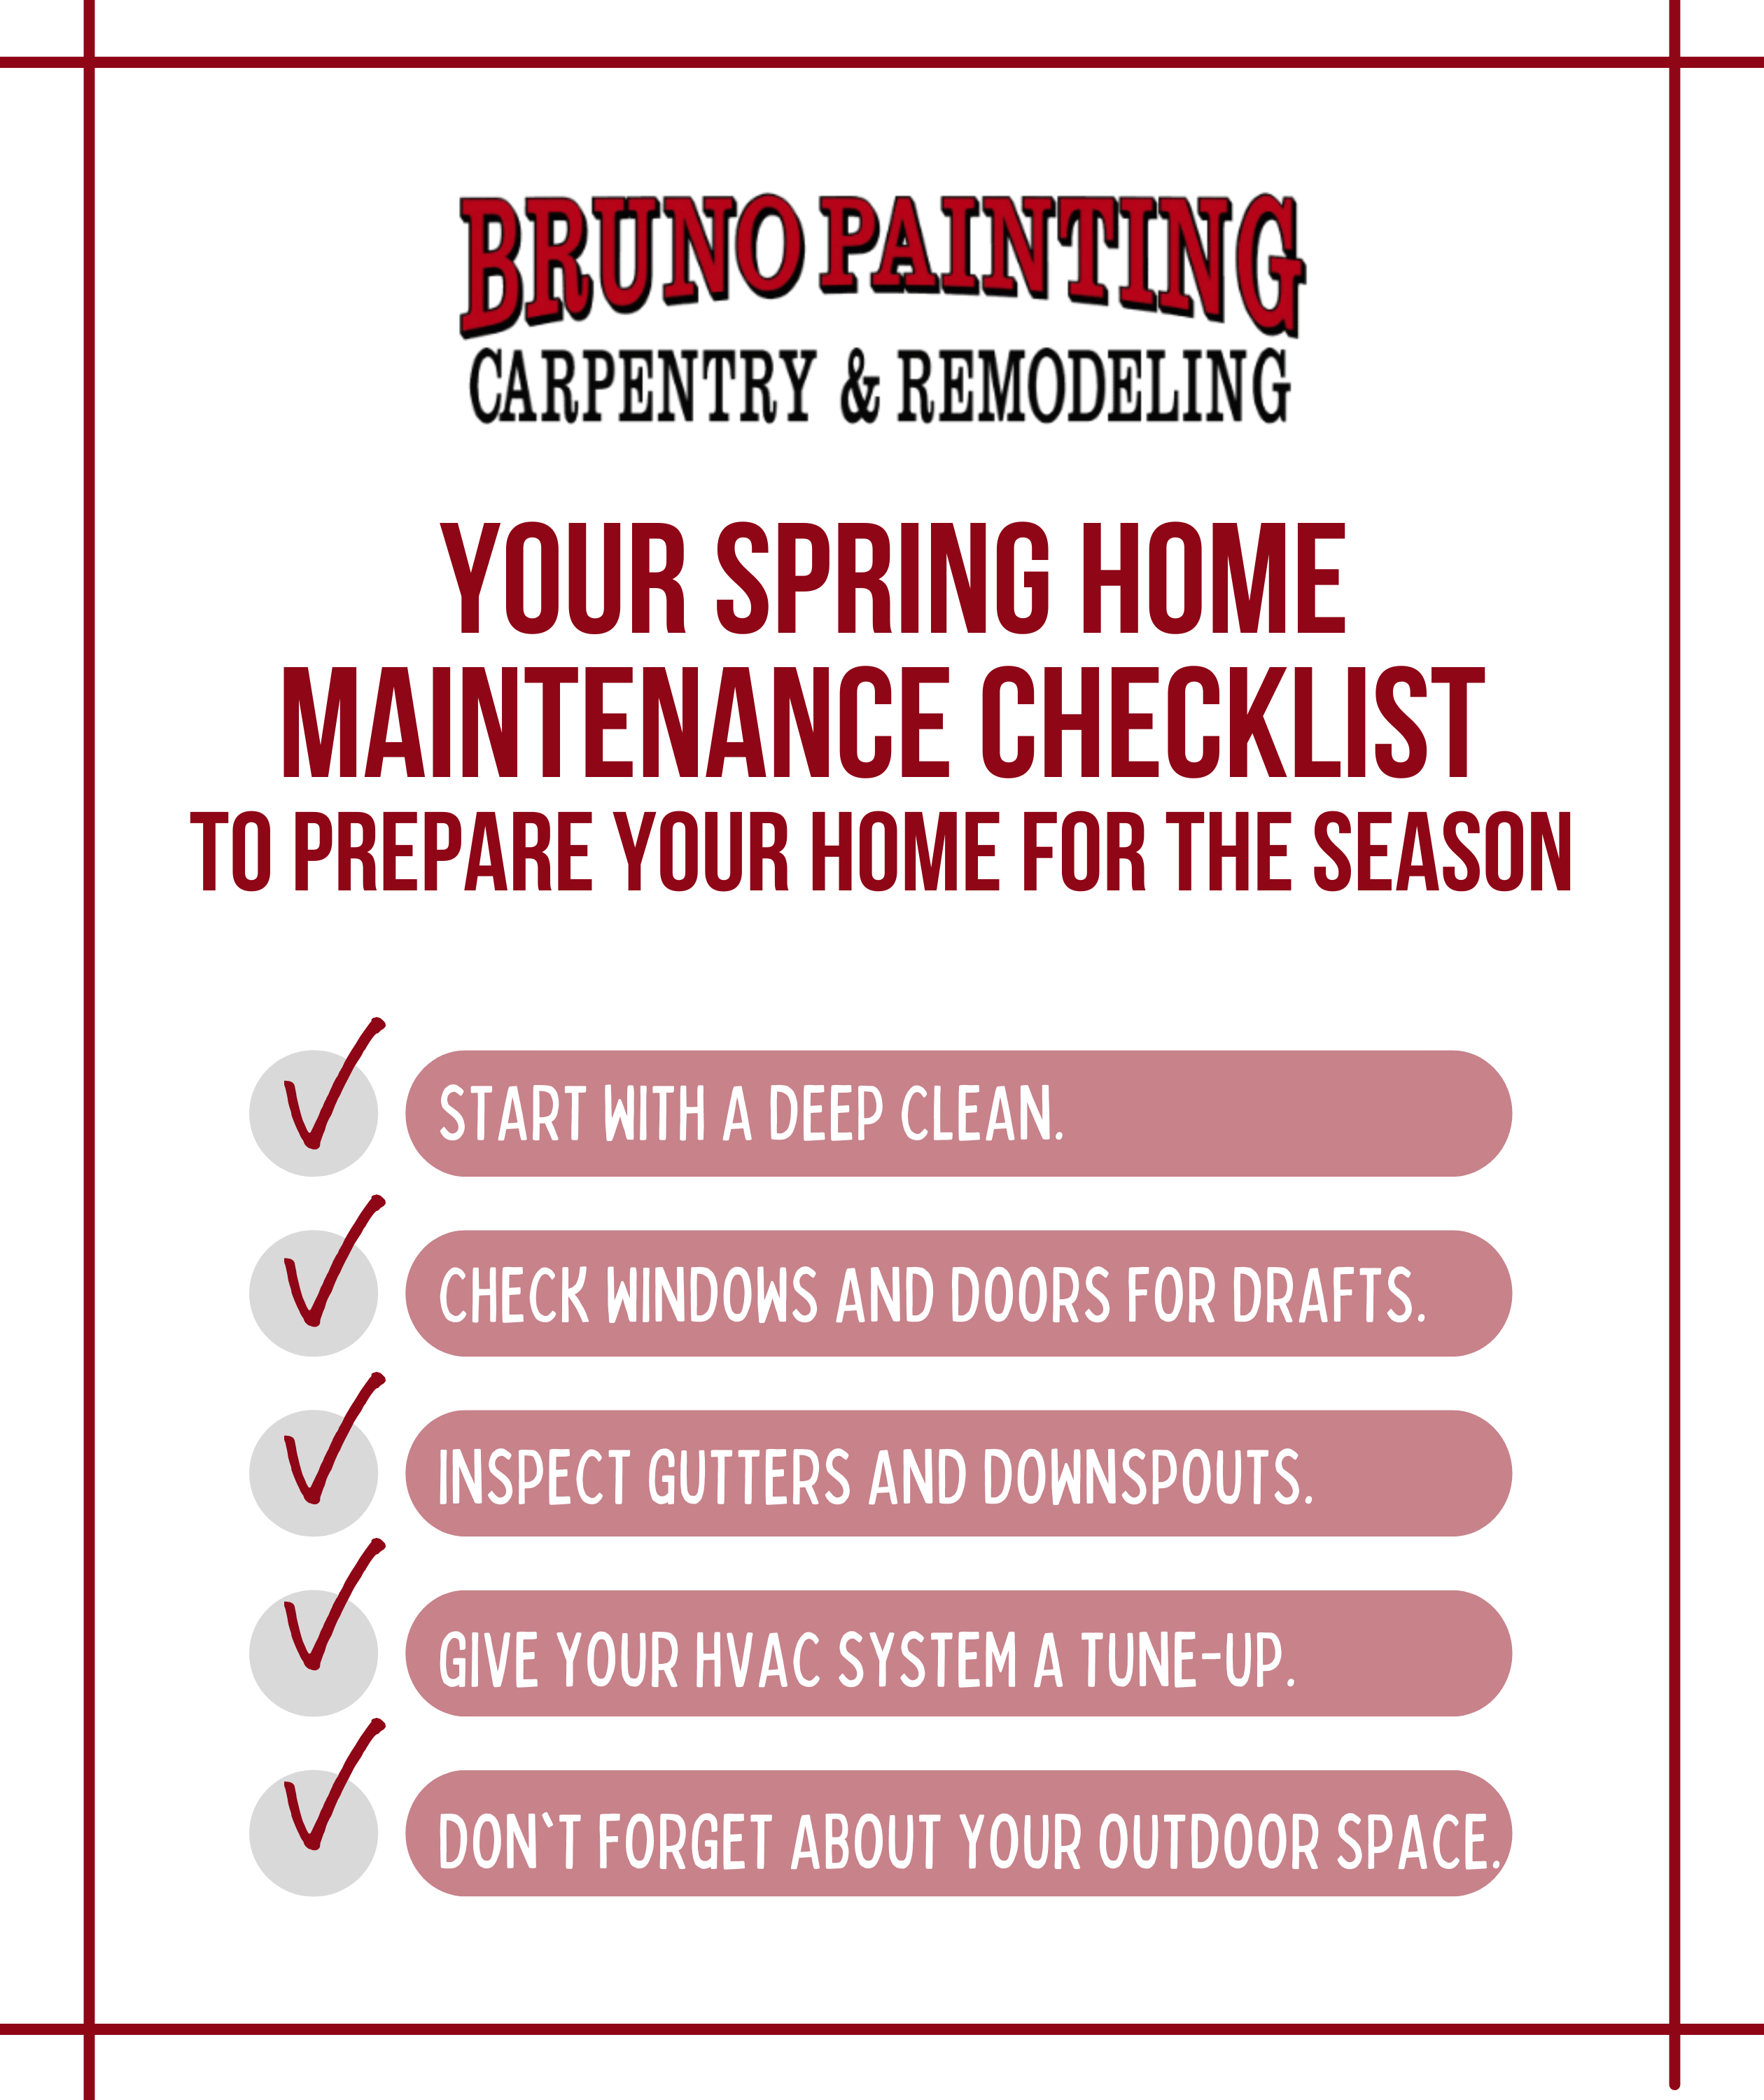
Spring is the perfect time to give your home a good deep clean and to do some maintenance tasks that you may have been putting off. Now that spring is in full swing, it's time to get your Rhode Island home in order for the warmer weather ahead on the classic coast. Check out our five spring home maintenance tips to get your house ready for the season.
After a long winter, your home may need some TLC both inside and out. Our experts at Bruno Painting have helped many homeowners in Rhode Island make improvements to their homes and have compiled the most common spring home maintenance tips to focus on this time of year.
Spring is the perfect time to do a deep clean of your entire house. This means getting rid of all the dirt, dust, and grime that has built up over the winter months. Don't forget to clean those hard-to-reach places, like ceiling fans, high shelves, and under furniture.
Window washing and carpet cleaning are great ways to brighten up your home. Removing dander and pollen buildup in these areas helps clean the air in and around your home as well as reduce allergic reactions that many people experience throughout the season.
Letting in the fresh air and natural light with clean windows will do wonders for your home. But too much air can make your home feel drafty and uncomfortable. Cold air can seep into your home through cracks and gaps in doors and windows. If you noticed these types of drafts near windows and doors over the winter months, this will need to be a top priority on your spring to-do list.
Drafty windows and doors not only make your home less comfortable, but they can also drive up your energy bills. Unwanted openings in these areas can cause moisture to accumulate, which can lead to costly damage to your home. To help prevent drafts, check all your windows and doors for any gaps or cracks. Re-caulk these areas to keep moisture out and help your home stay clean and fresh.

Clogged gutters can lead to water damage on your roof, ceilings, and even walls. During the winter months, ice dams can form which cause damage to your gutters and roof. So, it's important to inspect and clean your gutters and downspouts both in the fall and again in the spring to keep your gutters clear.
To clean your gutters, use a ladder to remove any heavy debris by hand and rinse any remaining dirt with your garden hose. If you notice any damage to your gutters, be sure to get them repaired or replaced as soon as possible.
Your heating and cooling systems work hard all year long to keep your home comfortable. So, it's important to give it a tune-up before the summer heat sets in. This ensures that your system is running efficiently and can help prevent costly repairs down the road.
In addition to scheduling an HVAC tune-up, replace the air filters every three months or so to keep your system working properly and maintain the air quality in your home for everyday living.

Now that the cold weather is mostly behind us, your outdoor space should be the focus of your attention.
Now is the time to start prepping your yard and garden for the warmer months ahead. This includes tasks like mowing the lawn, trimming bushes and trees, and planting flowers.
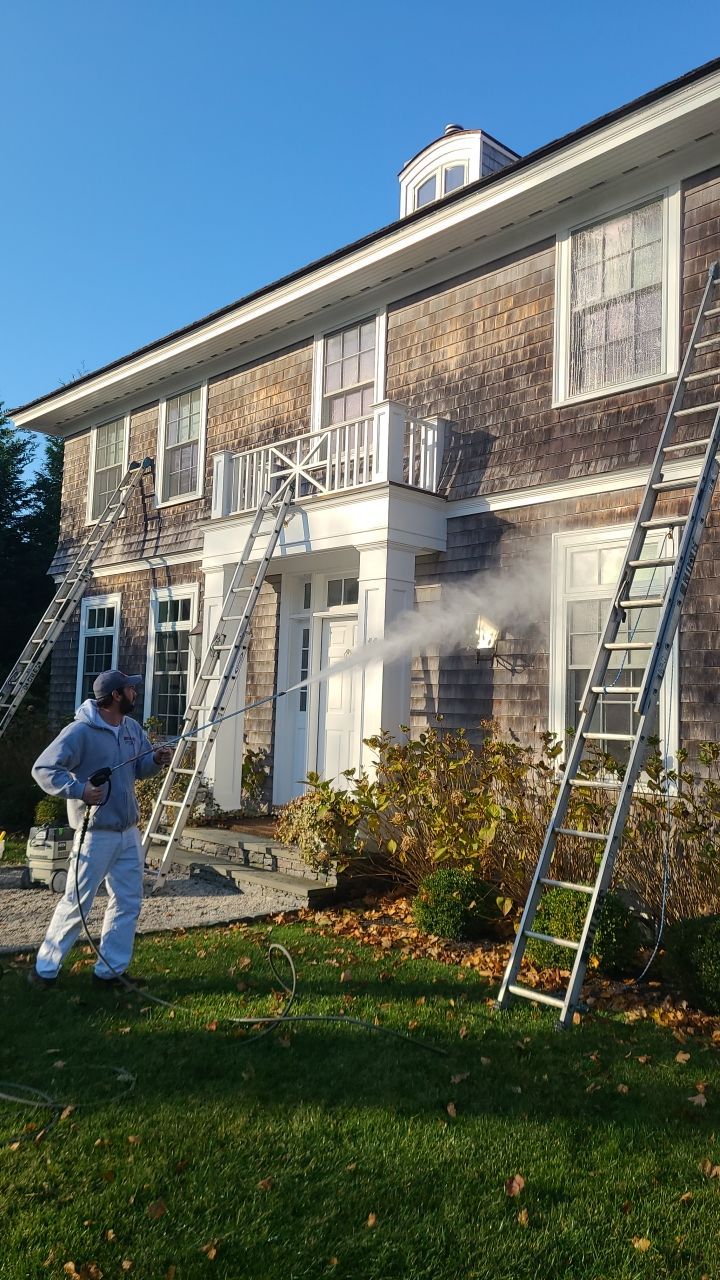
Once your greenery is ready for the sunshine, cleaning your home’s exterior is the perfect way to boost your curb appeal. This includes power washing your deck or patio, your exterior siding and gutters, and touching up your siding and trim with a fresh coat of paint. By taking care of these areas now, you can enjoy your outdoor space all summer long.
Following these simple tips can get your home ready for spring and enjoy the season worry-free. Use this checklist as a guide for things that you should do around your home this spring.
Many homeowners in Rhode Island have spring cleaning projects well underway. If you are looking to make any home improvement updates this season or need a helping hand with making your home look its best, reach out to our team of professional carpenters and painters.
Our team has been upholding and caring for surfaces and relationships since 2004. This spring, we’re happy to help boost your curb appeal and keep your home in top shape!
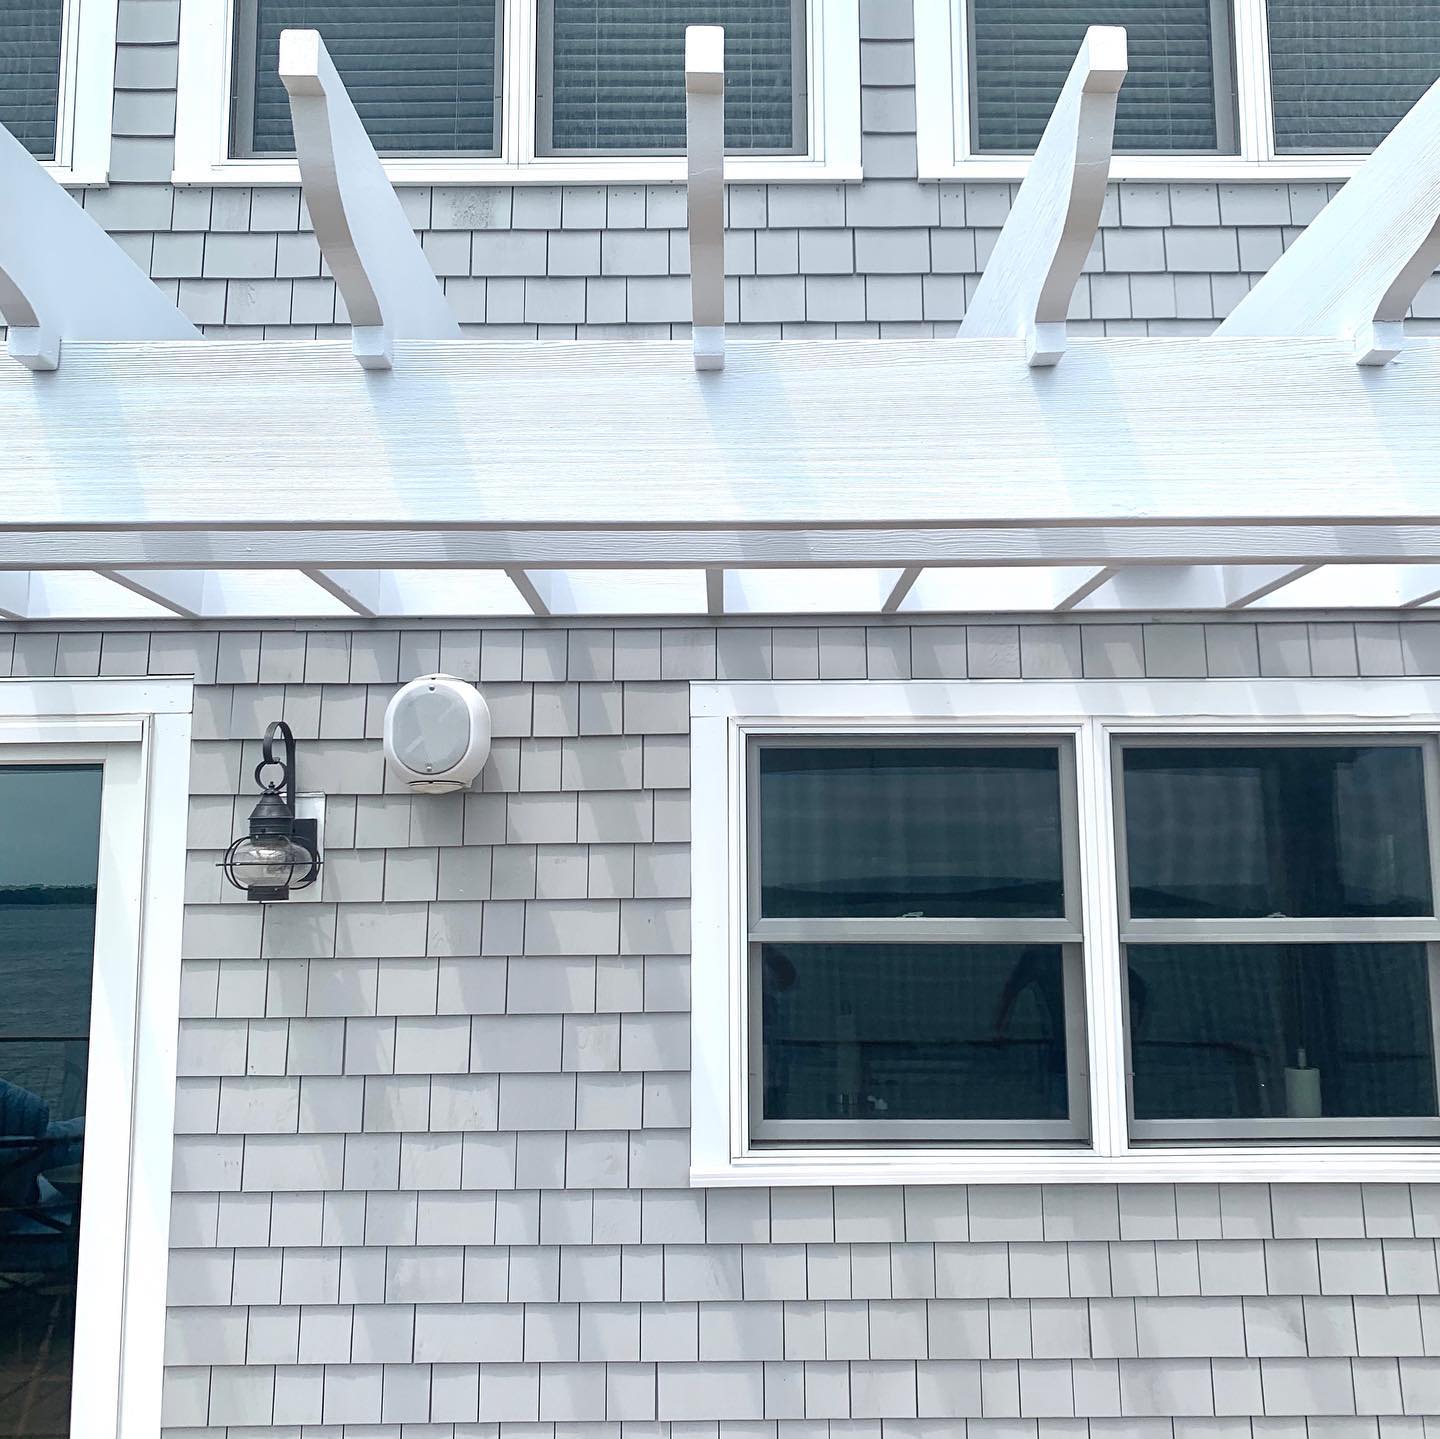
Cedar shake siding is a popular type of siding for homes in Rhode Island, especially on homes that are 10 years old or older. Homeowners enjoy the iconic look as it creates a unique finish and can add a rustic yet warm look to your home’s exterior.
If you have cedar siding, it’s important to take care of it properly to ensure that it looks good and lasts for many years. From installation through its lifetime, caring for your cedar shakes will help you protect your investment. Here are a few tips on how to care for your cedar shingle siding.

Cedar shakes are a specific type of siding material that is found on the classic coast since colonial times. It is typically made of cedarwood, though other types of wood may be blended in, and comes in a variety of colors and sizes.
Finish options for cedar shakes include stain and sealant or paint to create an even more unique look. When you properly care for your shake siding, it can last anywhere from 10 to 15 years or more. If you take excellent care of your cedar siding, it can last upwards of 20 years or more before needing to be replaced.
Shingle siding is not immune to wear and tear and there are a few common issues that you may experience over time. Due to the nature of the natural material cedar shakes are made from, they are prone to require more maintenance than brick or artificial siding options, such as vinyl.
As with any natural material, exposure to moisture will mean these surfaces are prone to moss, algae, and even mold growth. Cedarwood is a durable siding but can be a target of wood-boring insects. Traces of these insects such as termites, ants, and beetles seen around your home may be an indication that these insects are enjoying your siding as much as you are.
Other signs of wear and tear can be brought on by heat and dry conditions. Keep a watchful eye for cracked or warping shakes, especially on the sides of your home that are in the direct sunlight. It’s important to be aware of these issues and address them as soon as possible to prevent further damage.
To keep your shingle siding looking its best, it’s important to clean it and care for it regularly. This includes both cleaning and maintenance tasks, such as checking for damage and repairing any issues that may arise.
One of the most important things you can do to take care of your shingle siding is to clean it regularly. Washing your siding with a garden hose and dish soap is one way to maintain your cedar siding. This will help remove any dirt or debris that may have built up, and it will also help keep the siding looking its best.
A second way to clean your cedar shingles is to use oxygen bleach, which is nontoxic to trees, shrubs, and flowers. As a third option, you can power wash your cedar siding or hire a professional contractor to power wash it. To avoid damaging the cedar shingles, be sure the power washing equipment is used on its most gentle, lowest intensity settings and the appropriate mild detergents are used.
Keeping your cedar shakes free from moisture accumulating on them is one of the best ways to prevent damage. To prevent moisture from accumulating on your home’s cedar siding, you can trim nearby trees and shrubs so there is enough distance for airflow. If there are any loose boards that may allow water to penetrate the siding, they should be nailed down or replaced with newly treated shakes.
Treatments to protect from the elements, moisture, insects, and heat are available and will need to be applied every few years for effective protection. Additional measures such as painting can be an effective way to extend the life of your cedar shakes, but this can only be done when your siding is completely dry.
Touchups and repairs for shingle siding can vary in price depending on the size and scope of the job. However, most repairs are relatively affordable, and it’s always better to address an issue sooner rather than later.
While some minor maintenance or repairs can be done on your own, any major repairs or updates should be done by your local licensed carpentry professional. If you need major updates like painting your cedar shakes or have found damage that has led to larger issues like wood rot, calling your preferred contractor is the best next step so you can avoid costly problems with your home.
Cedar shake siding care and maintenance are important for your home’s integrity to ensure that it looks its absolute best and lasts for many years. By following these tips, you can keep your shingle siding looking great and free from damaging elements.
Have you noticed your cedar shake siding not looking its best and in need of repair? It may be time to either clean or instead, completely update your home’s siding. Bruno Painting is here to help! With our team of expert painters and our carpentry division, we provide an all-in-one service to our clients. Get your complimentary exterior home update consultation and estimate from the experts at Bruno Painting today!
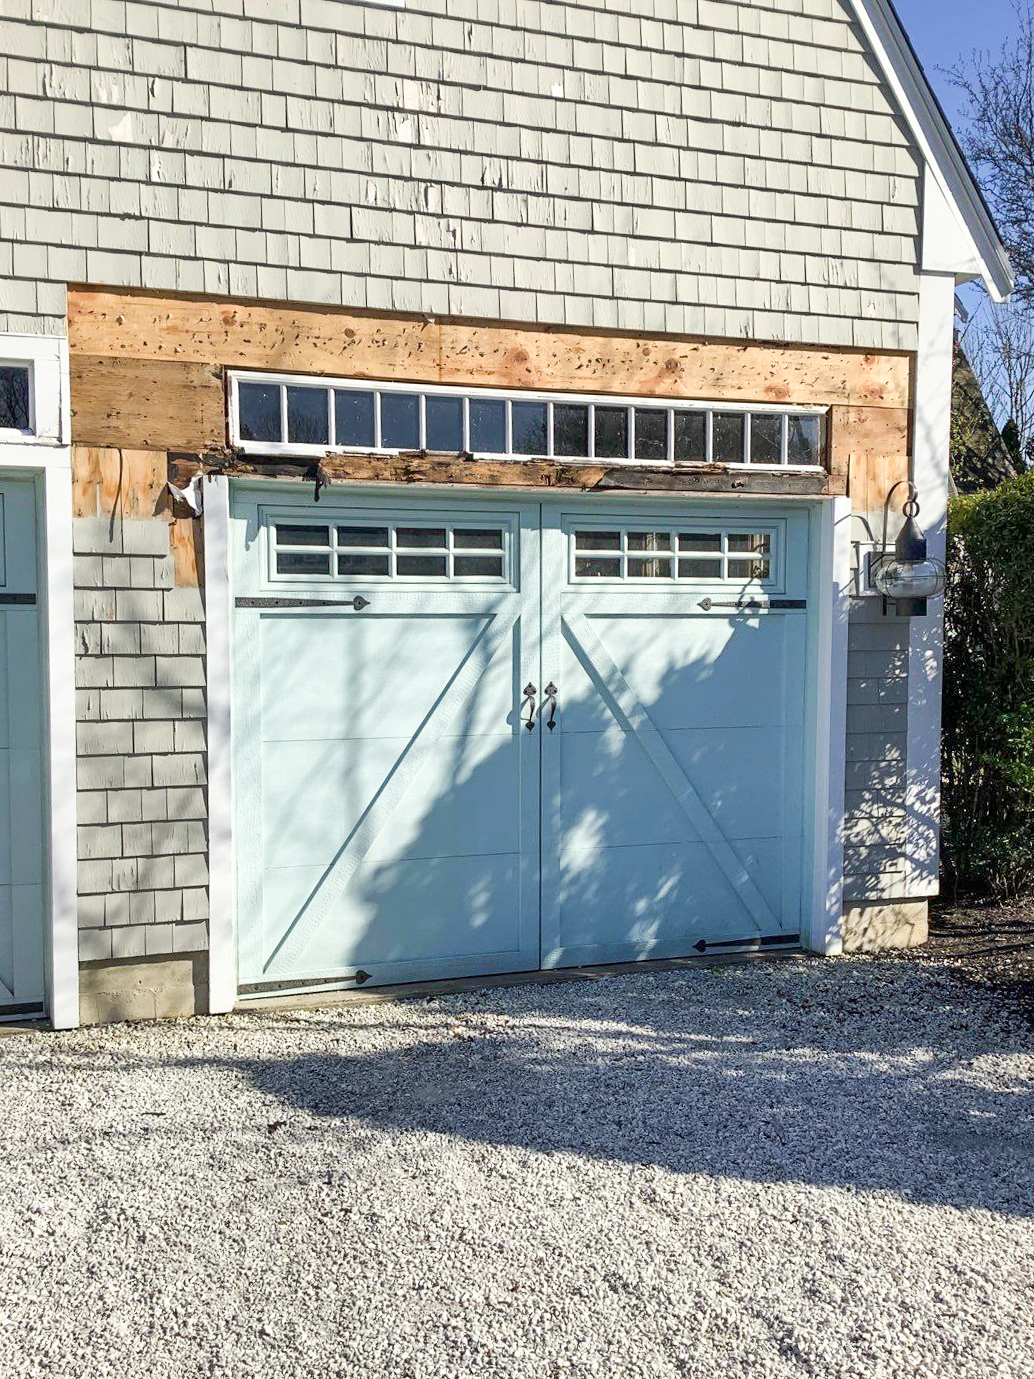
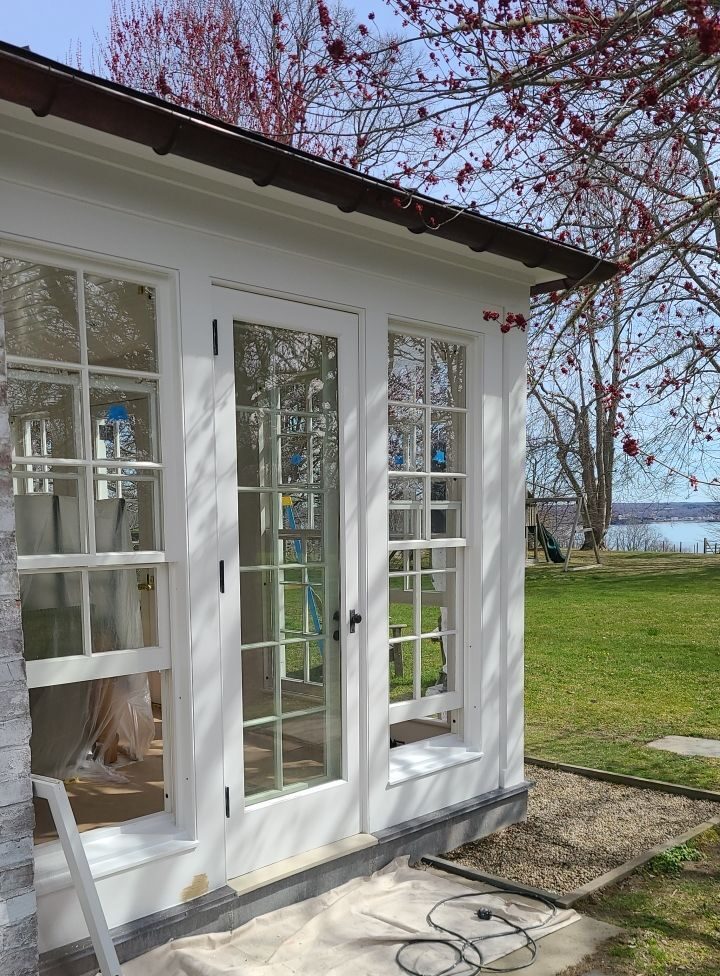
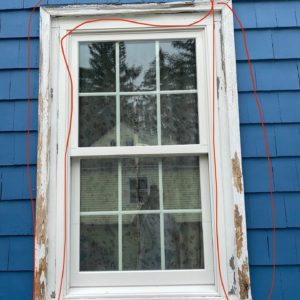
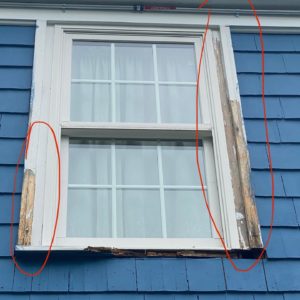
This past June, we had the opportunity to restore the exterior of a charming blue-shingled home in Middleton. What started as a request for a fresh coat of paint turned into a more involved project when our initial inspection revealed significant wood deterioration, specifically around the windows.
When wood is exposed to moisture and neglect over time, it begins to decay. This process, known as wood rot, can quickly compromise the structural integrity and appearance of a home. Before any painting could begin, replacing the rotted wood was essential to ensure a smooth, long-lasting finish.
In the case study below, we walk through how our team approached replacing wood rot, restoring the home’s exterior, and ultimately delivering a polished new look the homeowners loved.
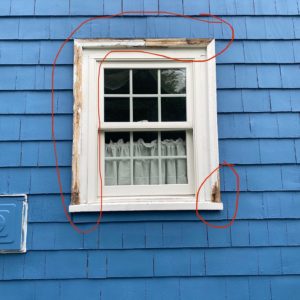
At our initial meeting with the homeowners, we focused on assessing the extent of the damage and identifying the cause, often weather-related, which is common for homes in Portsmouth and Newport. Along the classic coast, homes are frequently exposed to high moisture levels, salty air, and frigid temperatures. Over time, these conditions can wear down paint and deteriorate the materials beneath it, especially wooden window frames and other vulnerable exterior features.
Early signs of wood rot include soft or spongy areas, paint that’s chipping or peeling, splintering wood, and noticeable discoloration. If left untreated, the damage can quickly worsen. That’s why it's important to bring in a professional painting contractor and carpenter as soon as these symptoms appear. They can help determine whether the issue can be repaired or if replacing wood is the better long-term solution.
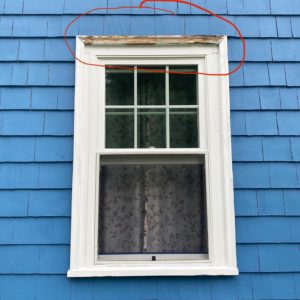
So how do you know when it’s time for replacing wood rather than repairing it? A good rule of thumb is if more than ten percent of the wood is compromised, replacement is necessary. In some cases, minor rot can be halted and reinforced using epoxy and sealants, but only if caught early.
In this particular case, the damage was extensive enough in some places that replacing wood rot was necessary. Our carpentry team made all the necessary repairs before our painters came in to finish the job.
When we removed the rotted frames and sills, our carpentry division took care to pull these boards out without causing damage to the house or windows themselves. Once the old frame and sills were removed, all leftover debris or wood pulp was removed and the area was cleaned.
The pieces of the old frame and sill were measured as a reference for the new boards to be put in place. Measurements were also taken of the sheathing where the frame and sill used to sit to ensure that the new pieces would fit securely.
If your home does not have standard fittings and features (and depending on what type of window or home you have), you’ll need a contractor more skilled than the average handyman to help with standout features like mitered corners and fastening sites. Our master carpenter, Chris, and his team did a fantastic job making sure the windows fit perfectly in our client’s home.
Once the wood frames and sills were removed, our carpentry division inspected the sheathing underneath and made necessary repairs. Repairs that may need to be done on sheathing include using caulk to fill in any smaller cracks and an expanding foam insulation to not only fill larger gaps but to also hold the new boards tightly in place.

Once the new pieces were cut, our painters stepped in to apply a few coats of paint to protect these new pieces of wood from exposure to moisture and water. Once the new window frames were ready, our carpentry division installed them into the sheathing and secured those pieces in place with nails. The final step in installing these new frames and sills is caulking any seams to keep out unwanted moisture, bugs, and other enemies of wood.
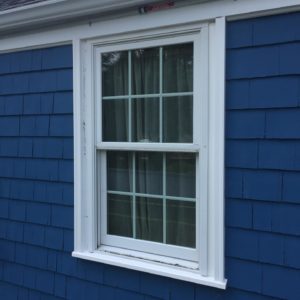
After the frames and sills were installed and inspected for quality, our painters finished the project with a fresh coat of exterior paint. Our team stripped and sanded the old paint to prepare the surface and to prevent unaffected parts of the frames from being exposed to moisture. The entire window trim was repainted with two coats of the highest quality paint to guard against all types of weather conditions.
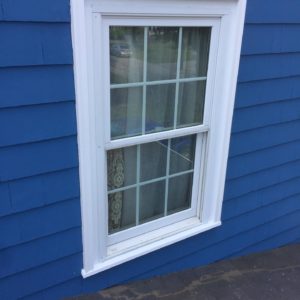
Throughout each step of the process, our team took the time and care necessary to ensure that every surface, from the newly painted siding to the areas where we focused on replacing wood, achieved a flawless, high-quality finish. The homeowners were thrilled with the results and appreciated the craftsmanship and attention to detail we brought to their home.
Since 2004, Bruno Painting has been committed to upholding and caring for surfaces and relationships. We take great pride in our work, and this project was no exception. From replacing wood damaged by coastal weather to restoring the home’s exterior beauty, it was an honor to help create a result that this family will enjoy for decades.
If you’ve noticed signs of damage on your home’s exterior, whether it’s peeling paint, soft window frames, or other signs of deterioration, don’t wait. Contact us today to learn how we can help with evaluating, repairing, or replacing wood to protect your home and restore its curb appeal with lasting results.
Call or email our office for a free estimate to see what we can do for your home!