Spring is here, and so is the perfect time to refresh your home’s look. If you're considering an exterior house painting quote, you're already one step ahead. A professional paint job can breathe new life into your space and protect your home. Let's talk about when, why, and how to make it happen.
There’s a reason painters love springtime. The mild temperatures and lower humidity levels create ideal conditions for exterior paint to adhere, cure, and last. Tackle your exterior painting early in the year and enjoy the fresh, vibrant look all spring and summer long. Milder temperatures and consistent, natural light make it the perfect time to see how your new color truly shines, so you can step back and enjoy the results for months to come. If you want your home to turn heads this year, spring is your window of opportunity for an exterior house painting quote from Bruno Painting.
After you receive an exterior house painting quote but before a single brush stroke hits your home, some groundwork needs to be done. Power washing is a must. Dirt, mold, mildew, and old flaking paint all need to go. This step ensures the new paint bonds correctly and lasts longer.
Next comes a full surface inspection. Cracks, broken wood, or gaps in siding should be repaired before painting begins. Covering damaged materials with paint is like throwing a rug over a hole in the floor. Sure, it hides it, but only for a while. The real problem gets worse (and more expensive). A reputable painting company like Bruno Painting will take the time to prep your home the right way.
The exterior of your house is like its skin. It’s your first line of defense against sun, rain, wind, snow, and pests. Over time, even the best paint can wear thin. Left unchecked, those tiny imperfections can turn into costly structural damage.
Here in Rhode Island, you can typically expect to repaint every five to ten years, but no two homes are the same. Several factors play into how often your home really needs attention.
Previous Paint Job
The quality of your last exterior paint job matters a lot. If top-tier materials were used and applied by pros, you’ve bought yourself some time. Cheaper paint or a sloppy job? You’ll be seeing peeling and fading way sooner than you’d like.
“Just Like New” Feeling
Sometimes, it’s not about damage at all. Maybe your current color feels outdated, it came with the house when you bought it, or you’re going for a fresh new vibe. Exterior painting is a great way to express yourself or make a newly purchased home truly your own.
Environmental Clues
Faded colors, visible chalking, or water stains? Your home is dropping hints that it's time for a makeover. Don’t ignore these signs. Regular inspections help you catch issues early and plan a paint job before bigger problems pop up.
No one-size-fits-all timeline exists for exterior painting. It’s a bit like noticing when your car needs a tune-up; you know your home best, and visual signs will guide your decision.
Getting an exterior house painting quote isn’t just about pricing. It’s about understanding what you’re paying for and making sure it’s done right the first time.
Here’s what a solid exterior house painting quote from a professional team like Bruno Painting should include:
The exterior house painting quote shouldn’t be a quick number scribbled on a notepad. It should be thoughtful and thorough, just like the paint job itself.
Picking the right color is exciting but also a little nerve-wracking. After all, you're painting your whole house! This isn’t a bedroom wall you can redo next weekend. Here's what to consider before you commit:
Style of House
Not all colors look great on all homes. For example, darker colors can look stunning when paired with white trim on homes that have architectural detail. If your home lacks that contrast, a dark color could make it look boxy or flat. A soft, light shade can help balance that out.
Landscaping
Think of your yard as part of the outfit. A green-heavy landscape could clash with certain shades of blue or red. On the flip side, if your garden is full of bright flowers, choosing a muted tone might make the whole scene pop.
Neighborhood
Love a bold purple or fire-engine red? Awesome. But your neighbors might not be as thrilled. Look around and consider what fits in with the vibe of the neighborhood. Being different is great, but being an eyesore isn’t. Of course, you might need to check with your HOA if certain colors are not permitted.
Test Your Colors
Paint swatches can look very different in real life than they do on a screen or in a can. Sample your top choices by applying small patches to the exterior and observing them throughout the day. Light changes everything. And don’t forget to consider how it looks with your roof, shutters, and trim.
A professional exterior house painting quote does more than put a number on paper. It sets clear expectations, protects your investment, and guides the entire project. A fresh coat of paint can boost curb appeal, add lasting protection, and make your home feel brand new. This spring, partner with the experts at Bruno Painting for an exterior house painting quote and make your home’s next chapter a beautiful one.
If your house is looking a little tired and you're seeking an exterior house painting quote, Bruno Painting is ready to help it shine again. Our quotes are detailed, honest, and free. Let’s get your home looking its best this season—get in touch today for a thorough and professional exterior house painting quote and let the transformation begin.
Email: office@brunopainting.com
Call: 401.662.0057
Proudly serving: Charlestown, East Providence, Narragansett, Newport, Westerly, and Westport.
When it comes to refreshing your interiors, painting might be the first upgrade that comes to mind. But there’s a secret weapon that can take your home to the next level: custom carpentry. From elegant moldings to striking wainscoting, carpentry work adds character, depth, and functionality to your space.
Whether you’re looking to elevate a single room or create a cohesive design throughout your home, incorporating custom carpentry details is a surefire way to make your interiors stand out.
Crown Molding: Crown molding frames a room beautifully, adding a sense of elegance and refinement. It works especially well in living rooms, dining areas, or bedrooms where you want to add a classic touch.
Baseboards: Upgraded baseboards make the transition between wall and floor seamless and polished. A modern, taller baseboard can provide a striking contrast against freshly painted walls.
Picture Frame Molding: Add a sense of luxury and dimension by framing sections of your walls. Whether you prefer a traditional or modern aesthetic, this element elevates any space.
Wainscoting is a timeless carpentry technique that protects walls while adding visual interest. Options like raised panels or beadboard wainscoting are particularly effective in high-traffic areas, such as hallways or dining rooms. Pair wainscoting with a bold paint color above to create an eye-catching contrast.
Other trending ideas include two-tone wainscoting, where the upper portion of the wall is painted in a bold color while the lower portion features crisp white paneling for contrast. Even small-scale projects, like adding wood slats to a plain wall to create a grid or linear design, can deliver big visual impact. These projects work best when planned with a professional carpenter, ensuring precise measurements, clean lines, and expert execution.
Custom carpentry isn’t just about aesthetics—it can make your home more functional, too. Consider built-in bookcases, window seats, or customized shelving that blends seamlessly with your interiors. Painted to match your décor, these features provide both storage and design impact. Custom bookshelves can include features like adjustable shelving or unique trim that aligns with the aesthetic of the room. A handcrafted bench or window seat, complete with hidden storage, can combine practicality with an elegant touch.
Doors are often overlooked in home updates, but custom carpentry can make them a standout feature. Add intricate detailing or upgrade your door frames for a cohesive, sophisticated look. Whether painted in bold hues or neutral tones, they can become a design element in their own right.
A statement wall with wood paneling or a custom-crafted fireplace mantel instantly draws attention. Carpentry can add layers of personality to spaces like living rooms and bedrooms, making them feel curated and unique.
For older homes, carpentry work can restore historical features like decorative moldings, beams, or trim, preserving their authenticity. In modern spaces, clean-lined carpentry designs can add sleek, minimalist appeal.
Walls with intricate wood patterns—such as chevron, herringbone, or geometric designs—can completely transform a space, creating a striking focal point in any room. Similarly, upgrading outdated trim to modern, detailed designs enhances the architectural appeal of your home, tying the whole room together with a polished look.
For homeowners who want their space to feel uniquely theirs, custom carpentry offers a chance to add personal flair. Imagine a fireplace mantel carved with a design that reflects your family’s heritage or monogrammed paneling in a home office that blends style with individuality. Adding bespoke details like this not only personalizes your home but also creates conversation-worthy elements that guests will admire.
Even small, thoughtful details—like adding trim designs that echo the era or style of your home’s architecture—can make a significant difference. Whether you prefer ornate, traditional moldings or sleek, minimalist designs, a skilled carpenter can tailor these elements to perfectly suit your vision.
With custom carpentry, you can go beyond the ordinary to create spaces that feel intentional, polished, and distinctly yours. Whether you’re aiming for trend-setting design or timeless personalization, the possibilities are limited only by your imagination.
Carpentry isn’t just about looks—it’s an investment in your home’s value and functionality. High-quality woodwork provides:
When updating your interiors, incorporating current trends in carpentry can bring a fresh, stylish look to your space. Here are three popular styles to consider:
Custom carpentry doesn’t just enhance your home’s aesthetics—it also provides practical benefits that improve your living experience:
At Bruno Painting, we specialize in not only painting but also enhancing spaces with expert carpentry work. Whether you’re envisioning detailed moldings, custom built-ins, or architectural upgrades, our team is ready to bring your ideas to life.
Contact us today to schedule a consultation and discover how custom carpentry can make your home more beautiful, functional, and timeless. Your dream interior is just a project away!
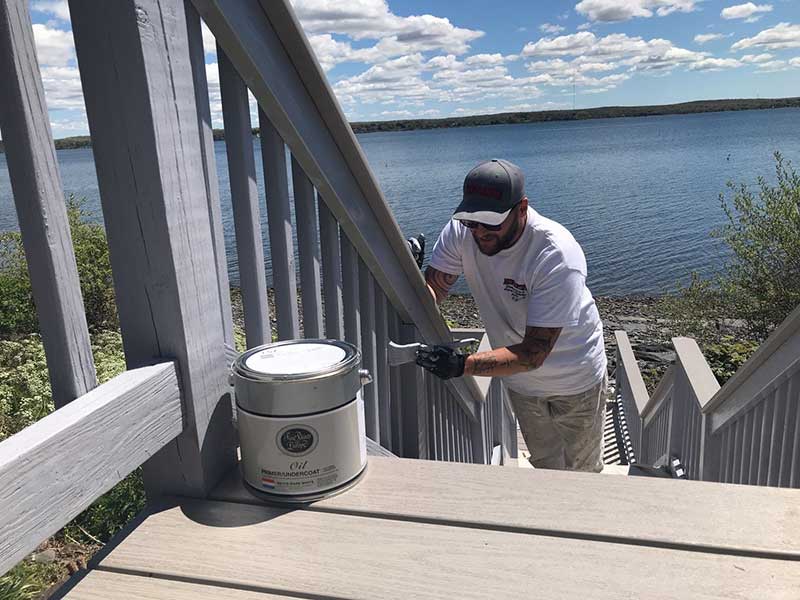
As the warmth of summer approaches, many of us eagerly anticipate spending more time outdoors, soaking up the sun and enjoying the fresh air. For homeowners fortunate enough to have a deck, it's an integral part of the summer experience, providing a space for relaxation, entertainment, and family gatherings. However, before you invite guests over for that first barbecue of the season, it's crucial to ensure that your deck is ready to handle the increased activity. In this blog post, we'll explore the importance of safety, preventative maintenance, and renovation when it comes to your deck's readiness for summer.
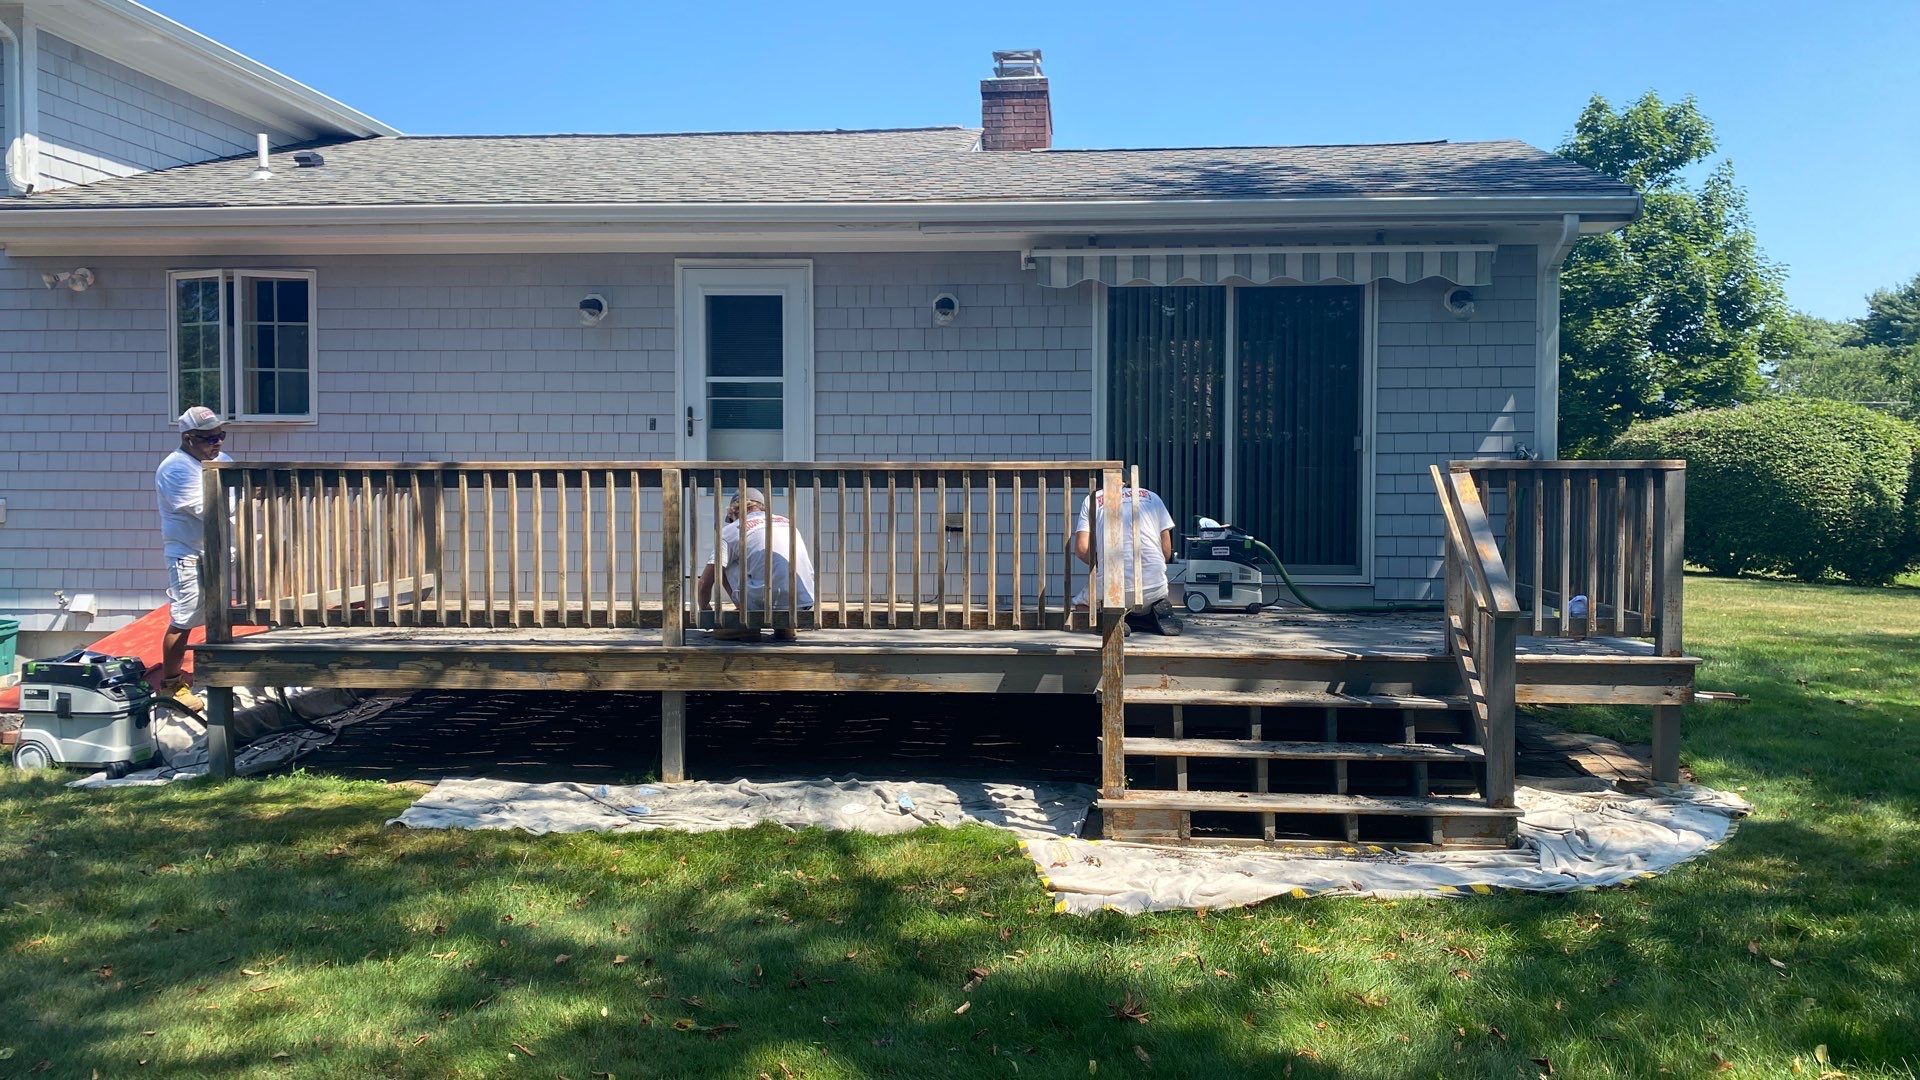
One of the most significant concerns regarding deck safety is the presence of wood rot. Over time, exposure to the elements can cause wooden deck components to deteriorate, compromising their structural integrity. This deterioration is not always visible to the naked eye, making it essential for homeowners to inspect their decks regularly for signs of decay.
Wood rot can weaken the supports, railings, and stairs of your deck, increasing the risk of accidents and injuries. Imagine the horror of a railing giving way as someone leans against it or stairs collapsing underfoot. These scenarios are not merely hypothetical—they're potential dangers that could turn a fun summer gathering into a disaster.
To ensure the safety of your deck, it's crucial to address any signs of wood rot promptly. This may involve replacing damaged boards, reinforcing supports, or even rebuilding certain sections of the deck if the damage is extensive. By prioritizing safety, you can enjoy peace of mind knowing that your deck is a secure and reliable space for relaxation and recreation.
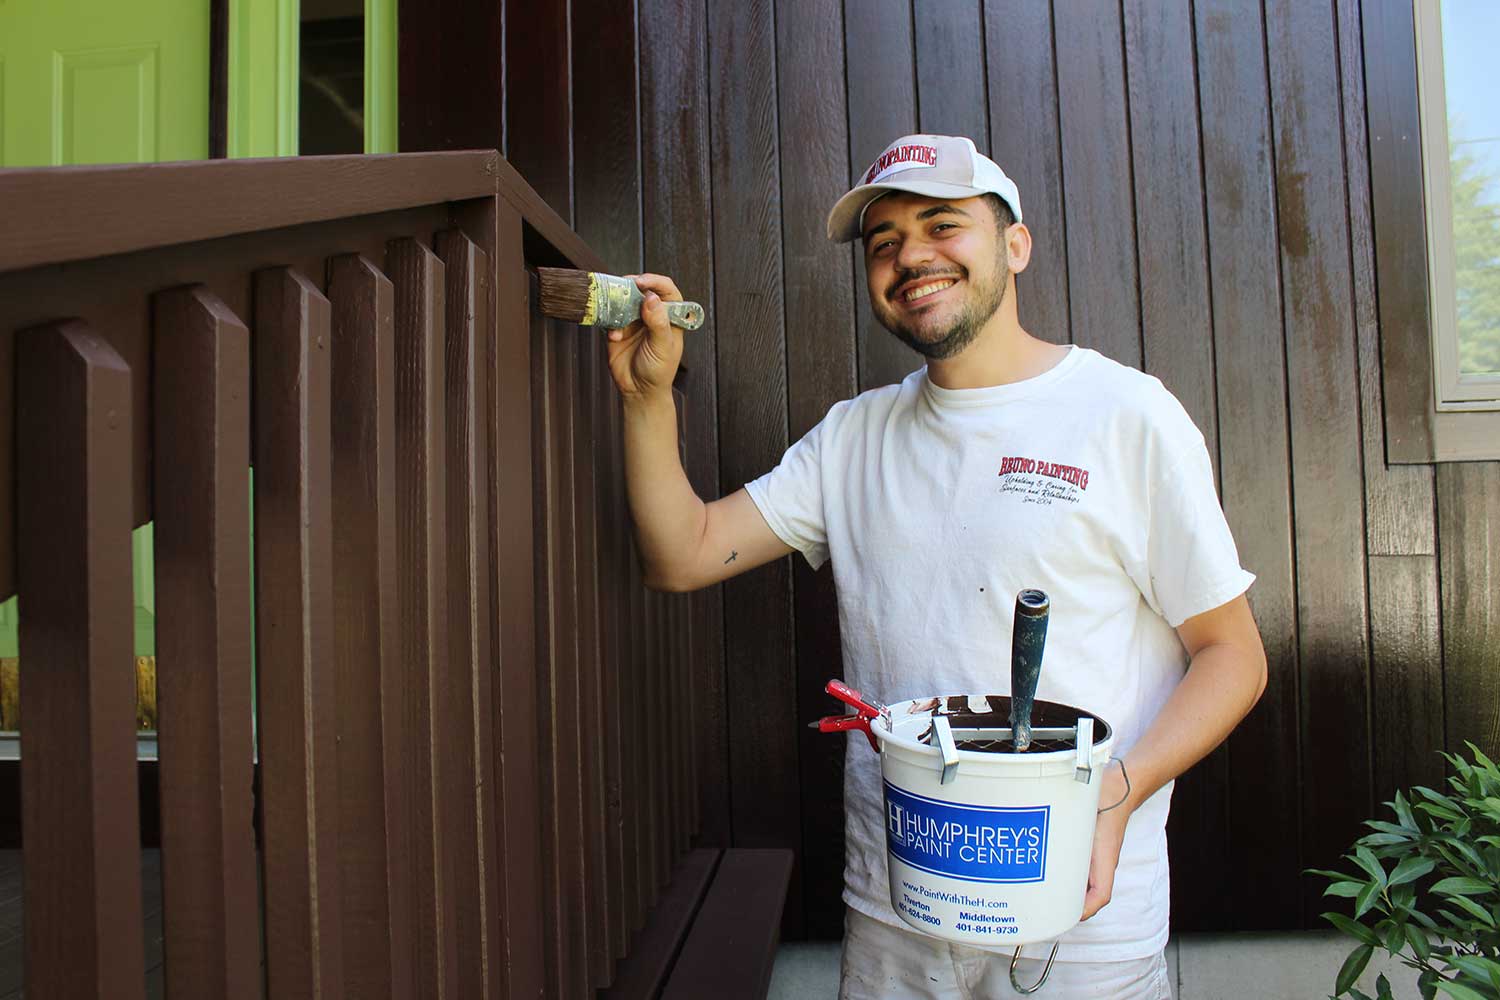
Prevention is always preferable to cure, especially when it comes to preserving the integrity of your deck. One of the most effective ways to prevent wood rot and other forms of deterioration is through proper painting or staining. These treatments create a protective barrier that shields the wood from moisture, UV rays, and other damaging elements.
Ideally, decks should be painted or stained every few years to maintain their appearance and structural integrity. However, if it's been a while since your deck received this treatment, now is the perfect time to schedule a refresh. Not only will a fresh coat of paint or stain enhance the aesthetic appeal of your deck, but it will also provide essential protection against the elements, prolonging its lifespan and reducing the need for costly repairs down the line.
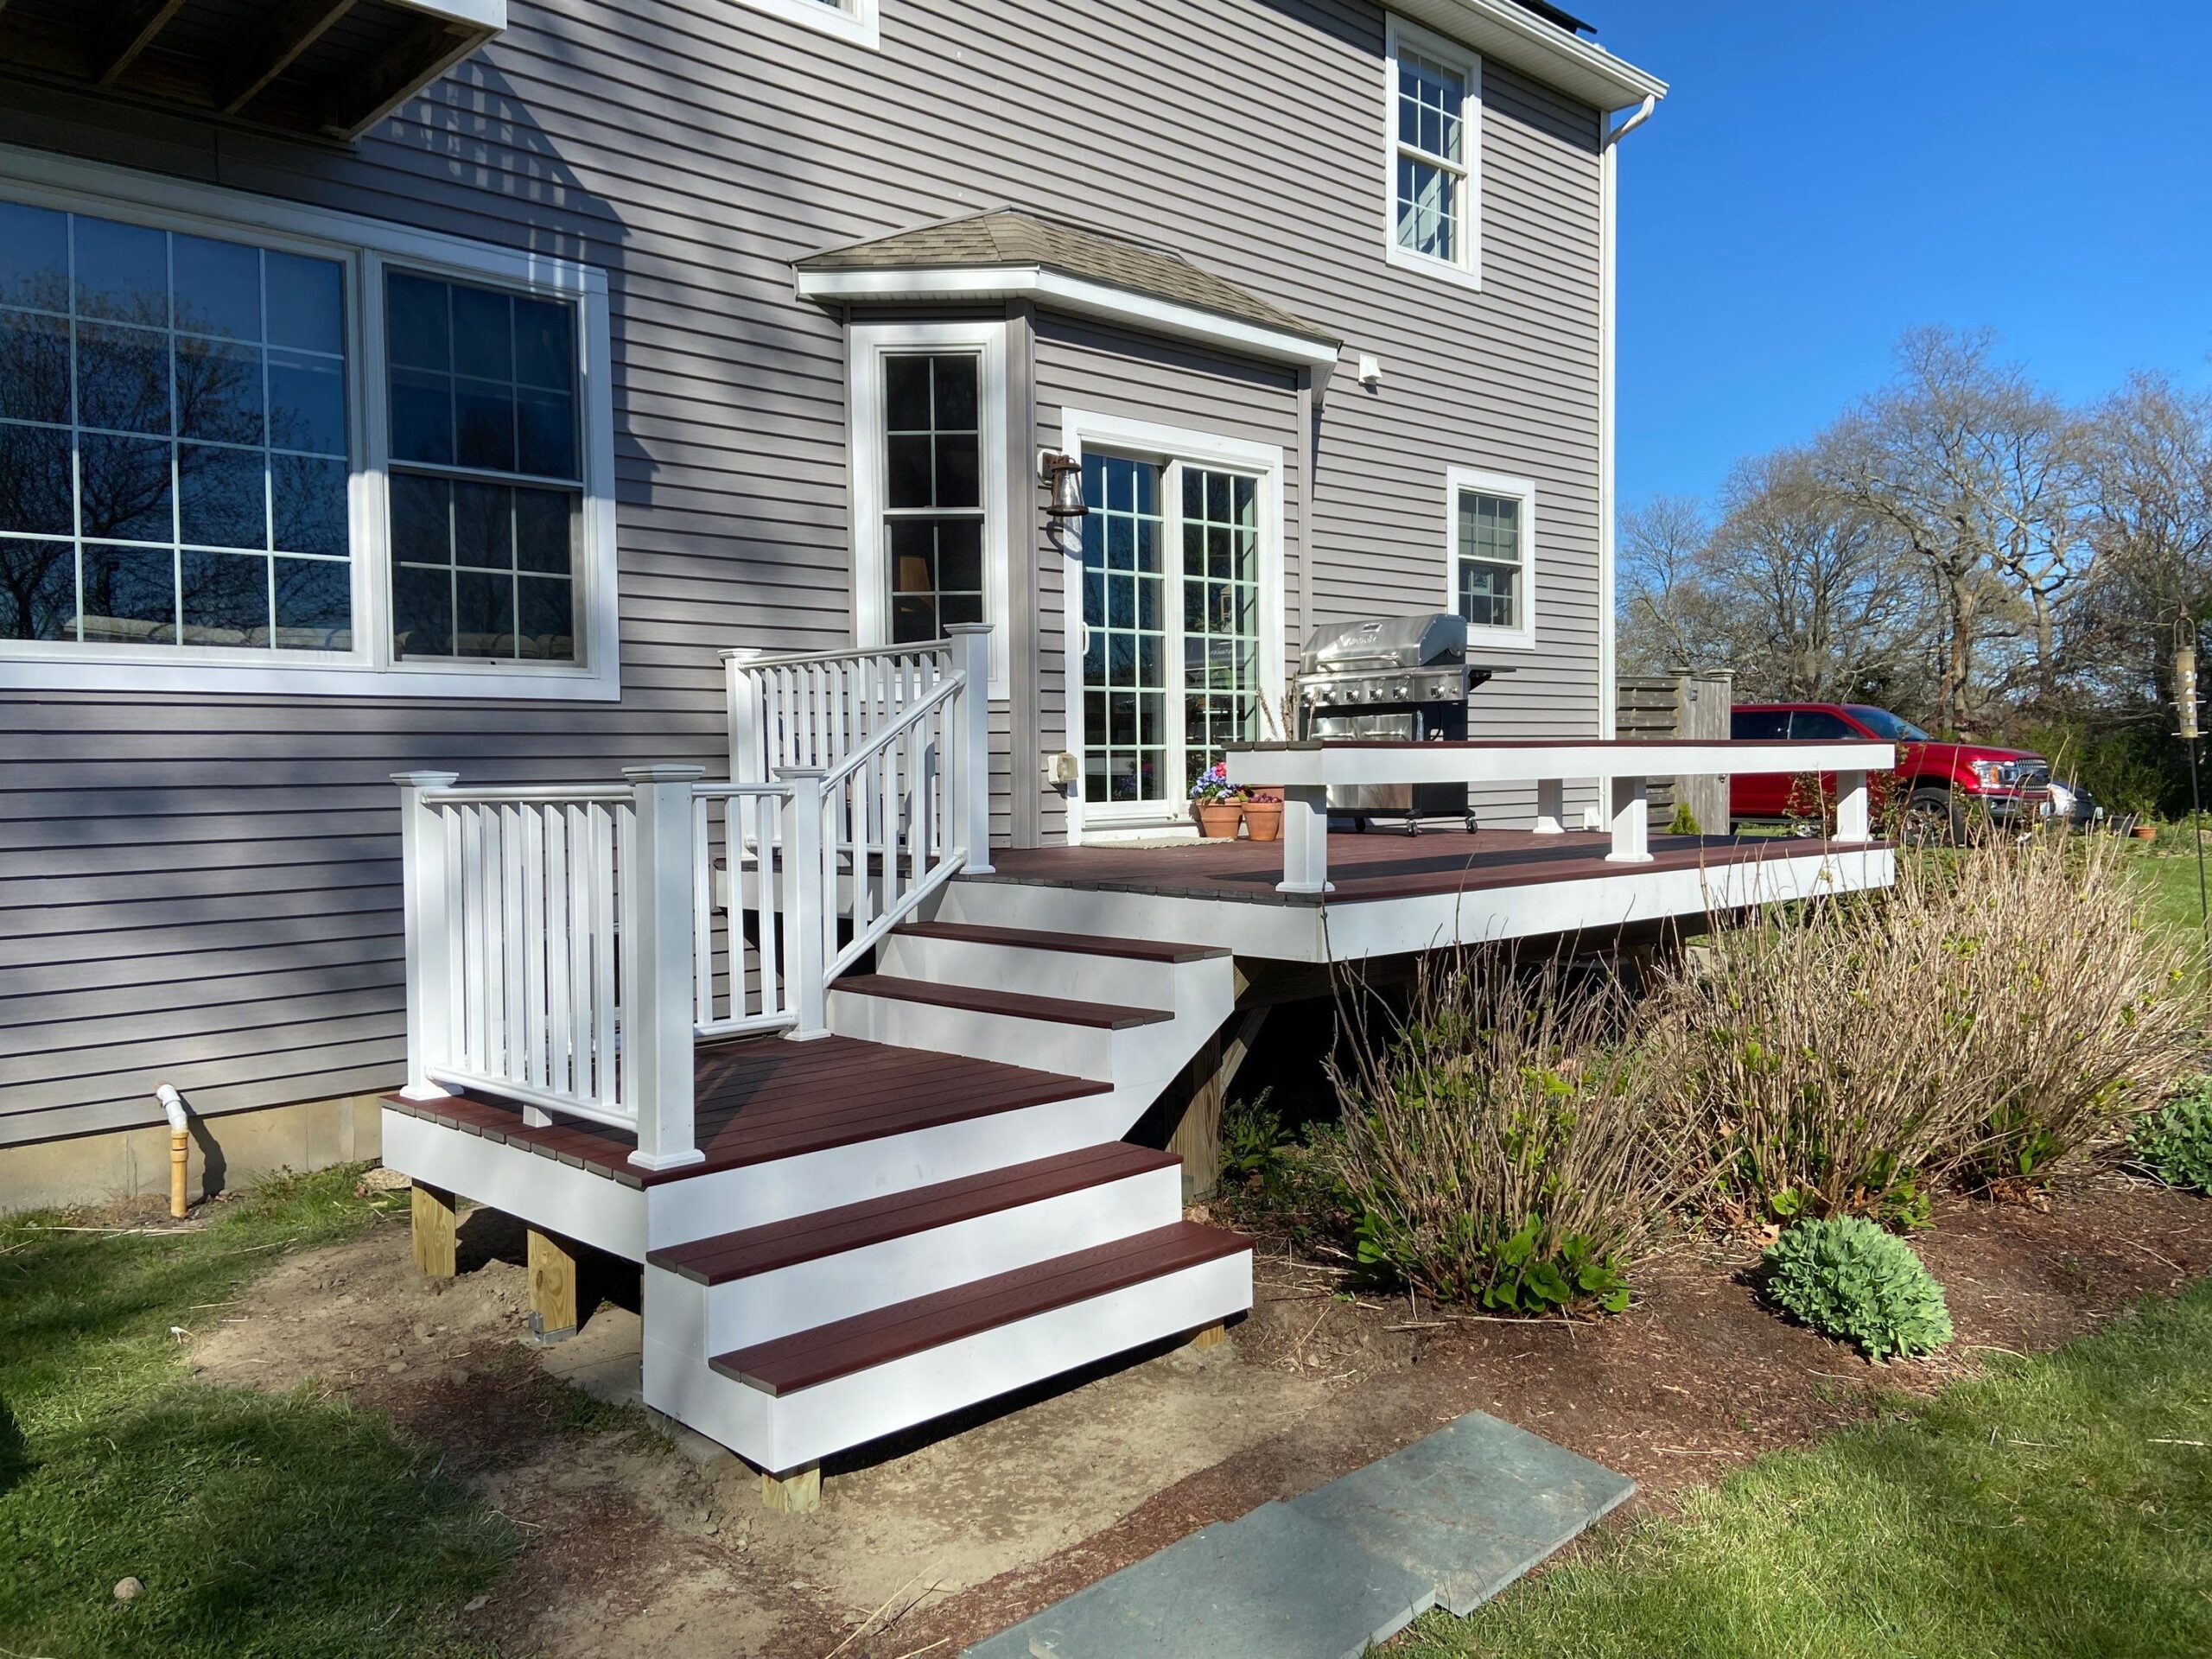
Perhaps your deck has served you well over the years, but you can't help feeling that it's time for a change. Whether you're looking to expand your outdoor living space, update its design, or add new features, summer is the ideal season to embark on a renovation project.
Renovating your deck allows you to tailor it to your specific needs and preferences, whether that involves adding built-in seating, installing a pergola for shade, or incorporating a built-in grill for outdoor cooking. Not only will these updates enhance your enjoyment of your outdoor space, but they can also increase the value of your home.
Additionally, if your deck is showing signs of wear and tear, such as splintered boards or loose railing, a renovation can breathe new life into it, making it a more inviting and functional space for years to come.
How long does a deck makeover typically take?
The duration of a deck makeover can vary depending on the scope of the project. Simple cosmetic updates, such as painting or staining, may only take a few days to complete. However, more extensive renovations, such as adding new features or replacing damaged components, could take several weeks. Our team will provide a detailed timeline based on the specific requirements of your project.
Will I need to obtain permits for my deck makeover?
The need for permits largely depends on the nature of the makeover and local building codes. Minor cosmetic updates like painting or staining typically don't require permits.
What materials are best for a long-lasting deck makeover?
Choosing the right materials is essential for ensuring the longevity and durability of your deck makeover. Pressure-treated wood, composite decking, and PVC decking are popular choices known for their resistance to rot, insects, and warping. Additionally, stainless steel or galvanized hardware can help prevent corrosion and extend the lifespan of your deck. Our team will help you select the best materials based on your budget, aesthetic preferences, and maintenance requirements.
Can I incorporate eco-friendly options into my deck makeover?
Absolutely! There are numerous eco-friendly options available for a sustainable deck makeover. For example, you can use reclaimed or recycled materials for decking, railing, and other components. Additionally, choosing low-VOC or water-based finishes for painting or staining can minimize environmental impact. We can discuss various eco-friendly options and help you make choices that align with your sustainability goals.
How much does a deck makeover cost?
The cost of a deck makeover depends on several factors, including the size of the deck, the extent of the makeover, the materials chosen, and labor costs. Simple cosmetic updates like painting or staining may be relatively inexpensive, while extensive renovations or additions can be more costly. During our initial consultation, we'll provide you with a detailed cost estimate based on your specific project requirements and budget constraints.
At Bruno Painting, we understand the importance of having a safe, beautiful, and functional outdoor space. That's why we offer comprehensive deck painting, staining, and renovation services to homeowners throughout the area.
If your deck is in need of attention before the summer season kicks into full gear, don't hesitate to reach out to us. Our team of skilled professionals will work closely with you to assess your deck's needs and provide tailored solutions that fit your budget and timeline.
Whether you're looking to refresh your deck with a fresh coat of paint, protect it from the elements with a quality stain, powerwash, or embark on a full-scale renovation, Bruno Painting has the expertise and experience to bring your vision to life.
Don't let an unsafe or outdated deck put a damper on your summer plans. Contact Bruno Painting today and make sure your deck is ready for the season ahead.
The first thing you may think of when it comes time to repaint your home’s exterior is the color you’ll choose this time around. Since a well-done exterior paint job lasts between 5 – 7 years, considering our often-harsh Rhode Island weather conditions, you’ll be looking at the color you choose for some time. Selecting the exterior paint color you’ll love for many years is a topic for another blog. Suffice it to say, paint color selection is not the only thing that goes into painting your home’s exterior.
You may or may not know that an excellent paint prep and application can actually protect your home’s exterior surfaces, and provide protection from unwanted water, from snow, rain, condensation, or other sources, from entering your home. If unwanted water gets inside and is not somehow dried, you may get mold which can cause rot and harm your health.
Before your house can benefit from the protection afforded by a well-executed paint job, it’s essential to be sure your professional painter does all it takes to properly prepare and then paint your home’s exterior.
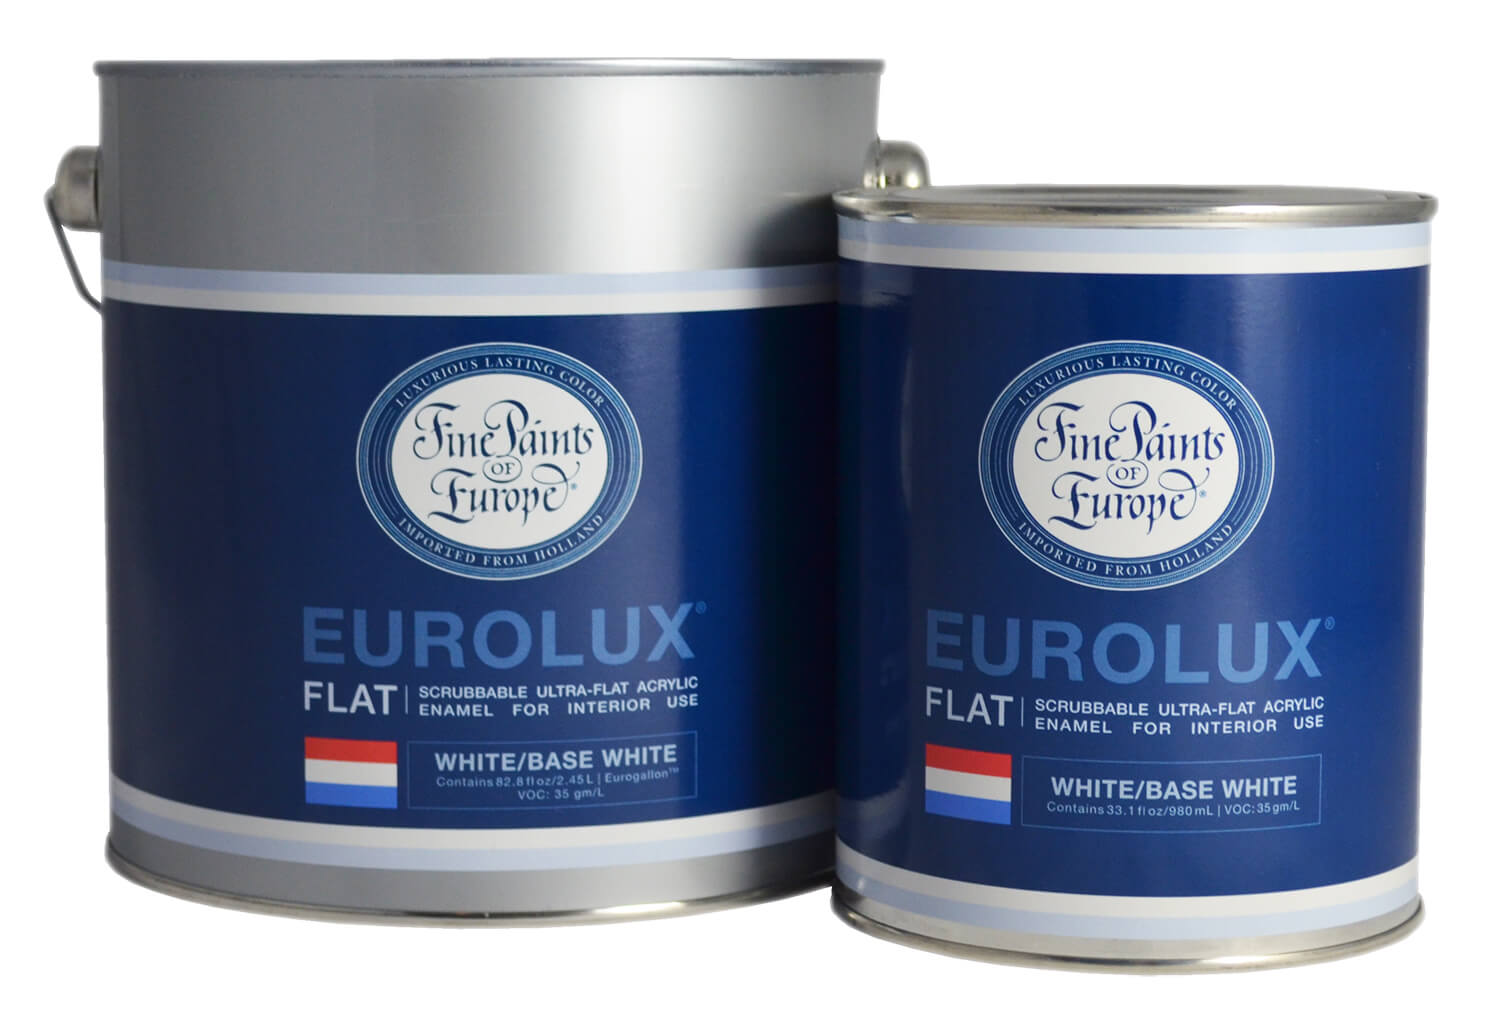
One of our favorite paint brands to use for our clients is called Fine Paints of Europe (FPE). Their tagline is “Luxurious Lasting Color, Imported from Holland.” They’re not inexpensive, but what FPE supports is following proper painting protocols for best results.
In fact, on their website, FPE says, “Please do not consider the use of our house paints unless you are committed to doing a proper job and are aware of the factors which will determine the appearance and durability of the application.”
At Bruno Painting, we are 100% committed to doing a proper job and exceeding expectations for best painting results. How do we do that? We follow a step-by-step process cultivated over many years of painting our clients’ homes. Our formula is proprietary, but we’ll share the basic steps for how to properly paint your home’s exterior for the best results.
Select your painting professional. Of course, we’re biased and believe we’re one of the best painters in Rhode Island. (Anyone who takes their work seriously should believe they’re the best!) At Bruno Painting, we not only offer elite painting services, we also have a team of experienced carpenters who can remodel your home, fix any fixable problems with your home, and basically re-work or rebuild your home to your liking. Then our team of experienced, highly trained painters come in and add the coats of paint needed to make your home aesthetically amazing!
What we’ve cultivated at Bruno Painting is a teamwork environment so our carpenters and our painters work seamlessly to do the work the right way, no cutting corners, the best way, the correct way. You’re assured a structurally sound, well-painted home when your project is completed!
Plan which parts of your exterior will be painted and agree on the paint brand and the color palettes that will be used. If there are any structural updates or fixes to be made to your home, we’ll discuss those with you in detail so you can decide all the work that needs to be done prior to paint prep.
Decide on exactly what color and finish goes on which surfaces. Even exterior paints come in different sheens and selecting the sheen for each area to be painted, such as the siding or the trim, is an important step not to be overlooked. To note, exterior paints with a more matted sheen tend to be less durable. Conversely, exterior paints with a more glossy sheen tend to tolerate wear and tear better.
Another consideration when choosing the sheen for your exterior paint is to realize that an exterior paint with a more matted sheen is not as easy to wash. If you anticipate needing to have your home power washed because it is near an ocean or trees, you’ll want to select a finish that is not completely a matte finish.
During your professional painting consultation, paint brand, color, and sheen selection will all be addressed.

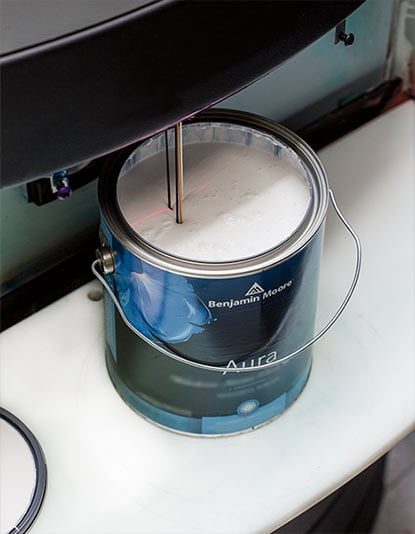
Decide on a schedule for the painting your home based on your best estimates and weather forecasts. Another one of our favorite paint brands is Benjamin Moore. According to the experts at Benjamin Moore, “Plan based on weather – rain can easily ruin a fresh coat of paint … so weather Is truly a critical component of a successful exterior paint project.”
Benjamin Moore’s tip for exterior painting in the “right” weather: “Low temperatures and high humidity are a bad combination. Generally speaking, the higher the humidity, the slower a product dries.”
Realize, of course, that the weather can change. But it’s important to be aware of upcoming weather to give your paint project the best chance of success!
Prepare your home for painting. This stage is often referred to as “prep” and many experts prep a home for painting in different order. The important thing to note is that a house exterior is cleaned, dried, caulked, and sanded for optimal paint adherence before a primer or paint brush is used.
Prime the exterior surfaces to be painted, including brick surfaces. Note that some experts recommend caulking after priming. You may even choose to caulk some areas before priming and caulking other spots after priming. The key point is to make the caulked surface as smooth as possible so the paint covering it will look as smooth.
Have your carefully chosen paint color and sheen applied to your home’s exterior. This is the most rewarding step, of course, especially if you’re changing to a new color that you’re excited to see on your home.
While painting professionals may differ in their process of painting your home, the best exterior painting results will be achieved when the approach is systematic and well-planned. It is a big endeavor to have your home’s exterior painted. There’s a lot that goes into properly painting your home’s exterior.
At Bruno Painting, we’re focused on doing all the right things and on Upholding and Caring for Surfaces and Relationships since 2004. We invite you to become a completely happy Bruno Painting client. Reach out today for your complimentary remodeling and painting estimate.
Summer is here on the classic coast and with it comes enjoying the outdoor areas of your home. The summer season is also the best time to make some exterior updates to your home.
Exterior updates are a great way to boost your curb appeal, protect your home and add value to your investment. Regularly inspecting and updating your home's exterior will help to identify any potential problems.
Whether you're looking to add some curb appeal or just want to make your home more enjoyable, there are easy ways to make home exterior updates for summer. Here are some great ideas for giving your home a summer makeover.
Late nights around a fire pit or beautiful patio are some of the best ways to entertain and spend time with your family. Updating your outdoor spaces can extend your living area to your backyard and beyond. Try incorporating some of these into your next home improvement project.
Painting is one of the most effective ways to transform your home. Paint is also an incredible agent for protecting your surfaces against weather and decay. Two of the most popular updates homeowners make to their exteriors are siding and front door projects.
Installing new windows is a great way to update your home's exterior and improve its energy efficiency. If your windows are old or drafty, they could be costing you money on your energy bills.
New windows will keep your home better insulated and reduce your energy costs. You can also find windows that come with UV protection to help keep your furniture and carpets from fading.
Exterior updates are also a great way to improve your home's energy efficiency. Not only will regular exterior updates save you money in the long run, but they'll also help make your home more comfortable and efficient.
Updating and maintaining your exterior in summer protects your home, improves your curb appeal, and adds value to your investment. At Bruno Painting, we handle any necessary carpentry work, do the key prep work to ensure longevity in your project, and use high-quality paint. Our expert teams of painters and carpenters are ready to make your home exterior updates seamless. Contact us for your next exterior painting or carpentry project!
Spring is the perfect time to give your home a good deep clean and to do some maintenance tasks that you may have been putting off. Now that spring is in full swing, it's time to get your Rhode Island home in order for the warmer weather ahead on the classic coast. Check out our five spring home maintenance tips to get your house ready for the season.
After a long winter, your home may need some TLC both inside and out. Our experts at Bruno Painting have helped many homeowners in Rhode Island make improvements to their homes and have compiled the most common spring home maintenance tips to focus on this time of year.

Spring is the perfect time to do a deep clean of your entire house. This means getting rid of all the dirt, dust, and grime that has built up over the winter months. Don't forget to clean those hard-to-reach places, like ceiling fans, high shelves, and under furniture.
Window washing and carpet cleaning are great ways to brighten up your home. Removing dander and pollen buildup in these areas helps clean the air in and around your home as well as reduce allergic reactions that many people experience throughout the season.
Letting in the fresh air and natural light with clean windows will do wonders for your home. But too much air can make your home feel drafty and uncomfortable. Cold air can seep into your home through cracks and gaps in doors and windows. If you noticed these types of drafts near windows and doors over the winter months, this will need to be a top priority on your spring to-do list.
Drafty windows and doors not only make your home less comfortable, but they can also drive up your energy bills. Unwanted openings in these areas can cause moisture to accumulate, which can lead to costly damage to your home. To help prevent drafts, check all your windows and doors for any gaps or cracks. Re-caulk these areas to keep moisture out and help your home stay clean and fresh.
Clogged gutters can lead to water damage on your roof, ceilings, and even walls. During the winter months, ice dams can form which cause damage to your gutters and roof. So, it's important to inspect and clean your gutters and downspouts both in the fall and again in the spring to keep your gutters clear.
To clean your gutters, use a ladder to remove any heavy debris by hand and rinse any remaining dirt with your garden hose. If you notice any damage to your gutters, be sure to get them repaired or replaced as soon as possible.
Your heating and cooling systems work hard all year long to keep your home comfortable. So, it's important to give it a tune-up before the summer heat sets in. This ensures that your system is running efficiently and can help prevent costly repairs down the road.
In addition to scheduling an HVAC tune-up, replace the air filters every three months or so to keep your system working properly and maintain the air quality in your home for everyday living.
Now that the cold weather is mostly behind us, your outdoor space should be the focus of your attention.
Now is the time to start prepping your yard and garden for the warmer months ahead. This includes tasks like mowing the lawn, trimming bushes and trees, and planting flowers.
Once your greenery is ready for the sunshine, cleaning your home’s exterior is the perfect way to boost your curb appeal. This includes power washing your deck or patio, your exterior siding and gutters, and touching up your siding and trim with a fresh coat of paint. By taking care of these areas now, you can enjoy your outdoor space all summer long.
Following these simple tips can get your home ready for spring and enjoy the season worry-free. Use this checklist as a guide for things that you should do around your home this spring.
Many homeowners in Rhode Island have spring cleaning projects well underway. If you are looking to make any home improvement updates this season or need a helping hand with making your home look its best, reach out to our team of professional carpenters and painters.
Our team has been upholding and caring for surfaces and relationships since 2004. This spring, we’re happy to help boost your curb appeal and keep your home in top shape!
Cedar shake siding is a popular type of siding for homes in Rhode Island, especially on homes that are 10 years old or older. Homeowners enjoy the iconic look as it creates a unique finish and can add a rustic yet warm look to your home’s exterior.
If you have cedar siding, it’s important to take care of it properly to ensure that it looks good and lasts for many years. From installation through its lifetime, caring for your cedar shakes will help you protect your investment. Here are a few tips on how to care for your cedar shingle siding.

Cedar shakes are a specific type of siding material that is found on the classic coast since colonial times. It is typically made of cedarwood, though other types of wood may be blended in, and comes in a variety of colors and sizes.
Finish options for cedar shakes include stain and sealant or paint to create an even more unique look. When you properly care for your shake siding, it can last anywhere from 10 to 15 years or more. If you take excellent care of your cedar siding, it can last upwards of 20 years or more before needing to be replaced.
Shingle siding is not immune to wear and tear and there are a few common issues that you may experience over time. Due to the nature of the natural material cedar shakes are made from, they are prone to require more maintenance than brick or artificial siding options, such as vinyl.
As with any natural material, exposure to moisture will mean these surfaces are prone to moss, algae, and even mold growth. Cedarwood is a durable siding but can be a target of wood-boring insects. Traces of these insects such as termites, ants, and beetles seen around your home may be an indication that these insects are enjoying your siding as much as you are.
Other signs of wear and tear can be brought on by heat and dry conditions. Keep a watchful eye for cracked or warping shakes, especially on the sides of your home that are in the direct sunlight. It’s important to be aware of these issues and address them as soon as possible to prevent further damage.
To keep your shingle siding looking its best, it’s important to clean it and care for it regularly. This includes both cleaning and maintenance tasks, such as checking for damage and repairing any issues that may arise.
One of the most important things you can do to take care of your shingle siding is to clean it regularly. Washing your siding with a garden hose and dish soap is one way to maintain your cedar siding. This will help remove any dirt or debris that may have built up, and it will also help keep the siding looking its best.
A second way to clean your cedar shingles is to use oxygen bleach, which is nontoxic to trees, shrubs, and flowers. As a third option, you can power wash your cedar siding or hire a professional contractor to power wash it. To avoid damaging the cedar shingles, be sure the power washing equipment is used on its most gentle, lowest intensity settings and the appropriate mild detergents are used.
Keeping your cedar shakes free from moisture accumulating on them is one of the best ways to prevent damage. To prevent moisture from accumulating on your home’s cedar siding, you can trim nearby trees and shrubs so there is enough distance for airflow. If there are any loose boards that may allow water to penetrate the siding, they should be nailed down or replaced with newly treated shakes.
Treatments to protect from the elements, moisture, insects, and heat are available and will need to be applied every few years for effective protection. Additional measures such as painting can be an effective way to extend the life of your cedar shakes, but this can only be done when your siding is completely dry.
Touchups and repairs for shingle siding can vary in price depending on the size and scope of the job. However, most repairs are relatively affordable, and it’s always better to address an issue sooner rather than later.
While some minor maintenance or repairs can be done on your own, any major repairs or updates should be done by your local licensed carpentry professional. If you need major updates like painting your cedar shakes or have found damage that has led to larger issues like wood rot, calling your preferred contractor is the best next step so you can avoid costly problems with your home.
Cedar shake siding care and maintenance are important for your home’s integrity to ensure that it looks its absolute best and lasts for many years. By following these tips, you can keep your shingle siding looking great and free from damaging elements.
Have you noticed your cedar shake siding not looking its best and in need of repair? It may be time to either clean or instead, completely update your home’s siding. Bruno Painting is here to help! With our team of expert painters and our carpentry division, we provide an all-in-one service to our clients. Get your complimentary exterior home update consultation and estimate from the experts at Bruno Painting today!

Homes with lots of character and beautiful finishes are seen commonly throughout Rhode Island. When you pull onto your street and take a first glance at your home, you should get a sense of joy because it looks lovely, well taken care of, and inviting. For others who may have recently moved in or who are otherwise behind schedule, this may not be the case. The first sight of your home as you approach may not give you such a feeling of happiness.
If your eye catches spots that need work, you may want to take steps to boost your home’s curb appeal. You can also schedule your home’s exterior updates during these colder months, in advance of when the work will be done as soon as the weather changes.
There are many options when you decide to improve the curb appeal for your Rhode Island home. The advantages of maintaining your curb appeal go beyond having an aesthetically pleasing house. Understanding the benefits, as well as how to accomplish a well-appointed home exterior will help you decide which updates you’d like to have done. Bruno Painting provides tips on how to boost your Rhode Island home’s curb appeal so each time you drive up to your home, you feel pleased, joyful, and happy.
Curb appeal is how attractive a house (or building or property) is when looked at from the sidewalk. Realtors use the phrase "curb appeal" more often than other types of professionals. However, curb appeal can be important outside of real estate.
There are many advantages to boosting your curb appeal. If you want to sell your home this year, improving the exterior of your home can be a great start to the process. Improving your curb appeal can also boost your overall mood when you drive up to your home. If neither of those is enough to convince you, putting energy and resources toward giving your home better curb appeal could increase the value of your home!
One of the primary features contributing to your home’s curb appeal is landscaping. Many homeowners are surprised how different their home looks after it has been properly landscaped and maintained. With fresh mulch, flowering plants, and some well-appointed shrubs or trees, you can complete your landscaping projects to enhance the appearance of your home’s exterior space. Using plants to increase privacy and create a symmetrical look are ideal additions.
Some prefer to use plants to increase privacy and improve appearance. It's worth noting that plant selection should include options that will do well for the weather we see in Rhode Island. Find perennials that are native to our area, as well as evergreens. They will add touch of color all year round.
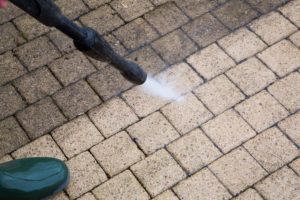
Is your home’s paint is in good condition but is a little dusty or dingy looking or simply needs a light sprucing up? There is no better way to make your surfaces look new than a good pressure washing. From siding to driveways to walkways, this is an instantaneous improvement to your curb appeal. Pressure washing cleans a variety of surfaces with ease by removing dirt, oil, and grime that builds up over time.
Another note from the experts: pressure washing can be done on your own. However, using an ill-fitted nozzle or the wrong cleaners for a surface can cause damage instead of improving your surfaces. Always consult with a professional if you are unsure what pressure washing method is best for your home.
Wood rot can greatly affect your home's curb appeal. Not only is it an eyesore, but if wood rot is left untreated, it can spread and cause even more damage to your home. Before you paint the exterior of your home, the wood rot will need to be repaired or, in some cases, replaced.
How do you know if you have wood rot? Look for pieces of wood that seem spongy or soft. They are at the beginning or intermediate stages of rot. Other signs of wood rot include paint chipping, paint peeling, wood splintering, or discoloration. If you think your home may have wood rot, contact a professional painting or carpentry contractor to remedy these areas to protect your home from further damage.
Another feature related to your home’s curb appeal that can make a lasting impression is an inviting porch or a welcoming entryway. Home makeovers that include eaves, gables, or a full front porch can make any home a showstopper when it comes to curb appeal.
These types of updates require a trusted and skilled carpentry team that can work within the framework of other updates you want to make. One example is window and door updates. Installing windows, doors, and trim may seem like a possible DIY project. These are better left to carpentry professionals, however, who can provide high-quality craftsmanship that will last.
As with any home improvement update, the most effective and impressive way to increase curb appeal is with a fresh coat of paint for your home’s exterior, windows, and doors. A paint update to a home with a lack-luster finish not only makes your property look more inviting but also helps protect your home from the elements.
Improving the curb appeal for your Rhode Island home is an important contribution. It can make your exterior look its best for your enjoyment, possibly get it ready to sell, or increase the value of your investment. Carpentry and painting updates are best done by professionals who understand your vision for the look of your home.
The painters and carpentry professionals at Bruno Painting in Rhode Island have been working diligently to prepare and plan for the upcoming exterior painting season. We are taking new clients who need assistance from full-service, experienced home improvement professionals. Contact us for more information about our range of services and how we can help you get the most joy from your home.
When you take on a home painting project yourself, you’ll find an almost excessive number of paint types within each paint brand from which to choose. Though there are many choices, it can be difficult to know which paint is best for your specific painting project.
When you hire a painting professional to paint your home, on the other hand, you’ll have a wide variety of professional paint brands at your disposal, plus a painting team with the knowledge and information needed to select the best paint for your particular home and its unique characteristics.
We’ve put together a list of some of the best interior and exterior paint brands for your home. You can use this information to better understand all the different paint technologies available and be better able to have a conversation with your painting contractor about the best paints for your home.
Source: Benjamin Moore
For interior paint, some paint characteristics we believe are important are paint thickness, paint coverage or spread, fumes or paint odor, “green” considerations, color variety, sheen selection, specific chemical and preservative ingredients, and ease of application.
When we consider if a paint is “green,” we look at the presence or absence of volatile organic compounds (VOCs). VOCs release gasses into the air that cause a strong paint odor, and which can be harmful to people and animals, possibly causing respiratory problems as well as harm the air quality.
Along with these factors, we look at customer satisfaction and overall performance for the price. Here are our top recommendations for interior paints:
Source: finepaintsofeurope.com
Fine Paints of Europe created the Eurolux™ Interior Acrylic Paint line to serve as an odorless acrylic paint option, which has been perfected over the last two decades. The coating quality is unmatched by this remarkable paint. Many have compared the durability and scrubbable strength tile, with the same washability! It is both quick drying and Low VOC, making this a wonderful option for lasting beauty in any home. We recommend this in both kitchens and bathrooms due to its impeccable ability to be cleaned.
As an alternative, Eco™ Waterborne Paints by Fine Paints of Europe offer the benefits of both alkyd and acrylic formulated paints. With easy clean-up and application, this self-leveling paint dries to a beautiful finish while also being Low VOC paint, making it an eco-friendly choice. We recommend this paint for dining rooms, family rooms, and even bedrooms.
Source: Benjamin Moore
Aura by Benjamin Moore is another paint we recommend for homeowners specifically looking for a paint that goes on effortlessly. The Gennex color-technology in this paint has maximum performance for long-lasting results. As a paint and primer in one, this paint dries quickly and adapts well to different surfaces. We recommend Aura in bedrooms for its low VOCs and minimal-odor qualities. Additionally, Aura Bath and Spa is designed specifically for high-humidity areas like your bathroom.
Last, but not least, for interior paint Regal Select by Benjamin Moore has performed well for more than 50 years. With its unique formula, a wide variety of beautiful colors, and an easy-to-clean finish for all sheens, this paint is one of our favorites.
As a paint and primer in one, Regal Select performs consistently on many different surfaces. The greatest advantage is that it has zero VOC and low odor making this a versatile choice for any room in your home.
Exterior surfaces require paints that match the needs caused by local conditions. For homes that are near a body of water, for example, mildew-resistant paint will protect best; a stain- and dirt-resistant paint performs well in urban areas. Our exterior paint recommendations are based on specific attributes that may apply to your home’s unique needs.
Benjamin Moore’s Regal Select Exterior Paints offer optimum coverage with protection and durability. This paint holds up its appearance to weathering very nicely. This is due in part to the alkyd technology, which provides ultimate adherence to all surfaces. Its resistance to cracking, dirt, mildew, and color change make this a good overall choice for homes whose exterior requires extra protection from moisture and other elements.
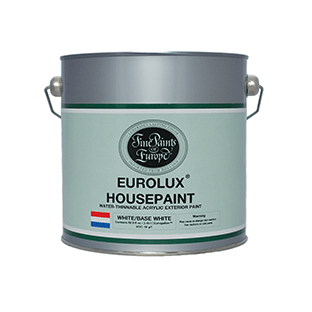
Source: finepaintsofeurope.com
EUROLUXⓇ Housepaint by Fine Paints of Europe provides the advantages of both traditional oil formulas and modern acrylic features with a state-of-the-art formulation. Thanks to the advanced, durable coating this paint application is known for easy use. Weather resistance and environmental conscientiousness are associated with this paint which boasts superior adhesion to surfaces with flexibility making it a great choice for exterior paint as it stands up to numerous cycles of contraction and expansion that we see on the classic coast.
We use a number of different paint lines from these companies outside of these and always prioritize the highest quality paints. These are a simple selection of some of the best options as a starting point for you to consider. There are many paints on the market, with professional-grade paints offering the most technologically advanced qualities. Choosing one or more of these paints that are manufactured using the latest in paint-performance technologies will give your home greater protection and a better paint finish in the long run.
We know paint selection can be difficult, even confusing. Our mission at Bruno Painting is Upholding and Caring for Surfaces and Relationships. We take great pride in the carpentry and painting projects we do for Rhode Island homeowners and are excited to help you with the process of choosing the right paint for your home's interior and exterior. Contact us for a fresh coat of paint for your home!
With the lingering warm days ahead of us and the remnants of summer still in the air, boosting your home’s curb appeal with a fresh coat of paint is a great way to wrap up this summer. While homeowners typically schedule exterior painting projects in Spring and Summer, Fall is still a good time of year to schedule your home’s facelift in Newport and surrounding cities, here in Rhode Island.
Few homeowners understand the extent of care and work professional contractors put into prepping their customers’ homes before the paint hits the brush. Thankfully, professional painters do take their time in the steps before painting to ensure the results are both long-lasting and smooth. We’ve detailed 8 essential tips to ensure your painters are focused on your exterior surface prep work for your enjoyment and home protection for years to come.
During the consultation and the planning stages of a home exterior paint project, a professional painter will take care to plan your project to perfection. The first step in this process is scheduling the painting project for days and times during the day when the weather and sun are most cooperative.

Strong winds and rain can shorten painting windows and leave your home exposed to the elements, effectively ruining your paint finish. High humidity and extreme temperatures can also influence how your paint dries and its eventual look and performance. Professional contractors know how to plan around these types of weather patterns and will ensure that your home stays safe and the best results occur throughout the entire project.
During the consultation and inspection, repairs identified will need to be taken care of before any painting begins. These sorts of repairs can include exposed wood, loose gutters and shingles, wood rot, leaking windows, damaged siding, and doors that stick. Having skilled carpenters ready and available to make these repairs provides the home or building owner with the valuable gift of ensuring the foundation is healthy for the protective coat of paint goes on. A professional painter has a keen eye to find these issues and make repairs before they become larger issues.
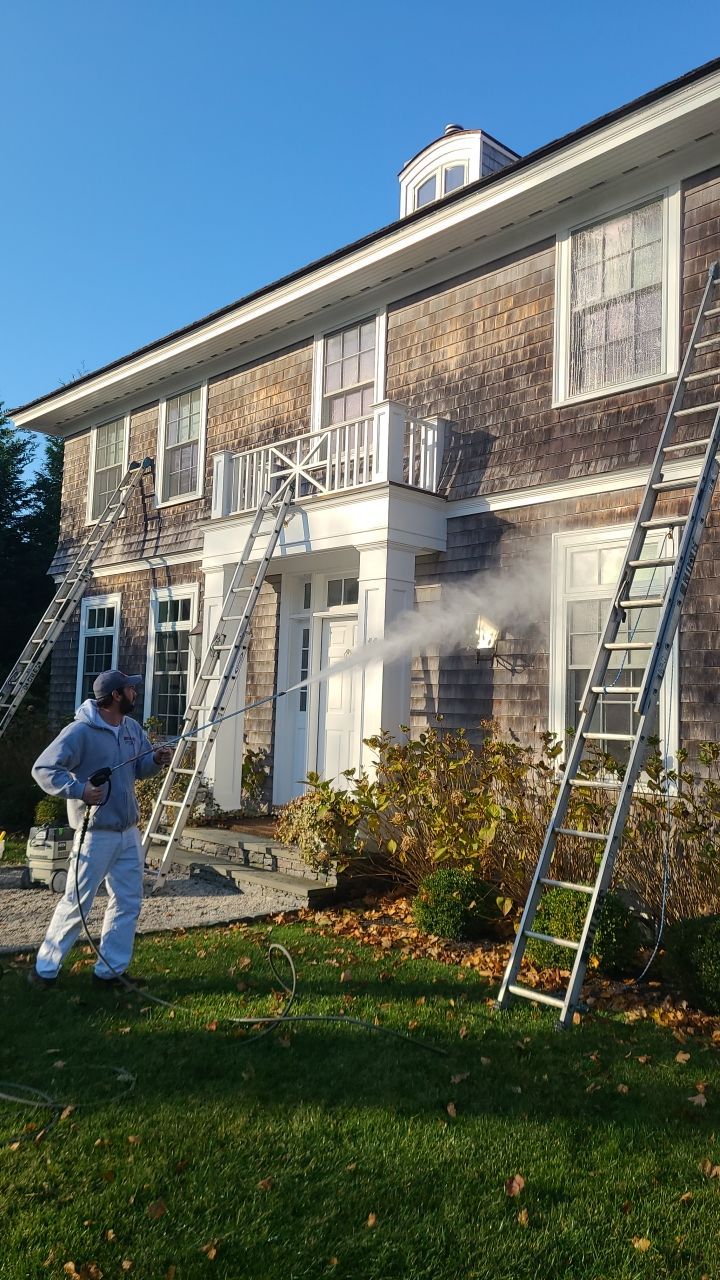
Once repairs have been addressed, cleaning should begin soon after. Professional contractors turn to pressure washing to cover areas that can safely and effectively be cleaned. If pressure washing doesn’t suit your home’s needs, a soft washing method or air blasting can be used. The goal in this process is to remove dirt, loose paint, and signs of mildew before advancing in your exterior project.
After your home is clean and dry, an inspection for loosened paint is conducted. Loose and flaking paint is removed with high-quality scraping tools. This stage in the project may take longer depending on how your home was cleaned. If a pressure washer wasn’t used, this step is essential to ensure your home is properly prepared.
The caulk on the exterior of a house is exposed to the sun and elements while it protects the seals around your windows and other areas. Over time, the caulk can crack and cause leaks. Any area of your home that has been caulked will need to be inspected and possibly recaulked to ensure continual protection. This includes doors, windowsills, and trim.
Once all the necessary repairs and cleaning are complete, the area will need to be prepped for painting. Protecting your landscaping should be a priority to your contractor. Using plastic wrap, tape, and other materials, your lights, plants, porch, sidewalks, and driveway will all be protected.

Depending on the number of painters in your contractor’s painting team, many of these steps can be completed simultaneously to save time between stages. It is, however, very important that your home is repaired, dried, and prepped before moving past this point. One last final inspection of each of these steps should be conducted by your contractor before priming begins.
Professional painters do not always agree about primer and its usefulness. Some professional painters believe using a primer helps your paint to adhere to your surfaces giving you better coverage that lasts longer. Other painting contractors forego the step of using a primer and, instead, paint two coats of your high-quality paint onto the surface.
Whichever way you prefer, with primer or using two coats of paint, be sure you and your painter agree and understand the best process for your home and its materials. The main and really the only consideration is the quality of the finish and its longevity.
The most crucial part of painting is allowing adequate time for your paint to dry in between coats and after the final coat. Most of the time, avoiding direct sunlight can be important, so professional contractors start with western facing sides of your building in the morning and eastern facing sides in the afternoon. However, sometimes it is useful to paint in direct sunlight, but as professional painting contractors, we know when or when to not paint in direct sunlight.

Beginning with the top of your home and working to the ground, high-quality brushes and rollers specific to your siding and paint base are used for even application. After the larger areas of your home are painted, window frames and trim are painted to ensure that your window panes dry properly. Finally, the foundation of your home is painted, if necessary.
No home project is complete until our clients are satisfied. Since 2004, our mission at Bruno Painting is Upholding and Caring for Surfaces and Relationships. We take great pride in the work we do for homeowners in the Newport area and in Rhode Island.
We’re excited to hear about your next project. Reach out and let us know about your home’s unique exterior painting project.
Our perfect summer weather in Rhode Island has seen many of us spending lots of time entertaining and dining outdoors, soaking in as much of the summer sun and air as possible. No matter where in our great state your home is located, a nice, well-appointed deck is a must for enjoying your yard, whether it backs up to a forest or to the sea.
Each home in Rhode Island is unique and each has specific needs for their deck and outdoor entertainment areas. While many people take advantage of the Spring weather to make exterior updates, it’s also very doable to update or even build an entirely new deck during the Summer and Fall months. These are a few examples of options for you to consider for your home’s decking needs.
Some may think that a worn deck is just a sign of a well-loved home or that there isn’t a real need to replace those splintering boards. However, decks left to wither can cause damage to your home and potentially cause you to have to make costly repairs.
Depending on how your deck is attached to your home, wood rot can set in the joists, ledger boards, and even your siding. If moisture seeps into your foundation, other larger issues such as mold, mildew, and decay will start to take hold. These major areas of repair can be avoided with a deck that is sealed and maintained regularly over the years.
It is no secret that we see quite a bit of moisture and humidity throughout the year. Most decks in Rhode Island have been built with pressure-treated lumber, as that was the go-to choice for deckbuilding for many decades. Pressure-treated lumber decking is affordable, readily available, durable, and easy to stain so it is no surprise that it is prevalent on the classic coast. Unfortunately, constant exposure to the elements causes pressure-treated wood to swell, crack, split, warp, makes it a relatively high maintenance home amenity in our climate. Annual pressure washing and restaining every one, two, or three years is recommended for this type of decking to keep it looking its best.
An alternative to wood for decking is composite and PVC. This mixture of recycled plastic and wood dust creates composite decking which is a synthetic, yet refined-looking, deck material that many Rhode Island homes are turning to for its many benefits.
These decks are virtually maintenance-free, weather-resistant, and come in a variety of colors and finish looks. If that isn’t enough of an advantage, they are also easy to clean and won’t splinter, warp, or rot. While this type of decking can cost about three times as pressure-treated wood, it can potentially save homeowners in the long run.
If you love the look and feel of real wood, consider the following options some Portsmouth and Newport homeowners have used to satisfy their desire for a ‘real wood’ deck. Note that some decks are constructed using cedar, exotic woods, and some really amazing, high-end real wood products. Be sure to ask your contractor and their team of carpenters to show you all of the many, many choices of real wood that are available to you if this material is your preference for your next deck.
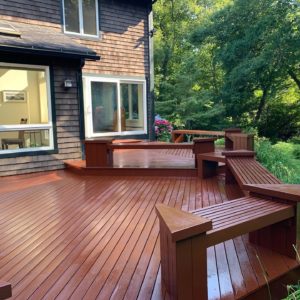
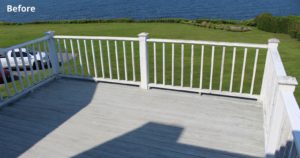
This multi-level low platform deck makes great use of this backyard space. The real wood deck and benches next to the garden create the feeling of a privately enclosed, secret garden. An oasis, a backyard paradise.
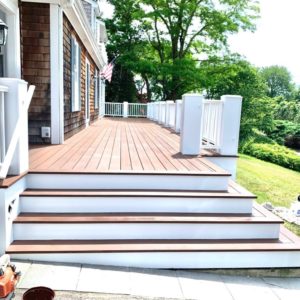
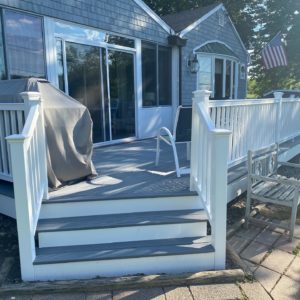
This wooden deck in Newport had new boards installed which were sanded, stained, and reinforced to create this beautiful aesthetic. The railing and stairs were replaced to keep the deck structurally sound.
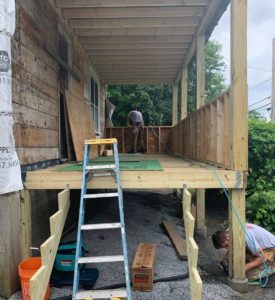
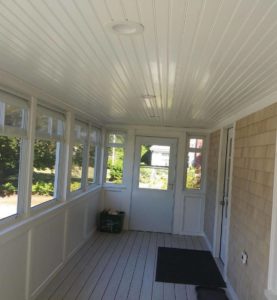
A raised pressure-treated deck in Portsmouth was completely transformed into a closed-in porch. The contractors built the overhang and installed windows to give this homeowner a completely new three-season space to spend their time.
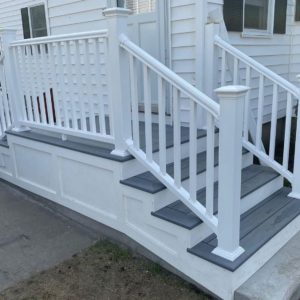
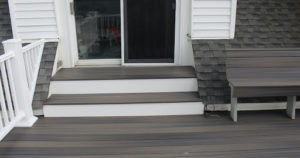
A back door landing repaired and painted to match this beautiful home. Even small spaces deserve a good looking deck and staircase.
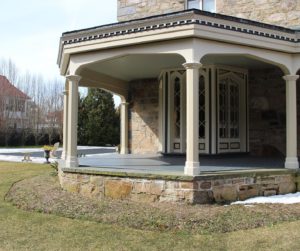
This unique stone home in Portsmouth went under some repairs including the porch area. The original wood was protected from the elements, sanded, and painted a beautiful grey.
An old wooden deck in Middletown was replaced with composite decking and a new PVC railing. The colors match perfectly to the shingles of this home.
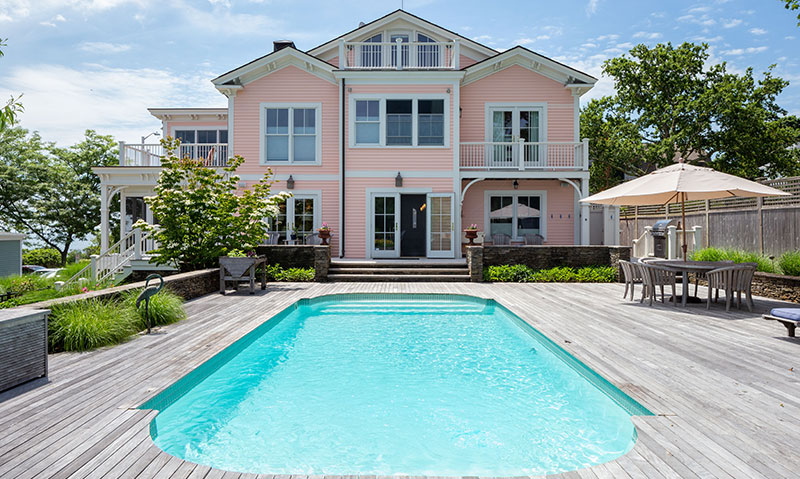
An elevated deck boasting a beautiful view of the water off of a roof is featured here complete with a bench. The railing is constructed from PVC and composite wood for the deck boards as well as the lovely bench.
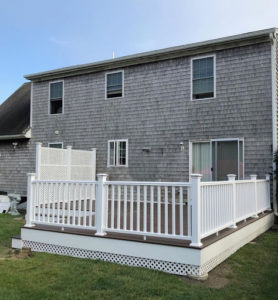
This larger composite deck boasts a privacy fence installed for these homeowners to entertain and enjoy the beautiful weather in a secluded area.
Regardless of the material, your deck and porch can, not only look its best but also be maintained regularly for the rest of your home’s protection. If you done your deck maintenance in the spring, take advantage of this time to update your existing deck or create a whole new backyard oasis.
Our mission at Bruno Painting is “to uphold and care for surfaces and relationships.” The carpentry and painting divisions that make up our team have some of the most skilled and caring professionals in all of Rhode Island. We look forward to the pleasure of restoring your deck this Summer or Fall for you to enjoy all year long. Call us or email us to discuss your deck, painting, or other home improvement project.
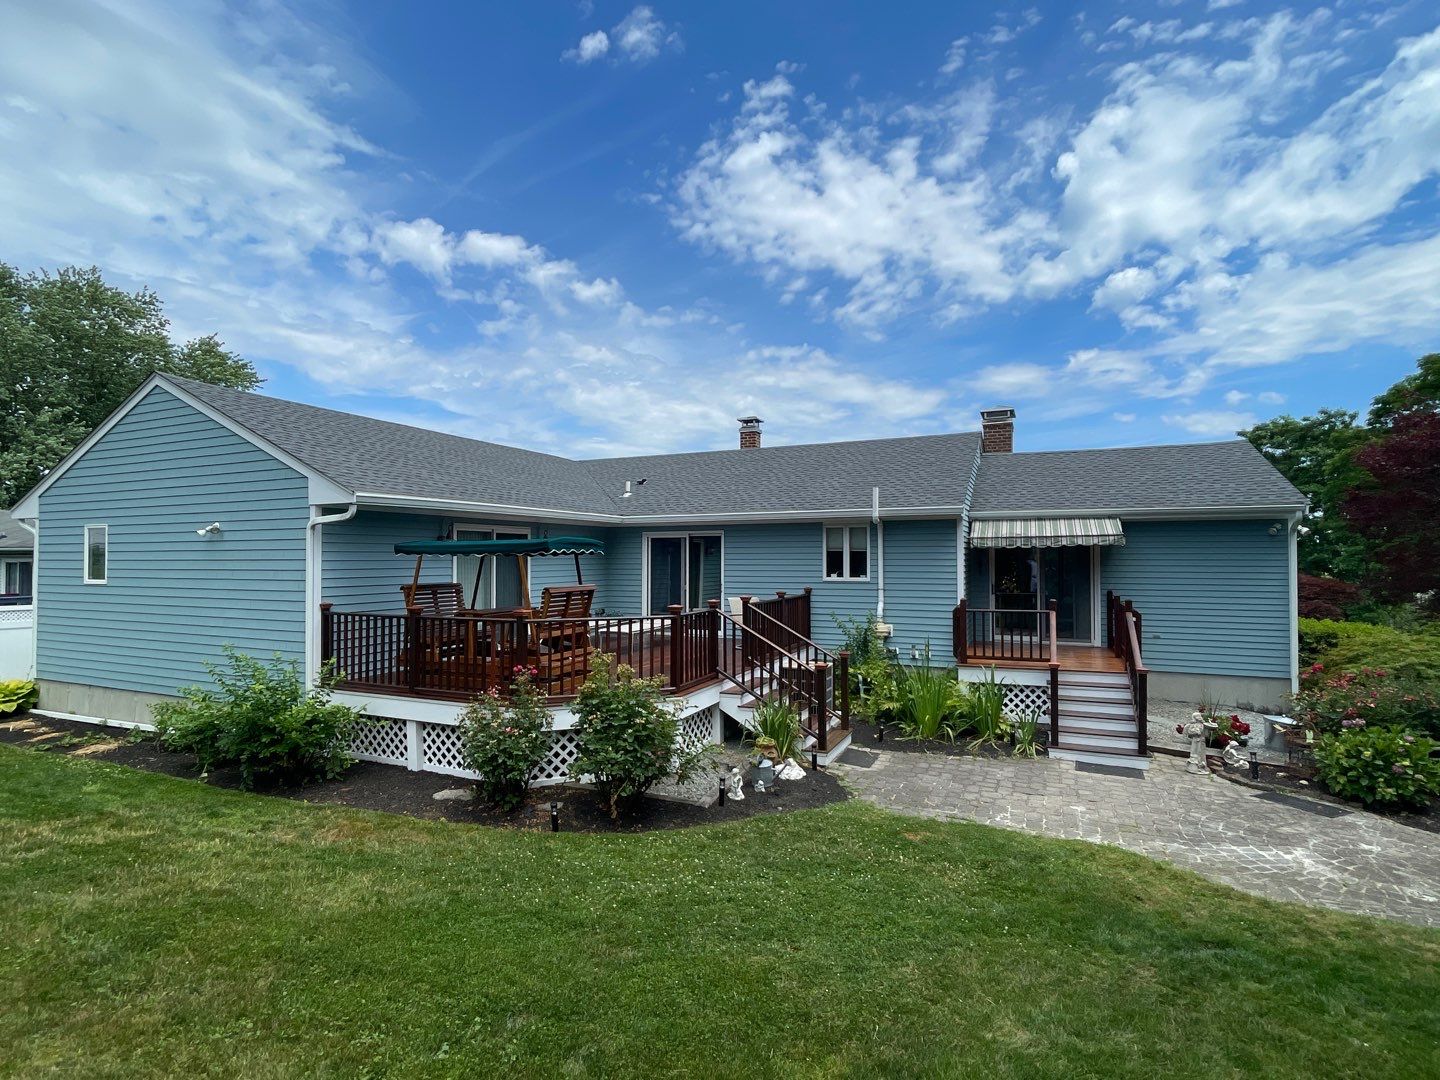
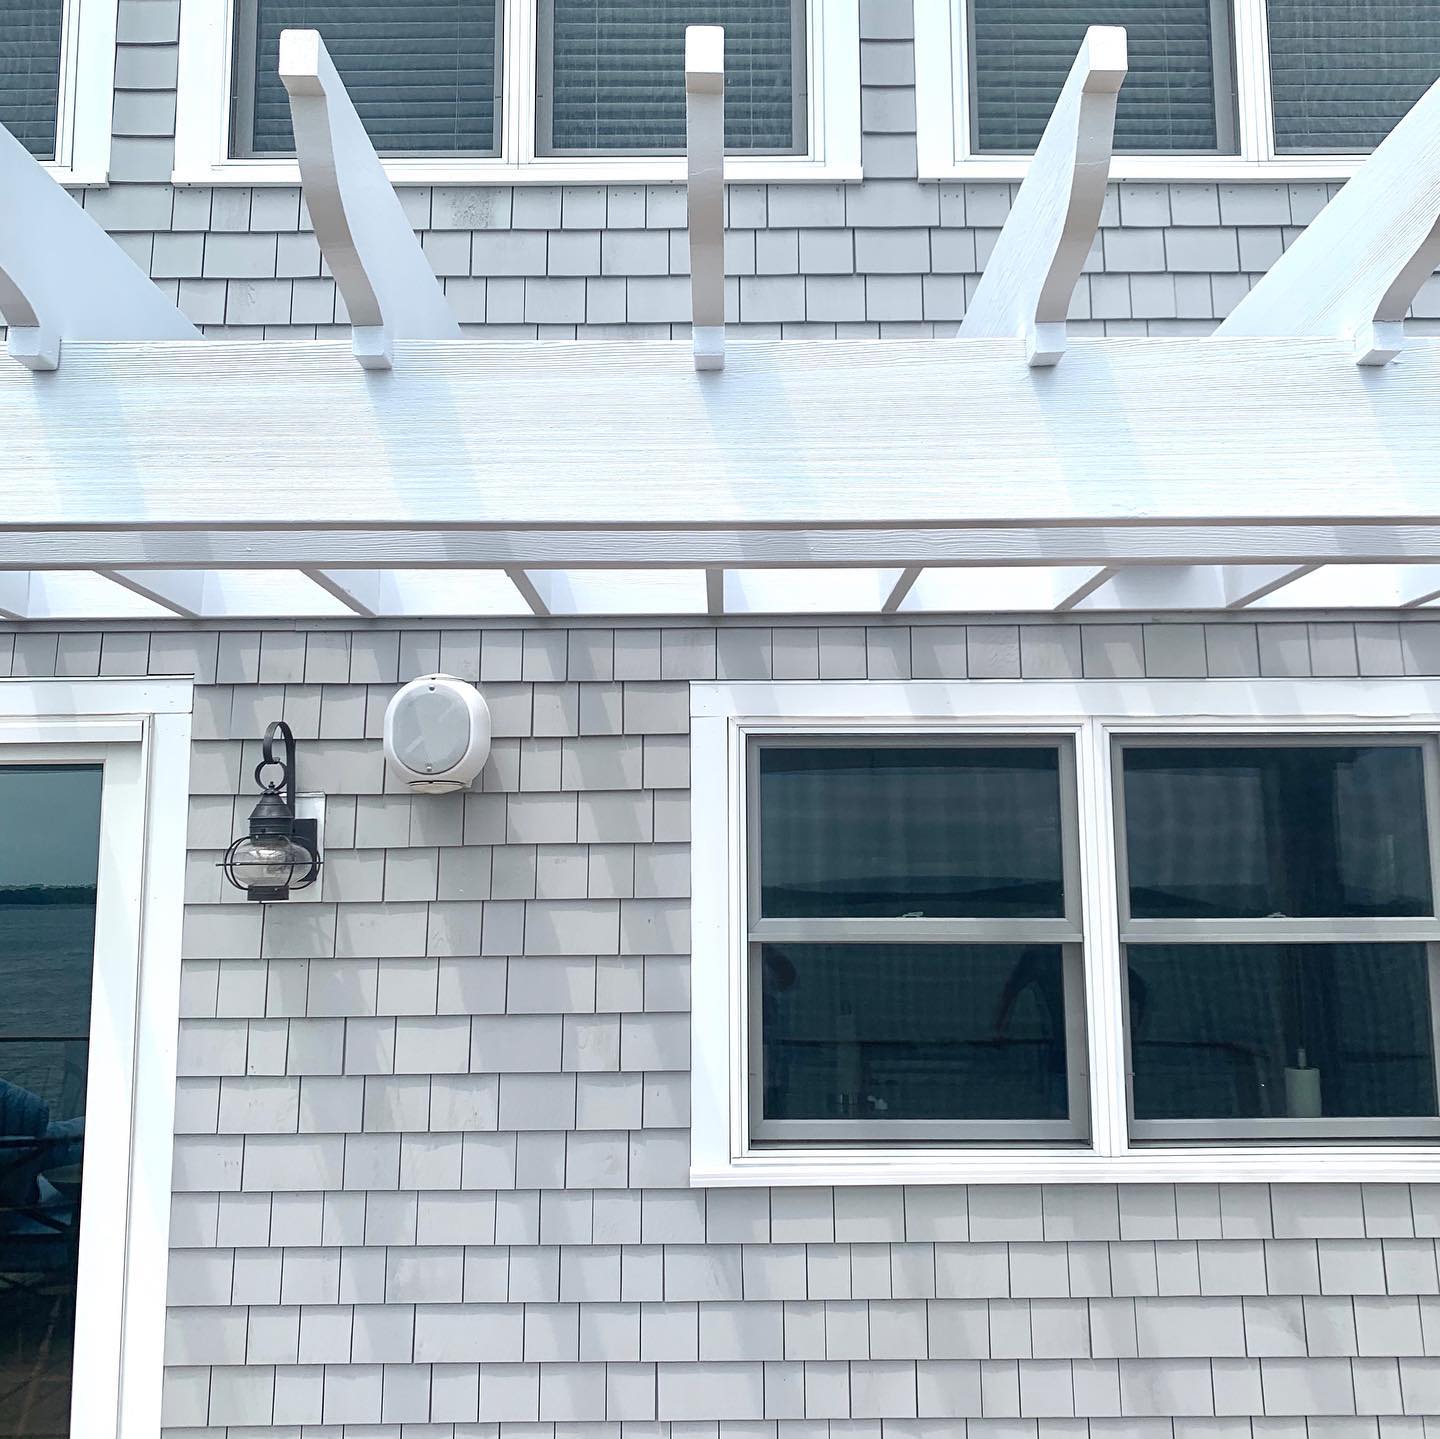
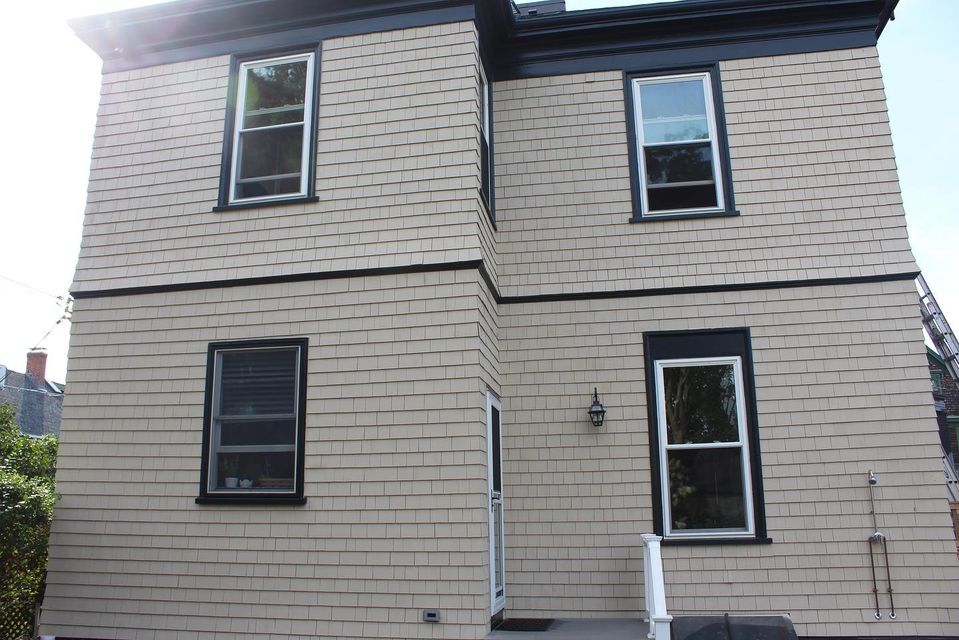
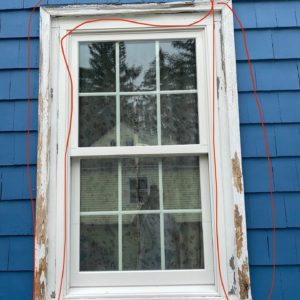
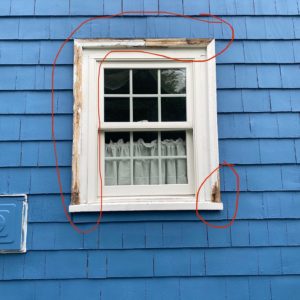
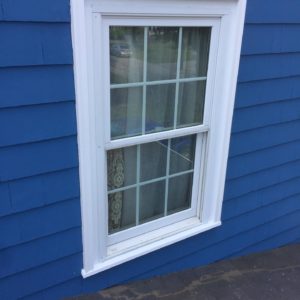
This past June, we had the opportunity to restore the exterior of a charming blue-shingled home in Middleton. What started as a request for a fresh coat of paint turned into a more involved project when our initial inspection revealed significant wood deterioration, specifically around the windows.
When wood is exposed to moisture and neglect over time, it begins to decay. This process, known as wood rot, can quickly compromise the structural integrity and appearance of a home. Before any painting could begin, replacing the rotted wood was essential to ensure a smooth, long-lasting finish.
In the case study below, we walk through how our team approached replacing wood rot, restoring the home’s exterior, and ultimately delivering a polished new look the homeowners loved.
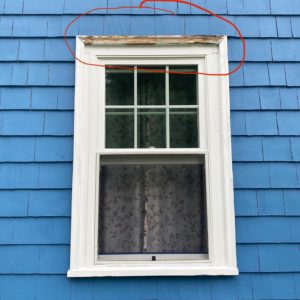
At our initial meeting with the homeowners, we focused on assessing the extent of the damage and identifying the cause, often weather-related, which is common for homes in Portsmouth and Newport. Along the classic coast, homes are frequently exposed to high moisture levels, salty air, and frigid temperatures. Over time, these conditions can wear down paint and deteriorate the materials beneath it, especially wooden window frames and other vulnerable exterior features.
Early signs of wood rot include soft or spongy areas, paint that’s chipping or peeling, splintering wood, and noticeable discoloration. If left untreated, the damage can quickly worsen. That’s why it's important to bring in a professional painting contractor and carpenter as soon as these symptoms appear. They can help determine whether the issue can be repaired or if replacing wood is the better long-term solution.
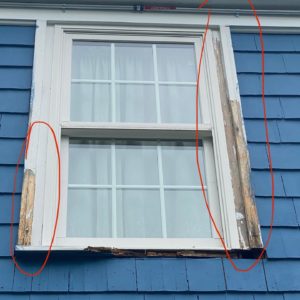
So how do you know when it’s time for replacing wood rather than repairing it? A good rule of thumb is if more than ten percent of the wood is compromised, replacement is necessary. In some cases, minor rot can be halted and reinforced using epoxy and sealants, but only if caught early.
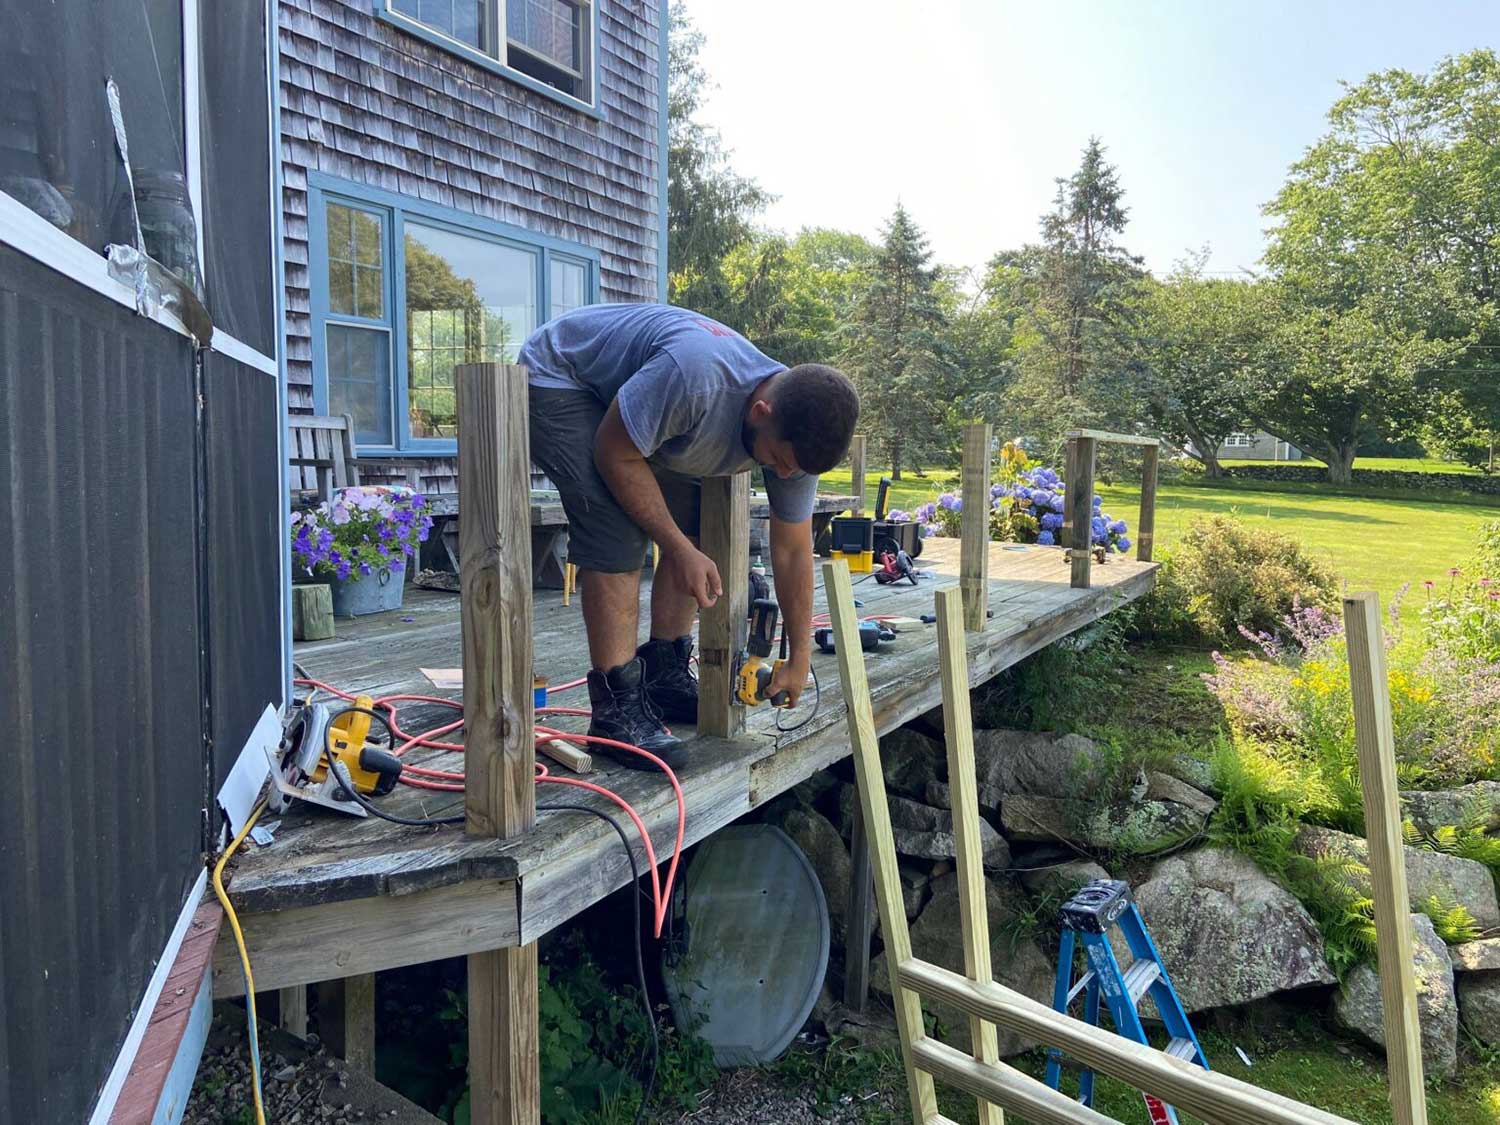
In this particular case, the damage was extensive enough in some places that replacing wood rot was necessary. Our carpentry team made all the necessary repairs before our painters came in to finish the job.
When we removed the rotted frames and sills, our carpentry division took care to pull these boards out without causing damage to the house or windows themselves. Once the old frame and sills were removed, all leftover debris or wood pulp was removed and the area was cleaned.
The pieces of the old frame and sill were measured as a reference for the new boards to be put in place. Measurements were also taken of the sheathing where the frame and sill used to sit to ensure that the new pieces would fit securely.
If your home does not have standard fittings and features (and depending on what type of window or home you have), you’ll need a contractor more skilled than the average handyman to help with standout features like mitered corners and fastening sites. Our master carpenter, Chris, and his team did a fantastic job making sure the windows fit perfectly in our client’s home.
Once the wood frames and sills were removed, our carpentry division inspected the sheathing underneath and made necessary repairs. Repairs that may need to be done on sheathing include using caulk to fill in any smaller cracks and an expanding foam insulation to not only fill larger gaps but to also hold the new boards tightly in place.

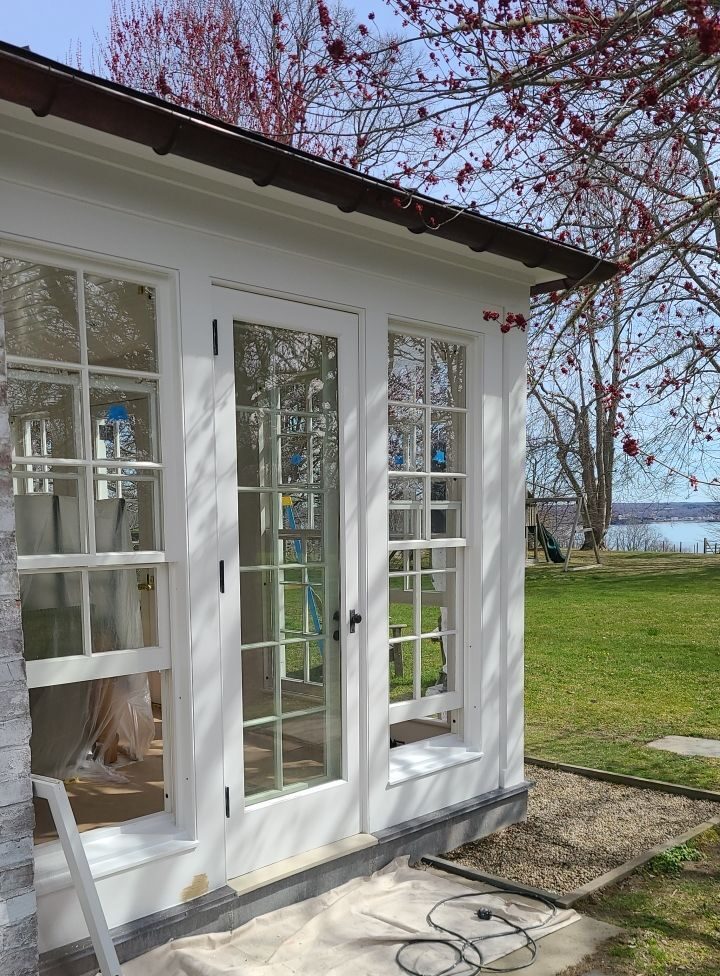
Once the new pieces were cut, our painters stepped in to apply a few coats of paint to protect these new pieces of wood from exposure to moisture and water. Once the new window frames were ready, our carpentry division installed them into the sheathing and secured those pieces in place with nails. The final step in installing these new frames and sills is caulking any seams to keep out unwanted moisture, bugs, and other enemies of wood.
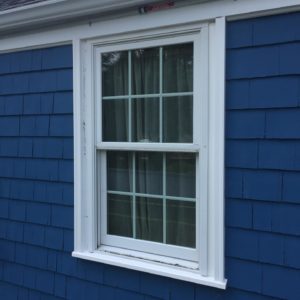
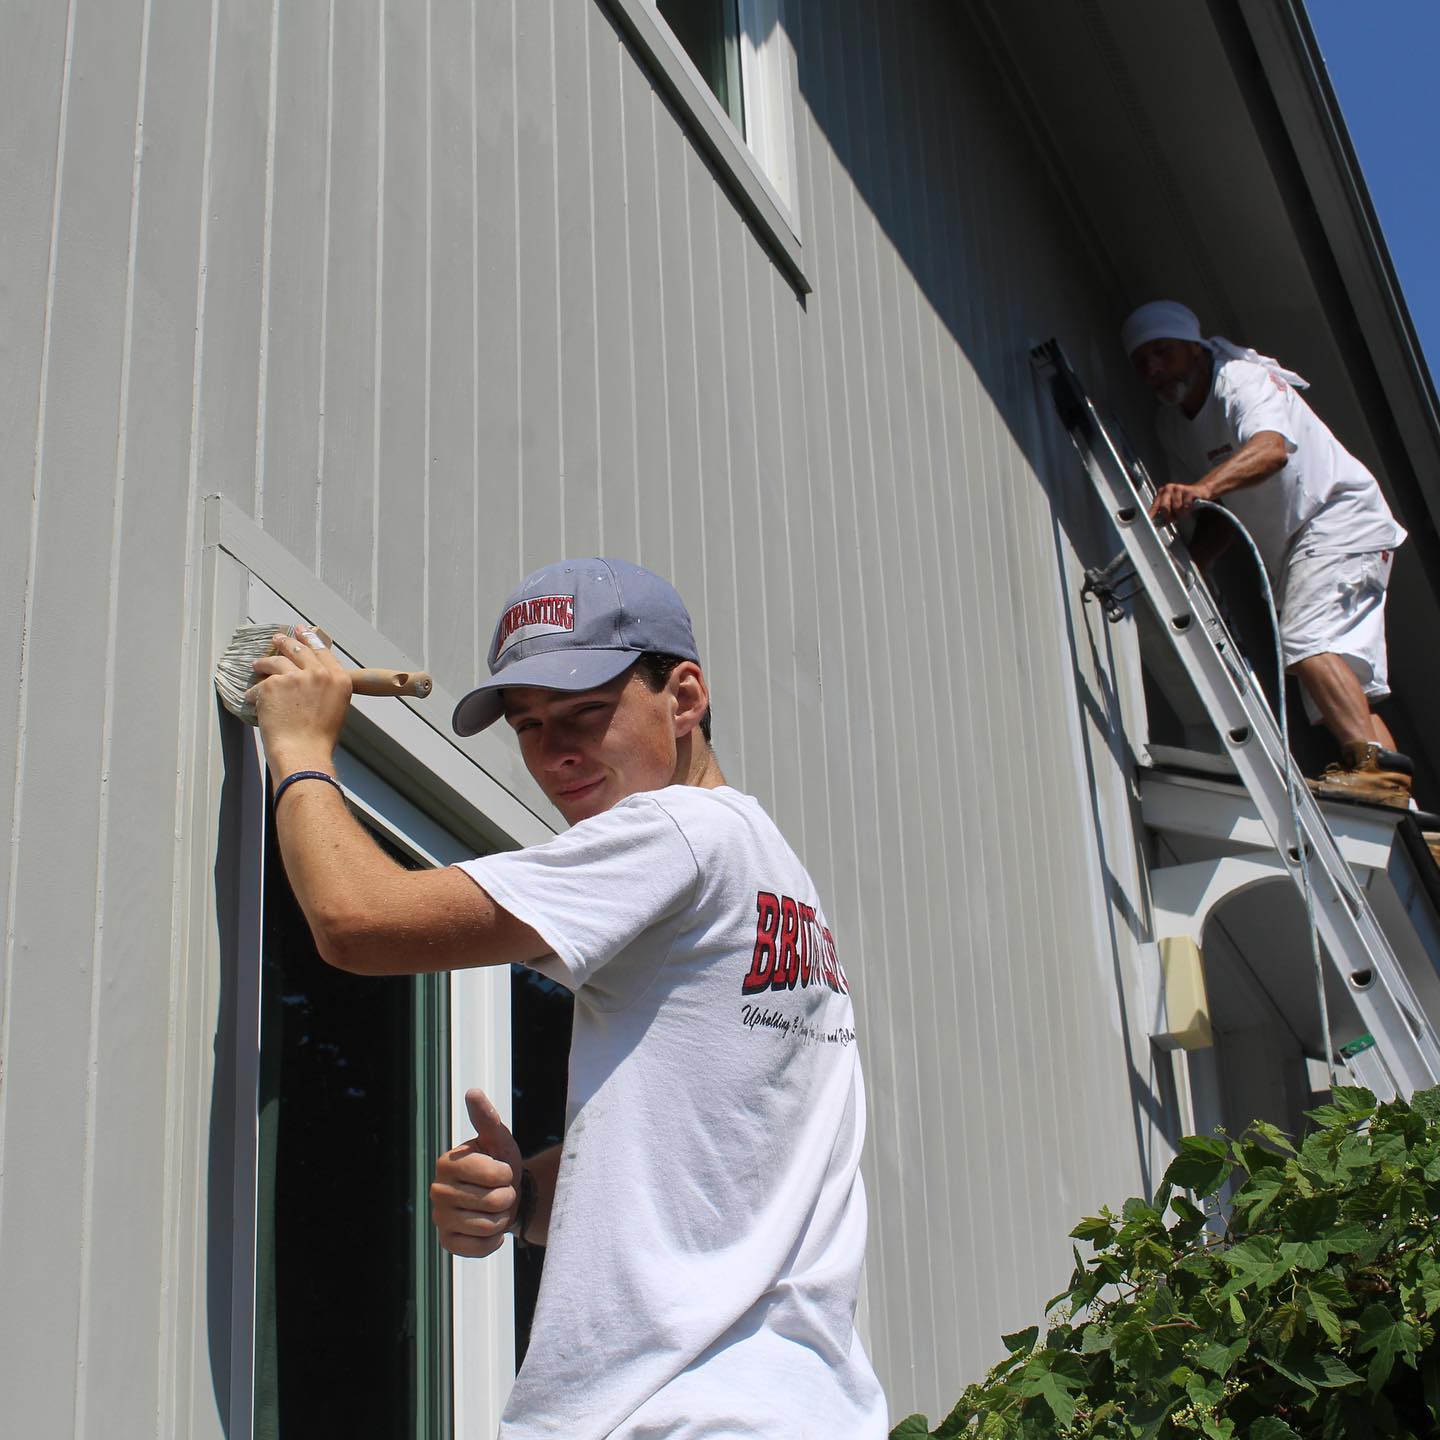
After the frames and sills were installed and inspected for quality, our painters finished the project with a fresh coat of exterior paint. Our team stripped and sanded the old paint to prepare the surface and to prevent unaffected parts of the frames from being exposed to moisture. The entire window trim was repainted with two coats of the highest quality paint to guard against all types of weather conditions.
Throughout each step of the process, our team took the time and care necessary to ensure that every surface, from the newly painted siding to the areas where we focused on replacing wood, achieved a flawless, high-quality finish. The homeowners were thrilled with the results and appreciated the craftsmanship and attention to detail we brought to their home.
Since 2004, Bruno Painting has been committed to upholding and caring for surfaces and relationships. We take great pride in our work, and this project was no exception. From replacing wood damaged by coastal weather to restoring the home’s exterior beauty, it was an honor to help create a result that this family will enjoy for decades.
If you’ve noticed signs of damage on your home’s exterior, whether it’s peeling paint, soft window frames, or other signs of deterioration, don’t wait. Contact us today to learn how we can help with evaluating, repairing, or replacing wood to protect your home and restore its curb appeal with lasting results.
Call or email our office for a free estimate to see what we can do for your home!